


167
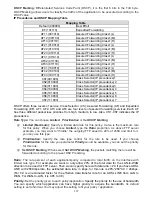
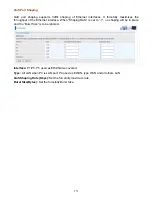
DSCP Marking:
Differentiated Services Code Point (DSCP), it is the first 6 bits in the ToS byte.
DSCP Marking allows users to classify the traffic of the application to be executed according to the
DSCP value.
IP Precedence and DSCP Mapping Table
Mapping Table
Default (000000) Best
Effort
EF(101110)
Expedited Forwarding
AF11 (001010)
Assured Forwarding Class1(L)
AF12 (001100)
Assured Forwarding Class1(M)
AF13 (001110)
Assured Forwarding Class1(H)
AF21 (010010)
Assured Forwarding Class1(L)
AF22 (010100)
Assured Forwarding Class1(M)
AF23 (010110)
Assured Forwarding Class1(H)
AF31 (011010)
Assured Forwarding Class1(L)
AF32 (011100)
Assured Forwarding Class1(M)
AF33 (011110)
Assured Forwarding Class1(H)
AF41 (100010)
Assured Forwarding Class1(L)
AF42 (100100)
Assured Forwarding Class1(M)
AF43 (100110)
Assured Forwarding Class1(H)
CS1(001000)
Class Selector(IP precedence)1
CS2(010000)
Class Selector(IP precedence) 2
CS3(011000)
Class Selector(IP precedence)3
CS4(100000)
Class Selector(IP precedence) 4
CS5(101000)
Class Selector(IP precedence) 5
CS6(110000)
Class Selector(IP precedence) 6
CS7(111000)
Class Selector(IP precedence) 7
DSCP offers three levels of service, Class Selector (CS), Assured Forwarding (AF) and Expedited
Forwarding (EF). AF1, AF2, AF3 and AF4 are four levels of assured forwarding services. Each AF
has three different packet loss priorities from high, medium, to low. Also, CS1-CS7 indicates the IP
precedence.
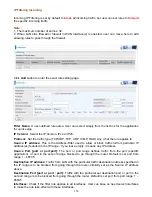
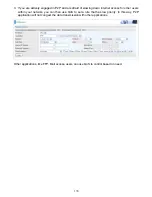
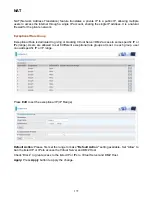
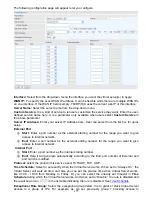
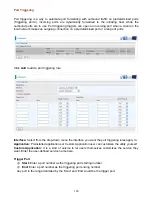
Rate Type:
You can choose
Limited
,
Prioritization or Set DSCP Marking
.
Limited (Maximum):
Specify a limited data rate for this policy. It also is the maximum rate
for this policy. When you choose
Limited
, type the
Ratio
proportion. As above FTP server
example, you may want to “throttle” the outgoing FTP speed to 20% of 256K and limit to it,
you may use this type.
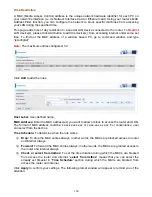
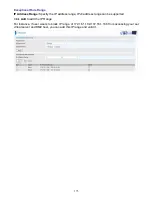
Prioritization:
Specify the rate type control for the rule to be used. If you choose
Prioritization
for the rule, you parameter
Priority
would be available, you can set the priority
for this rule.
Set DSCP Marking:
When select
Set DSCP Marking
, the packets matching the rule will be
forwarded according to the pre-set DSCP marking.
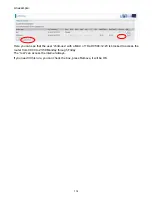
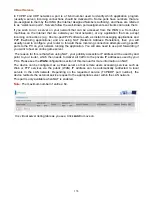
Ratio:
The rate percent of each application/policy compared to total traffic on the interface with
limited rate type.
For example, we want to only allow 20% of the total data for the LAN-to-WAN
direction to be used for FTP server. Then we can specify here with data ratio = 20. If you have ADSL
LINE with 256K/bps.rate, the estimated data rate, in kbps, for this rule is 20%*256*0.9 = 46kbps.
(For 0.9 is an estimated factor for the effective data transfer rate for an ADSL LINE from LAN to
WAN. For WAN-to-LAN, it is 0.85 to 0.8)
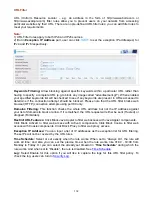
Priority:
Set
the priority given to each policy/application.
Specify the priority for the use of bandwidth.
You can specify which application can have higher priority to acquire the bandwidth.
Its default
setting is set to Normal. You may adjust this setting to fit your policy / application.
Содержание BiPAC 6900AX(L)-2400
Страница 20: ...15 3G LTE Router mode ...
Страница 66: ...61 7 Success ...
Страница 94: ...89 Configure AP as Enrollee Add Registrar with PIN Method 1 Set AP to Unconfigured Mode ...
Страница 144: ...139 Accessing mechanism of Storage In your computer Click Start Run enter 192 168 1 254 ...
Страница 146: ...141 Access the folder public ...
Страница 149: ...144 Step 2 Click Add a Printer Step 3 Click Add a network wireless or Bluetooth printer ...
Страница 152: ...147 Step 8 Click Next and you are done You will now be able to see your printer on the Devices and Printers Page ...
Страница 154: ...149 Take Windows media player in Windows 7 accessing the DLNA server for example for usage of DLNA ...
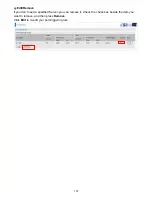
Страница 160: ...155 Rule inactive ...
Страница 196: ...191 ...
Страница 199: ...194 ...
Страница 207: ...202 2 Click Connect to a workplace and press Next 3 Select Use my Internet connection VPN and press Next ...
Страница 208: ...203 4 Input Internet address and Destination name for this connection and press Next ...
Страница 209: ...204 5 Input the account user name and password and press Create ...
Страница 210: ...205 6 Connect to the server ...
Страница 212: ...207 ...
Страница 222: ...217 2 Click Connect to a workplace and press Next 3 Select Use my Internet connection VPN and press Next ...
Страница 223: ...218 4 Input Internet address and Destination name for this connection and press Next ...
Страница 224: ...219 5 Input the account user name and password and press Create ...
Страница 227: ...222 9 Go to Network connections enter username and password to connect L2TP_IPSec and check the connection status ...
Страница 241: ...236 2 ipoe_eth0 with DDNS www hometest1 com using username password test test ...
Страница 250: ...245 in the system tray Step 6 Double click on the icon to display your current Internet connection status ...
Страница 252: ...247 Click Import Certificate button to import your certificate Enter the certificate name and insert the certificate ...
Страница 253: ...248 Click Apply to confirm your settings ...
Страница 259: ...254 Http Port The device equips user to change the embedded web server accessing port Default is 80 ...
Страница 261: ...256 Mobile Network User can press Scan to discover available 3G LTE mobile network ...
Страница 267: ...262 Example Ping www google com ...
Страница 268: ...263 Example trace www google com ...


