www.bbhscanners.com
38 of 48
More than one image filter can be set at a time. However, as additional filters are added, the scanning
speed may decrease.
Â
Note
Image filters can be used only in the Black and White mode.
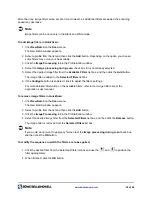
To add image filters in QuickScan:
1. Click
New Batch
on the
Scan
menu.
The New Batch window appears.
2. Select a profile from the list and then click the
Add
button. Depending on the option you choose,
some filters may or may not be available.
3. Click the
Image
Processing
tab in the Profile Editor window.
4. Select the
Image processing during scan
check box if it is not already selected.
5. Select the desired image filter from the
Available Filters
list box, and then click the
Add
button.
The image filter is added to the
Selected Filters
list box.
6. If the
Configure
button is enabled, click it to adjust the filter’s settings.
For more detailed information on the available filters, refer to the
Image Filter
help or the
application’s user manual.
To remove image filters in QuickScan:
1. Click
New Batch
on the
Scan
menu.
The New Batch window appears.
2. Select a profile from the list and then click the
Add
button.
3. Click the
Image
Processing
tab in the Profile Editor window.
4. Select the desired image filter from the
Selected Filters
list box, and then click the
Remove
button.
The image filter is removed from the
Selected Filters
list box.
Â
Note
If you would do not want to apply any filters, clear the
Image processing during scan
check box,
and then click the
OK
button.
To modify the sequence in which the filters are to be applied:
1. Click the desired filter from the Selected Filters list box and use the
and
to position the
filter appropriately.
2. When finished, click the
OK
button.

