Control and maintenance
BEKOMAT® 33U / 33U CO
21
Pos: 68 / Beko Technische Dok um ent at ion/ Sich er heit / Hin wei s Vor schr if t en Wer kzeug Rein igung Kon densat Ent sor gung @ 0\ m od_12332396 66823_ 2901. docx @ 13340 @ @ 1
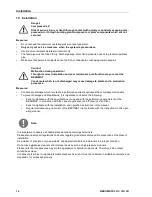
Note:
It is imperative to observe all hazard statements and warnings listed here.
Please also observe all regulations and notes regarding industrial safety and fire prevention at the place of
installation.
As a matter of principle, only use suitable and appropriate tools and materials in a proper condition.
Do not use aggressive cleaners and improper devices such as high-pressure cleaners.
Please note that condensates may contain aggressive or harmful components. Therefore, skin contact
should be avoided.
Condensate is subject to mandatory waste disposal. As such, it must be collected in suitable containers, and
disposed of or processed properly.
Pos: 69 / Beko Technische Dok um ent at ion/ War t ung/ BEKO M AT/ War t ung BM 33U ( nicht Var io+I F) 2x8760h @ 6\ m od_1375358 388906 _2901. docx @ 32983 @ @ 1
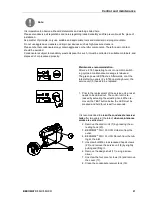
Maintenance recommendation:
After 2 x 8,760 operating hours or one million switch-
ing cycles, a maintenance message is released.
The green power LED flashes. Afterwards, or at the
latest after two years (2 x 8,760 operating hours), the
service unit (5) needs to be replaced.
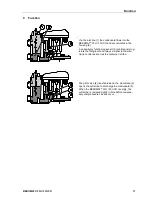
1.
Prior to the replacement of the service unit, a reset
needs to be carried out. The control unit is re-
leased by actuating the arresting hook. When re-
moved, the TEST button below the LED must be
pressed and held for at least five seconds.
It is recommended to
clean the condensate receiver
tank
after two years at the latest,
when maintenance
works are carried out
:
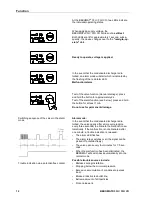
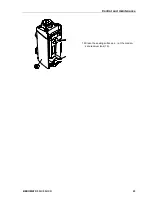
2.
Remove the control unit (1) by pressing the ar-
resting hook (23).
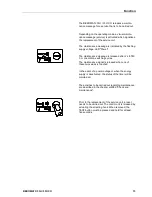
3.
BEKOMAT
®
33U / 33U CO Unfasten from the
outlet.
4.
BEKOMAT
®
33U / 33U CO
Detach from the tub-
ing at the inlet.
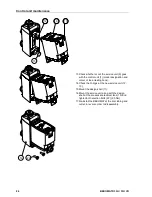
5.
Unscrew both M6 cross recessed head screws
(22) and remove the service unit (9) by slightly
pulling and lifting it.
6.
Remove the design shell (11) using a screw-
driver.
7.
Unscrew the four cover screws (16) and remove
the cover (17).
8.
Clean the condensate receiver tank (19).

