12
HTS Customer Care Kits User’s Guide
7
Tighten the captive screw that secures the HTS to the support bracket.
8
Turn on the cytometer.
BD FACSCanto, BD LSR II, BD FACSCalibur, and BD
LSRFortessa Systems
Removing the HTS
1
Turn off the cytometer and HTS.
2
Remove the HTS cover.
3
Unscrew the captive screw located at the bottom of the HTS support
bracket.
NOTE
There is no captive screw in BD LSRFortessa, because the HTS is
placed on a sliding drawer.
4
Pull the HTS out (about 2 inches) from the support bracket.
5
Remove the probe and the overflow reservoir.
6
Disconnect the power cable and the serial communications cable.
7
Disconnect the sampler coupler from the cytometer SIT.
8
Disconnect the sheath and waste connectors from the cytometer.
9
Remove the HTS from the support bracket.
a
Support the HTS on its base, raise the back of the HTS to balance the
load, and lift it off the support bracket.
10
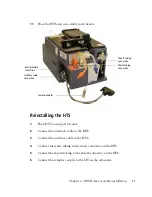
Place the unit on a stable work beach and replace the necessary part.
Содержание 644787
Страница 3: ...History Revision Date Change Made 23 11165 00 Rev A 1 2010 Initial release ...
Страница 4: ......
Страница 14: ...THIS PAGE INTENTIONALLY LEFT BLANK ...
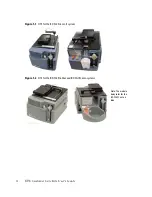
Страница 19: ...Chapter 2 HTS Removal and Reinstallation 13 Captive screw HTS positioned on its support bracket ...
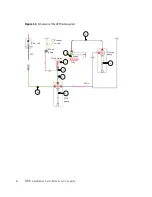
Страница 20: ...14 HTS Customer Care Kits User s Guide Figure 2 1 Electrical connection to the HTS Power plug Serial cable ...
Страница 28: ...THIS PAGE INTENTIONALLY LEFT BLANK ...
Страница 32: ...THIS PAGE INTENTIONALLY LEFT BLANK ...
Страница 42: ...THIS PAGE INTENTIONALLY LEFT BLANK ...
Страница 46: ...THIS PAGE INTENTIONALLY LEFT BLANK ...
Страница 50: ...THIS PAGE INTENTIONALLY LEFT BLANK ...


