background image

After Sales Support

TEL: 1300 884 987

143 * 210 mm 

25.02.2011 09:00 


18 

Channel Selection 


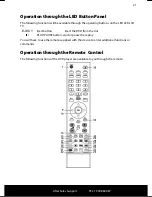
To select a TV channel, either press the buttons 

CH+/–

 (on the device or on the remote 

control) or select the channel directly by pressing the appropriate numbers. 
Enter the numbers directly in sequence for a two-digit or three-digit number. 


Press the 

 button to select the last channel played. 

Volume Setting 


You can increase or decrease the volume by pressing the volume buttons 

VOL +/-

 on 

the remote control or on the device. 


Use the mute button 

 to switch the volume fully off and on again.  


Use the 

AUDIO 

button to select mono or stereo playback, sound I and sound II. Sound I 

and sound II can only be heard when the current TV channel supports dual mode (e.g. for 
bilingual programmes). 


Use the 

S.MODE

 button to switch between the following sound modes: 

Standard

Music, Movie, Sports, Personal

. The 

Personal

 setting is defined under the menu 

option 

SOUND > Sound Mode

Picture Setting 


Use the 

P.MODE

 button to switch between the following picture modes: 

Standard

Dynamic

Mild

Personal

. The 

Personal

 setting is defined under the menu option 

PICTURE > Picture Mode


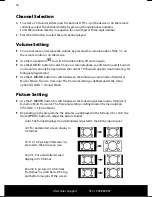
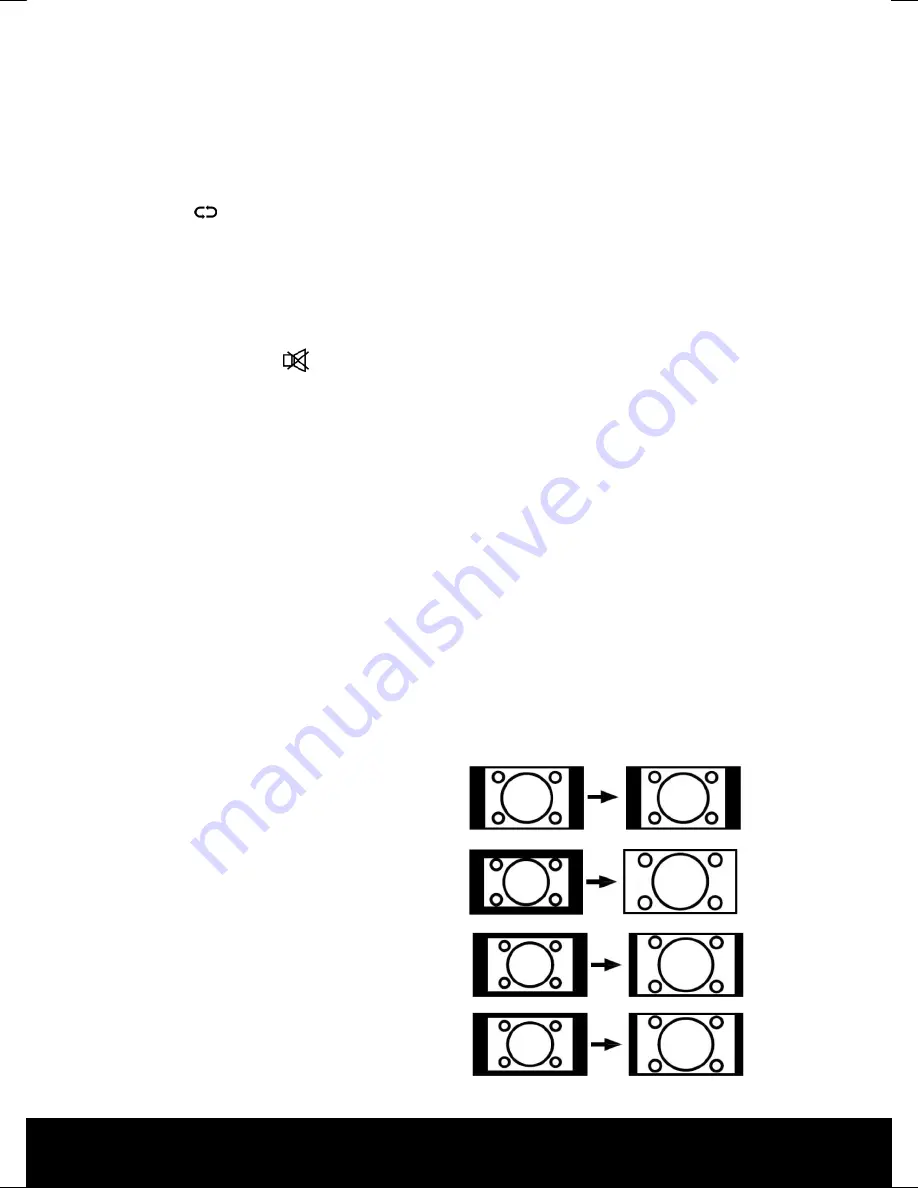
Depending on the programme, the pictures are displayed in the formats 4:3 or 16:9. Use 
the 

ASPECT

 button to adjust the picture format: 

Auto

: The format displayed is automatically adjusted to match the input signal. 

4:3

: For undistorted screen display in 

4:3 format. 


16:9

: A 16:9 picture (“letterbox“) is 

zoomed to the full screen size. 


Zoom1

: For undistorted screen 

display in 14:9 format.


Zoom2

: A picture in 14:9 format 

(“letterbox“) is stretched at the top 
and bottom margins of the screen. 


Содержание MD 21067

Страница 1: ...58 cm 23 Full High Definition LED LCD TV with inbuilt DVD Player After Sales Support TEL 1300 884 987 Instruction Manual MD 21067 N26968...

Страница 2: ...ce or if you require any information about the product please contact us via our after sales support services details of which can be found in this manual and on the product itself Copyright 2011 All...

Страница 3: ...e Contents 10 Device Overview 11 LED LCD TV 11 Front and Right Hand Side View 11 Rear View Connectivity 12 Remote Control 13 Getting Started 16 Inserting the Batteries into the Remote Control 16 Conne...

Страница 4: ...Media Menu System 28 Basic OSD Menu Settings 29 Navigating within the Menu 29 Menu System 30 CHANNEL Menu 30 PICTURE Menu 32 SOUND Menu 33 TIME Menu 34 LOCK Menu 35 SETUP Menu 36 EPG PROGRAMME GUIDE...

Страница 5: ...vice with HDMI or DVI Output 42 Connecting an External Device with HDMI Output 42 Connecting an External Device with DVI Output 42 Connecting a PC or Notebook 42 Troubleshooting 43 Do You Need More He...

Страница 6: ...has a safety system that prevents dangerous laser rays from escaping from the unit during normal use In order to avoid eye injuries never manipulate or damage the security system of the device Caution...

Страница 7: ...objects that are filled with water such as vases on the device The container may tip over and the liquid will impair the electrical safety Do not place any exposed sources of ignition candles or simil...

Страница 8: ...note Even when the mains switch is off some components of the device are live In order to disconnect the power to your LED LCD TV or to completely isolate the device from voltage sources remove the m...

Страница 9: ...ser product The unit has a safety system that prevents dangerous laser rays from escaping from the unit during normal use In order to avoid eye injuries never manipulate or damage the security system...

Страница 10: ...uids could get into your eyes or onto your skin If this should happen then rinse the affected areas immediately with a large amount of clean water and contact your doctor immediately Avoid heavy impac...

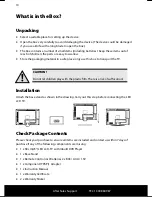
Страница 11: ...fe place only use this box to transport the TV CAUTION Do not let children play with the plastic film There is a risk of suffocation Installation Attach the base stand as shown in the drawing Carry ou...

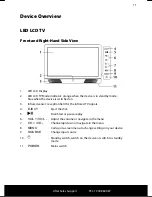
Страница 12: ...s switched on 3 Infrared sensor reception field for the infrared TV signals 4 EJECT Eject the disk 5 Disk Start or pause replay 6 VOL VOL Adjust the volume or navigate in the menu 7 CH CH Channel up d...

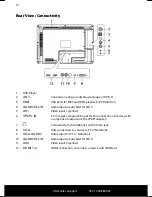
Страница 13: ...r AV1 5 AV1 Video input 1 yellow 6 YPbPr IN 3 5 mm jack component input for the connection of devices with a component output use the YPbPr adapter 7 Connectivity for headphones with 3 5mm jack 8 VGA...

Страница 14: ...After Sales Support TEL 1300 884 987 13 Remote Control...

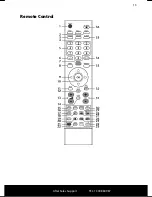
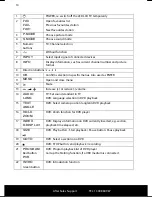
Страница 15: ...s ENTER 11 MENU Open and close menu 12 Mute 13 Increase or reduce volume 14 AUDIO LANG TV Set sound standard in TV DVD Language selection in DVD playback 15 TEXT ANGLE DVD Select camera position angle...

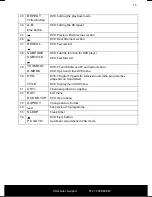
Страница 16: ...unction for DVD player DVD Fast forward 29 TV RADIO D MENU DVB T Switch between TV and radio stations DVD Open and close DVD menu 30 EPG TITLE DVB T Digital TV guide for television and radio programme...

Страница 17: ...connect to the house antenna or cable system connect a double screened cable from the antenna socket to the LED LCD TV DVB T Mode Digital TV If your location offers DVB T you can receive this by using...

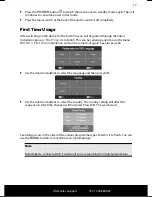
Страница 18: ...ation This can be called up any time via the menu SETUP First Time Installation and can be carried out again See also page 36 Use the direction buttons to select the language and then press OK Use the...

Страница 19: ...ports dual mode e g for bilingual programmes Use the S MODE button to switch between the following sound modes Standard Music Movie Sports Personal The Personal setting is defined under the menu optio...

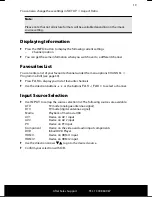
Страница 20: ...ns CHANNEL Programme Edit see page 30 Press FAV to display your list of favourite channels Use the direction buttons or the buttons FAV FAV to select a channel Input Source Selection Use INPUT to call...

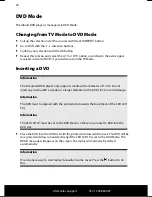
Страница 21: ...ts media with a diameter of 12 cm Do not insert any media with a smaller or a larger diameter in the DVD slot to avoid damage Information The DVD must be aligned with the printed side towards the back...

Страница 22: ...g buttons on the LED LED LCD TV EJECT Eject button Eject the DVD from the slot PLAY PAUSE button start or pause the replay You will have to use the remote supplied with the device to enter additional...

Страница 23: ...on Pause playback 19 GOTO DVD Select a section on a DVD 20 DVD STOP button end playback recording 21 PROGRAM DVD Program playback list of DVD player 22 INTRO DVD Introduction function 23 REPEAT DVD Se...

Страница 24: ...cture Association The eight release classes are 1 KID SAFE Even suitable for small children 2 G General for all age groups 3 PG Parental Guidance parental supervision recommended 4 PG13 Parental super...

Страница 25: ...t has them MENU LANG You will set the menu language of the DVD through this if it has several menu languages EXIT SETUP You will leave the DVD Menu system with this AUDIO SETUP Menu Menu Point Setting...

Страница 26: ...c Press ok to format You can select to format the USB device into FAT32 file system or High Speed FS system by using directional pad on the remote control FAT32 is suitable for USB thumb drive USB mem...

Страница 27: ...will be repeated every day accordingly during the set time frame WEEKLY Mode Allow setting the time Date and time of the recording can be set manually The recording will be repeated once every week o...

Страница 28: ...be connected to USB port 2 then the drive letter C will be assigned to the device connected to USB port 2 when another external USB device is now connected to USB port 1 for this device the following...

Страница 29: ...se the ATV or DTV option depending on the aerial signal Media Menu System As soon as you have connected an external USB device to the TV and have switched the source to Media you can choose between th...

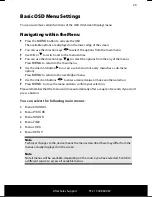
Страница 30: ...ton to access a sub menu not every menu has a sub menu option Press MENU to return to the next higher menu Use the direction buttons to enter a desired value or make another selection Press MENU to cl...

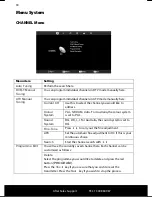
Страница 31: ...ustralia the colour system is set to PAL Sound System BG DK L I For Australia the sound system is set to BG Fine Tune Press to carry out the fine adjustment AFC Set the automatic fine adjustment to On...

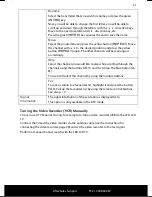
Страница 32: ...like to skip while scrolling through the channels using the buttons CH and then press the blue button A B You can still select this channel by using the number buttons Fav To save a station to a favou...

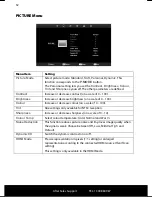
Страница 33: ...of 0 100 Colour Increase or decrease colour on a scale of 0 100 Tint Hue settings only available for NTSC reception Sharpness Increase or decrease sharpness on a scale of 0 10 Colour Temp Select colo...

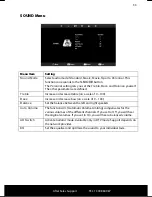
Страница 34: ...on a scale of 0 100 Bass Increase or decrease bass on a scale of 0 100 Balance Set the balance between the left and right speakers Auto Volume The function AVL Automatic Volume Limiting compensates f...

Страница 35: ...zone This option is only available in DTV mode Sleep Timer Select a time after which the device should switch itself off automatically Select Off to end the function Auto Standby Set the time by which...

Страница 36: ...lease enter new password Enter a new four digit password Confirm new password Enter the new password again The appropriate message will appear Information Note the new password It will not be set back...

Страница 37: ...connection with your LED LCD TV The USB storage medium will have to be formatted before you can start the recording Carry out the formatting by means of this Menu point You will start the recording di...

Страница 38: ...e options for the PROGRAMME GUIDE Button Entry Function Red Button PROGRAM Record Set the start and end of the recording on the external storage medium here You will be able to make the following sett...

Страница 39: ...ted programme into the timetable The device will switch to the programme set automatically as soon as the time programmed is reached It will not be possible to store the current programme in the memor...

Страница 40: ...damage your hearing Connecting an External DVD Player There are a number of options for connecting a DVD player 1 Stereo Cinch Cable and a Video Cinch Cable Connect a video cinch cable yellow jack to...

Страница 41: ...e antenna socket on the LED LCD TV and the antenna output on the DVD recorder Connect an additional antenna cable between the antenna input on the DVD recorder and the antenna socket in the wall Alter...

Страница 42: ...ideo Cable 3 x Cinch If the device has YUV outputs YPbPr we recommend connecting the device to the Y Pb Pr component inputs on the LED LCD TV via a component cable cinch cable green red blue Important...

Страница 43: ...will need a HDMI DVI adapter The DVI output does not transmit sound so you will have to connect an audio cable in addition Connect a stereo cinch cable with 3 5 mm jacks to the VGA AUDIO IN socket to...

Страница 44: ...es have been connected properly Check to ensure you have selected the correct AV source There is no sound Ensure that the volume has not been set to the minimum level Ensure the mute setting is not ac...

Страница 45: ...is being pressed or stops again at once Has the disk been inserted with the written side to the front Check whether the disk is damaged by inserting another disk Wipe the disk carefully from the cent...

Страница 46: ...me incorrectly controlled because of this very high number of transistors and the associated extremely complex manufacturing processes used Description Accepted number Bright sub pixel 1 sub pixel 2 T...

Страница 47: ...a cleaning cloth If you do not wipe off the dust first or if you apply too much pressure when wiping down the high gloss finish you could scratch the high gloss finish Do not use solvents corrosive or...

Страница 48: ...f environmentally friendly material which can be recycled Device At the end of its service life the device should not be disposed of with the household rubbish Please enquire about the options for env...

Страница 49: ...dio Stereo Nicam Program Storage Sorting 199 ATV 400 DTV Antenna input 75 Ohm Connections General 2 x USB Interface 1 x Antenna Socket Video 2 x HDMI with HDCP Decoding 1 x PC VGA In 2 x AV In 1 x YPb...

Страница 50: ...device Permissible ambient temperature 5 C 35 C Permissible relative air moisture 20 85 Dimensions W x H x D with stand Approx 574 x 408 x 160 mm Dimensions W x H x D without stand Approx 574 x 383 x...

Страница 51: ...After Sales Support TEL 1300 884 987 50...

Отзывы: