7
BarcodeGuy.com® - UnionNet SP2100 User’s Guide
Having Problems?
This section is for problems where the SP2100 times out while
trying to scan, not with problems with transferring the barcode data to a HID connected
bluetooth host. (
for HID transmission problems, see
Section 4.1
)
:
●
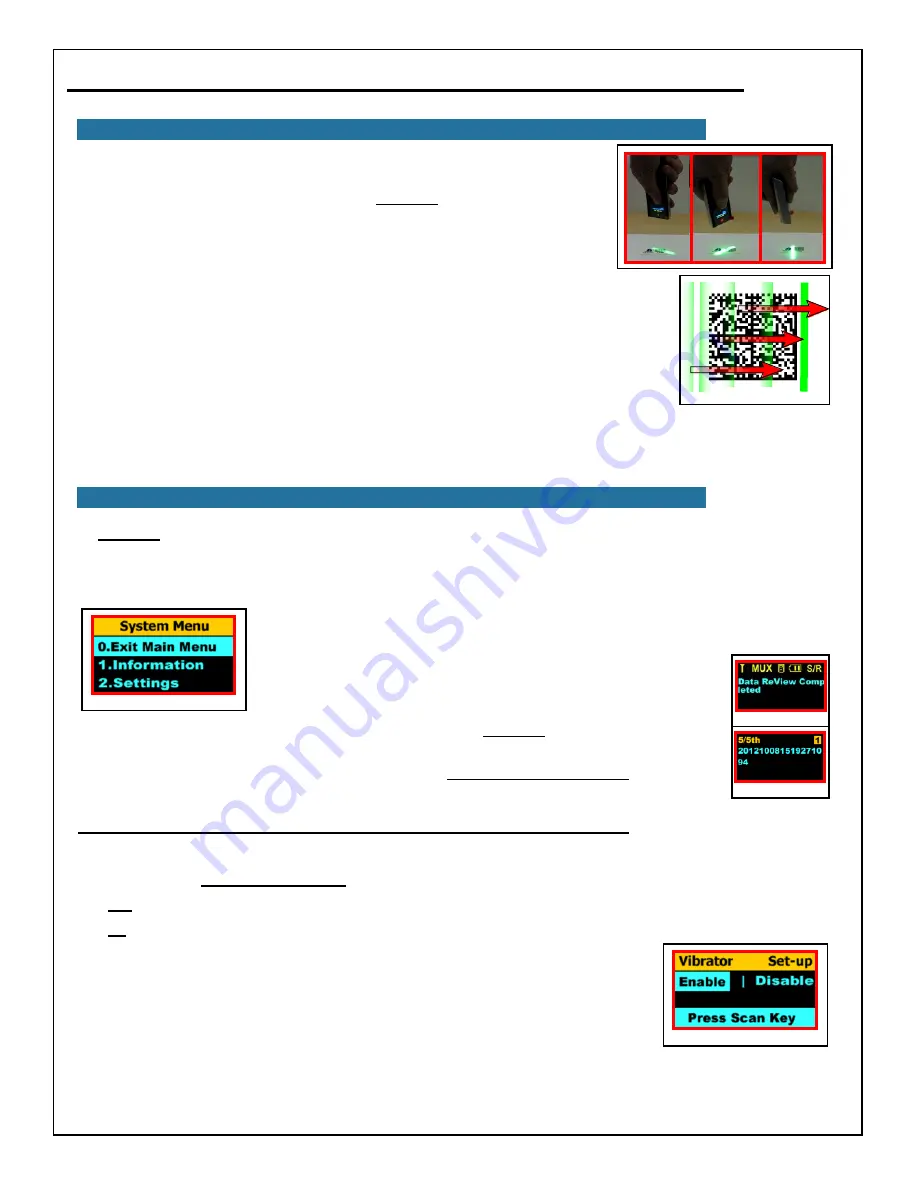
With the SP2100 directly above the barcode, press and hold the Scan Button and
center the green Aiming Line on the center of the barcode. Slowly pull the SP2100
away while holding the Scan Button. As it gets further away from the barcode, the
SP2100 will eventually focus and decode the barcode.
●
With “glossy” codes decrease reflected light by varying the perpendicular angle
between the SP2100 and the barcode.
●
On 2-Dimensional barcodes, the SP2100 will sometimes read quicker if you “raster” the
aiming light over the barcode
(figure 2.10)
. Just start at the non-printed end of one side of
the 2D barcode, press the Scan Button and drag the green Aiming Line from one side of the
barcode to the other.
As you start getting comfortable with your SP2100, you’ll learn the focal point for the different
barcodes you use. Instinctively, like muscle memory, you’ll learn the proper focal length for the
In
Section 2.4
, we referenced the LCD timeout setting in the SP2100’s System Menu. The System Menu allows you to
change general things like the power off time and screen brightness, but it also allows powerful granular control of settings
like bluetooth communications mode, suffixes & prefixes, and the SP2100’s memory storage options. Changing the System
Menu settings allows you to customize the SP100 for your application needs. As we move through the User’s Guide, we’ll
continue to refer System Menu options. Lets explore the System Menu.
To enter the System Menu press and hold the Top Side button on the SP2100 until
the System Menu screen
(figure 2.11)
appears
.
figure 2.11
figure 2.12
figure 2.13
If you press the Top Side button quickly, the SP2100 scanner enters
Data
Review
mode, allowing you to see and delete the scanned data stored in its
on board memory. If you haven’t scanned anything, you’ll see the
Date
ReView Completed
screen as depicted in
figure 2.12
. If scanned barcodes
are stored in the SP2100, you’ll see the last barcode scanned on a screen
similar to the one in
figure 2.13
. See
Section 4.3
for details on the SP2100’s
System Menu Notation - Short-Hand for this Guide & BarcodeGuy
®
Support
data review mode.
The memory capabilities of the SP2100 are covered fully in
Section 4.0 - Managing Memory
later in this
User’s Guide.
Sometimes when we answer a service question via email, customers will literally ask “What the heck does that mean?”.
That’s because we’ve developed a sort of short-hand way of navigating the SP2100’s System Menu. You’ve already seen
some short-hand in
Section 2.4 - Power Mode
. Here’s how the shorthand works:
●
SM
- means enter the System Menu by pressing and holding the Top Side Button until the System Menu appears
●
>>
- means you perform 2 actions. First, use the Side Buttons to highlight the System Menu or Sub-Menu option, then
press the Scan Button to select it.
For example, to turn on the SP2100’s vibrator here’s the shorthand notation:
SM>>2.Settings>>8.Vibrator>>Enable>>0.Exit Sub Menu>>0.Exit Main Menu
Or
SM>>2>>8>>Enable>>0>>0
figure 2.14
If there are multiple options to choose from on a single line at the bottom of the menu, use the
Side Buttons to highlight the one you want and press the Scan Button to select it (
figure 2.14)
.
The User’s Guide will use the longer form of the shorthand, but you can see how it can save time and effort versus
spelling out the entire System Menu sequence or making up screen shots to show you how to manipulate the SP2100’s
firmware settings.
figure 2.10
combination of the SP2100 and the particular densities of the barcodes you normally scan.
If you have a circumstance where the SP2100 will consistently not read a particular type of barcode, email us a picture of it
and we’ll give you a call. In most cases we can troubleshoot the problem right from the picture.
2.6 - Scanning Barcodes with the SP2100, con’t
2.7 - Using the System Menu of the SP2100


