Bandit
47
MODEL 12XP CE
MAINTENANCE
SERVICING / CHANGING FEEDWHEEL BEARING
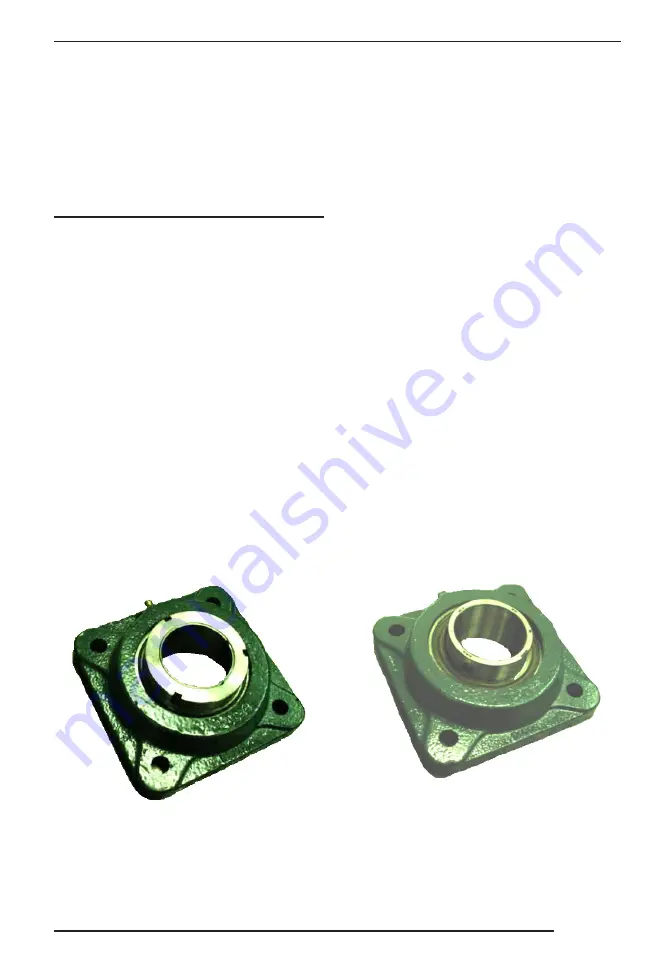
GRIP TIGHT BEARING
Your Bandit Chipper may be equipped with a
tapered lock style (Grip Tight) feedwheel bearing
on the hydraulic motor side of the feedwheel and
a conventional (set screw) style on the opposite
side. With the Grip Tight bearing this gives a very
positive locking system to the feedwheel shaft. The
set screws on both bearings should still be checked
as part of normal maintenance.
INSTALLATION PROCEDURE
1. Clean the feedwheel shaft of all debris, use a
degreaser.
2. Install both feedwheel bearings on the feedwheel
shaft with the Grip Tight bearing on the hydraulic
motor side and the set screw bearing on the opposite
side. Do not lock the bearing on the shaft at this time,
allow the feedwheel to shift freely for installation.
3. Position the feedwheel in the yoke mount and
install all (8) feedwheel bearing bolts with Loctite
263 (red) applied. These are completely tightened
and torqued at this time (refer to bolt torque chart).
4. The feedwheel then needs to be centered in
the yoke and then it must be offset 4.8 mm (3/16”)
towards the set screw bearing side (away from the
hydraulic motor). The weight of the feedwheel needs
to be taken off the bearing also.
WITH THE GRIP TIGHT BEARING BEHIND FEEDWHEEL MOTOR
The machine is set up with one set screw bearing
and one Grip Tight bearing because the one Grip
Tight bearing is all that is needed to securely hold
the feedwheel shaft (along with the set screws on
the opposite bearing). This also makes for very
easy assembly.
When installing the bearing it is
very important to install and lock the Grip Tight
bearing first with the set screw bearing done
after.
This is to keep the bearings from being put
into a side load which will lead to premature failure.
A few simple rules and installation instructions
must be followed if the bearings ever need to be
replaced or removed during service.
SET SCREW BEARING
5. First the Grip Tight bearing lock must be
tightened by hand as tight as possible (in a clock wise
direction). This is the zero reference point. Scribe a
line on the lock nut above the adapter slot.
6. Using a spanner wrench or drift pin and hammer,
lock the bearing to the shaft by tightening the lock
nut in a clock wise direction. Tighten 3/4 to 1 full turn
(you may need to block the feedwheel from turning
at this time). Now you can tighten the set screws on
the Grip Tight bearing. Note: the set screw is only
to be tightened to 2.7 Nm (2 ft.-lbs.).
7. Apply Loctite 263 (red) on the set screws of the
set screw bearing and torque to 27 Nm (20 ft.-lbs.).
Содержание Intimidator 12XP
Страница 2: ......
Страница 18: ......
Страница 80: ...66 3 19 Replacement Parts Model 12XP CE HYDRAULIC FUEL TANK ASSEMBLY 4 5 10 6 7 9 8 7 11 3 2 2 1...
Страница 82: ...68 3 19 Service Record Model 12XP CE SERVICE RECORD DATE DESCRIPTION AMOUNT...
Страница 106: ...Bandit Controls CE 3 19 92 24 245840062970 8Oct2018 Program Notes Thr dn btn overrides thr up input...
Страница 108: ...Bandit Controls CE 3 19 94 SERVICE RECORD DATE DESCRIPTION AMOUNT...


