


Flashing characters
Progressive message
Press TEMP button for “action”
Press LIGHT button to “select”
Pause / back to Main Screen / setting not saved
Pause / back to Main Screen / setting saved
Menu Items may or may not appear
SEQUENCE KEY
( View page 2 for full description )
The Reminders Display feature
has two settings: YES, NO. YES
means the feature is On and
Reminders will be displayed. NO
means the feature is Off and
Reminders will not be displayed.
Note: Reminders continue to run
in the background even when
not displayed. So, turning the
display of Reminders On/Off
does not reset any Reminder
counts.
Follow this sequence to view the
current setting and to turn this
feature On or Off.
SEQUENCE
Main Screen
TP200
USER GUIDE
42369 Rev A2
44
43
Balboa Water Group | Your Single Source Solution
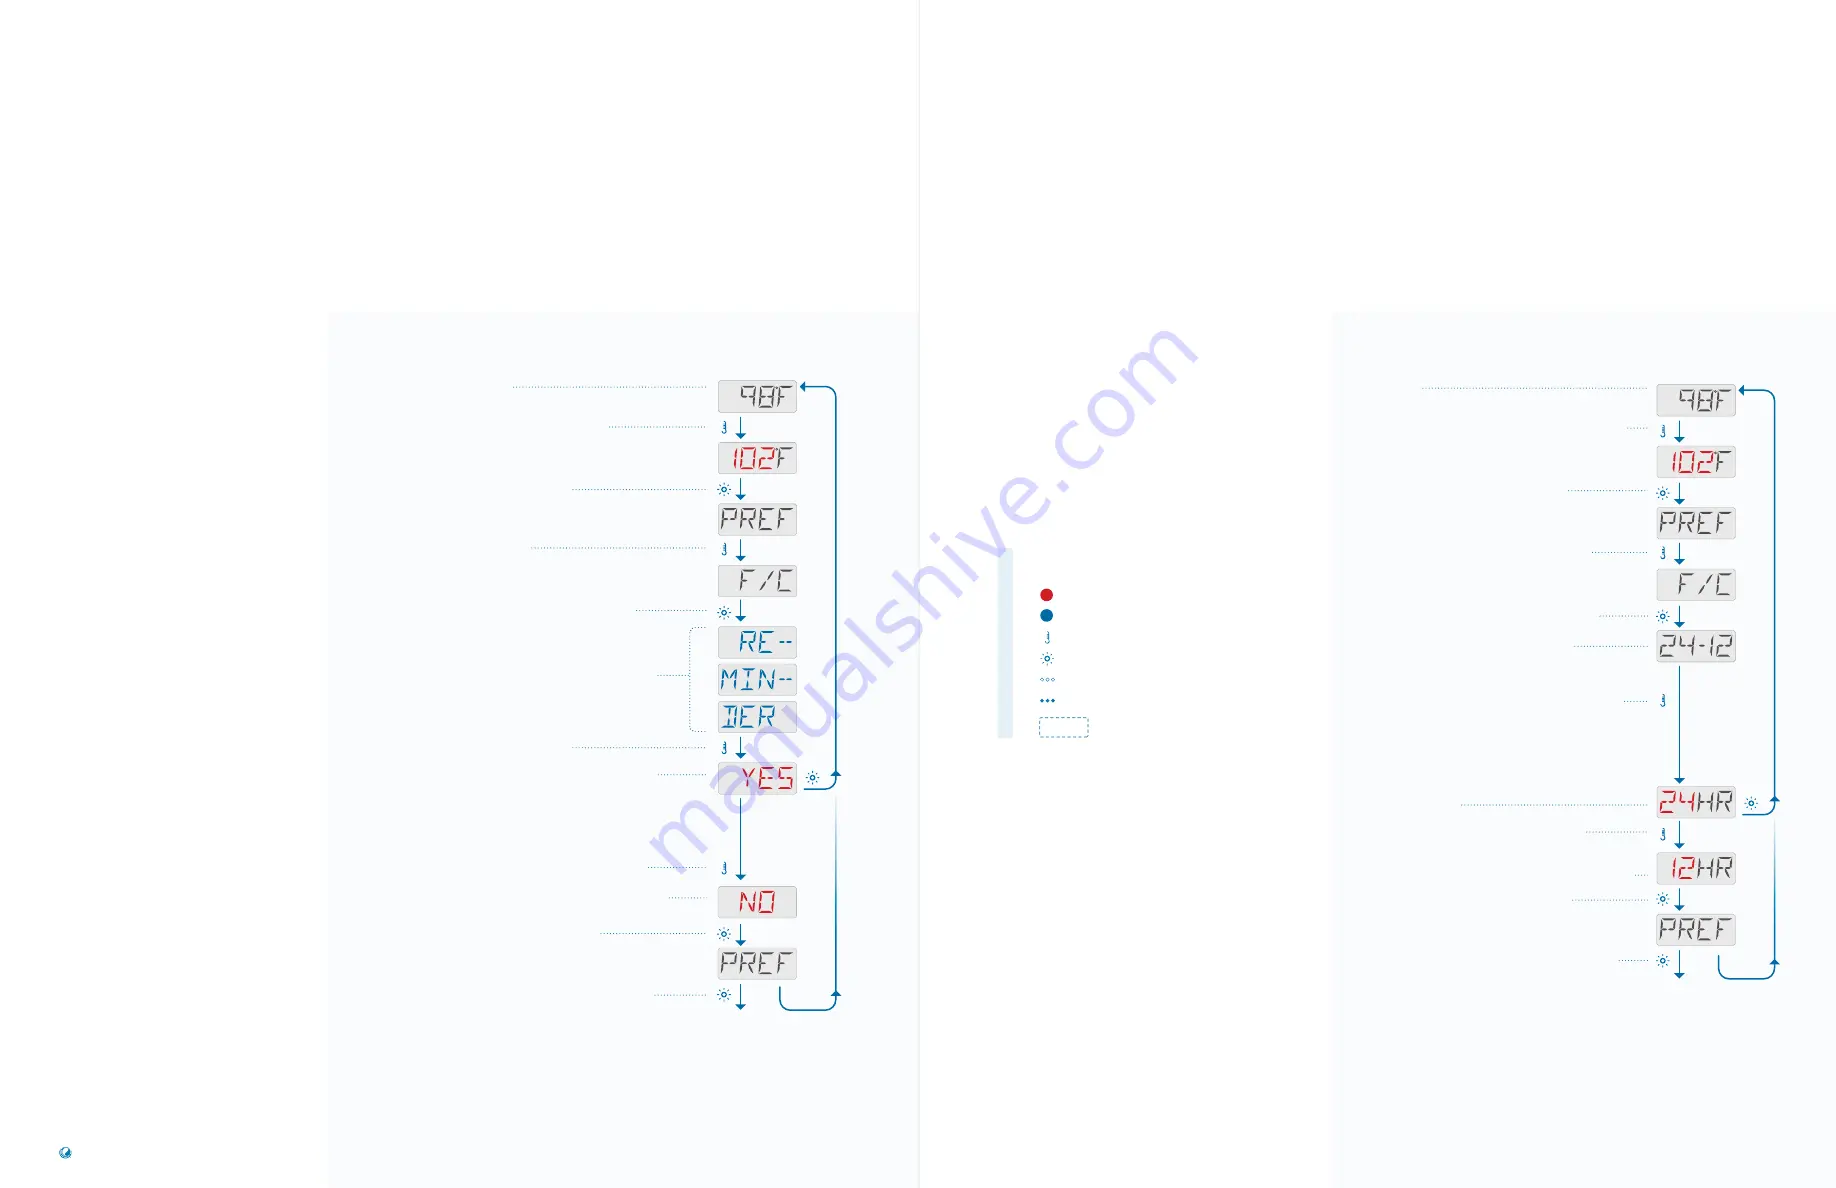
Press the TEMP button. The Set Temperature
will appear and flash.
While the Set Temperature is flashing,
press LIGHT until PREF appears.
Press TEMP until F/C appears.
Press LIGHT until the following message appears.
This indicates that you are about view the current setting
for Reminders. Reminders has two settings: YES or NO.
Press TEMP to view the current setting.
In this example YES appears first, so YES is the current
setting. YES indicates that Reminders is On. If you pause
for a moment, the Main Screen will appear automatically
and the Reminders setting will remain YES.
If you want to change the setting to NO, press TEMP.
NO indicates that the Reminders setting will be turned Off.
Press the LIGHT button to save your setting.
Press LIGHT to view UTIL. Or, pause a moment and the
Main Screen will appear.
SEQUENCE
Press the TEMP button. The Set Temperature will
appear and flash.
While the Set Temperature is flashing,
press LIGHT until PREF appears.
Press the TEMP button until F/C appears.
Press the LIGHT button until 24-12 appears.
24-12 indicates that you are about view
the current Clock setting.
Press TEMP to view the current Clock setting. Clock
has two settings: 24HR or 12HR. The setting that
appears first is the current setting.
In this example, 24HR appears first, so it is the current
setting. If you pause for a moment, the Main Screen
will appear automatically. The Clock setting will
remain at 24 Hours.
If you want to change the Clock setting to
12 Hours, press the TEMP button.
This indicates that the Clock will be set to 12 hours.
Press the LIGHT to save your setting.
Press LIGHT to view UTIL. Or, pause a moment
and the Main Screen will appear.
Main Screen
PREFERENCES
TURN ON/OFF
REMINDERS DISPLAY
PREFERENCES
SET
12
OR
24
HOUR CLOCK
The Clock feature has two
settings: 12 hours or 24 hours.
Follow this sequence to view
the current Clock setting and to
change the setting.


