xviii
6. If suitable adjustment was not accomplished
[1] If auto-setup does not operate
•
Check whether the input signal is 18 mA ± 1 mA.
•
Check whether the A/M switch is set to automatic. If it is
set to manual, switch it to auto. See 5.2, “A/M Switch,” in
this document for information on operating procedures.
•
Check the duty value of the electro-pneumatic module.
Regarding the confirmation method, see “EPM (electro-
pneumatic module) operation confirmation procedure” on
page 3-9 in this document.
Check whether the electronics module (terminal block) is
installed correctly in the case on the body of the device.
[2] If hunting occurs
•
Using the setup device, either change the actuator size
(Param) or change the individual PID settings that control
the AVP’s degree of opening. Regarding the configuration
method, see 4.4.4, “Control configuration,” in this docu-
ment.
[3] If the zero point floats or span adjustment cannot be
performed
Referring to Table 3-1, “Integral type setting,” in 3.1, “Auto-
setup,” in this document, check whether valve action is
configured correctly. If not, it will be necessary to change the
valve action (the direct/reverse setting). Referring to 4.4.3,
“Valve system,” in this document, configure the valve action
correctly.
[4] If linearity characteristic is poor
•
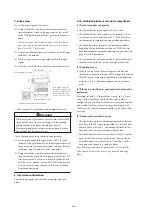
Check whether, when the attachment position of the feed-
back lever is the 50 % opening position, it is attached hori-
zontally. If not, refer to 2.2, “Installation Method,” in this
document and correctly attach the feedback lever.
•
Check the flow rate characteristics data. If equal %, quick
open, or the like has been specified, and these are funda-
mentally unnecessary, refer to 4.4.6, “Flow Type,” in this
document and change this setting to linear.
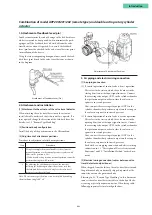
Note: When performing valve maintenance, first detach the
valve travel detector of the remote type from the mounting
plate.
Содержание AVP200
Страница 30: ......
Страница 66: ...2 28...
Страница 80: ...4 4 Menu Tree...
Страница 120: ...5 16...
Страница 128: ...6 8 For models those date of manufacture are before September 2017...
Страница 129: ...6 9 Chapter 6 Cautions regarding Explosion Proof Models For models those date of manufacture are before September 2017...
Страница 130: ...6 10 For models those date of manufacture are before September 2017...
Страница 131: ...6 11 Chapter 6 Cautions regarding Explosion Proof Models For models those date of manufacture are before September 2017...
Страница 132: ...6 12 For models those date of manufacture are before September 2017...
Страница 133: ...6 13 Chapter 6 Cautions regarding Explosion Proof Models For models those date of manufacture are after October 2017...
Страница 135: ...6 15 Chapter 6 Cautions regarding Explosion Proof Models For models those date of manufacture are after October 2017...
Страница 136: ...6 16 For models those date of manufacture are after October 2017...
Страница 138: ...6 18 For models those date of manufacture are after October 2017...
Страница 139: ...6 19 Chapter 6 Cautions regarding Explosion Proof Models For models those date of manufacture are after October 2017...
Страница 184: ...Appendix A Specifications A 25...
Страница 185: ......
Страница 188: ......
Страница 190: ......

