


Installing Beams And Rollers
A-Series Dobby Loom Assembly Manual
Page | 68
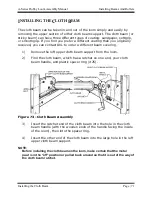
Tension Arm Installation
2)
Remove the long bolt (with its nut and washers) from the pulley
end of the tension arm.
3)
Put one of the washers back on the bolt and push the bolt through
the upper hole in the left rear vertical from the outside.
4)
Put another washer on and slip the tension arm (with its metal
bushing) onto the bolt.
5)
Add another washer, then the hex nut, and tighten it down.
6)
After tightening, check to make sure the arm swings freely.
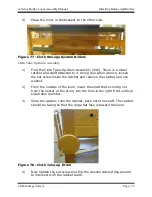
Attach the Tie-up (Cord or Cable)
1)
Find the tension arm cable (#38S) for the one yard sectional beam
or the tension arm cord (#38P) for the ½ yard sectional or plain
beam.
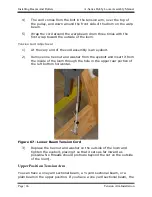
2)
Attach the cable or cord to the tension arm by removing the
shoulder bolt (the bolt near the wooden pulley) using a 5/32" Allen
wrench and place this bolt through the looped end of the cable or
cord and replace the bolt into the tension arm.
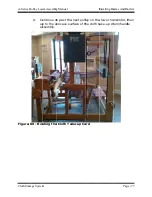
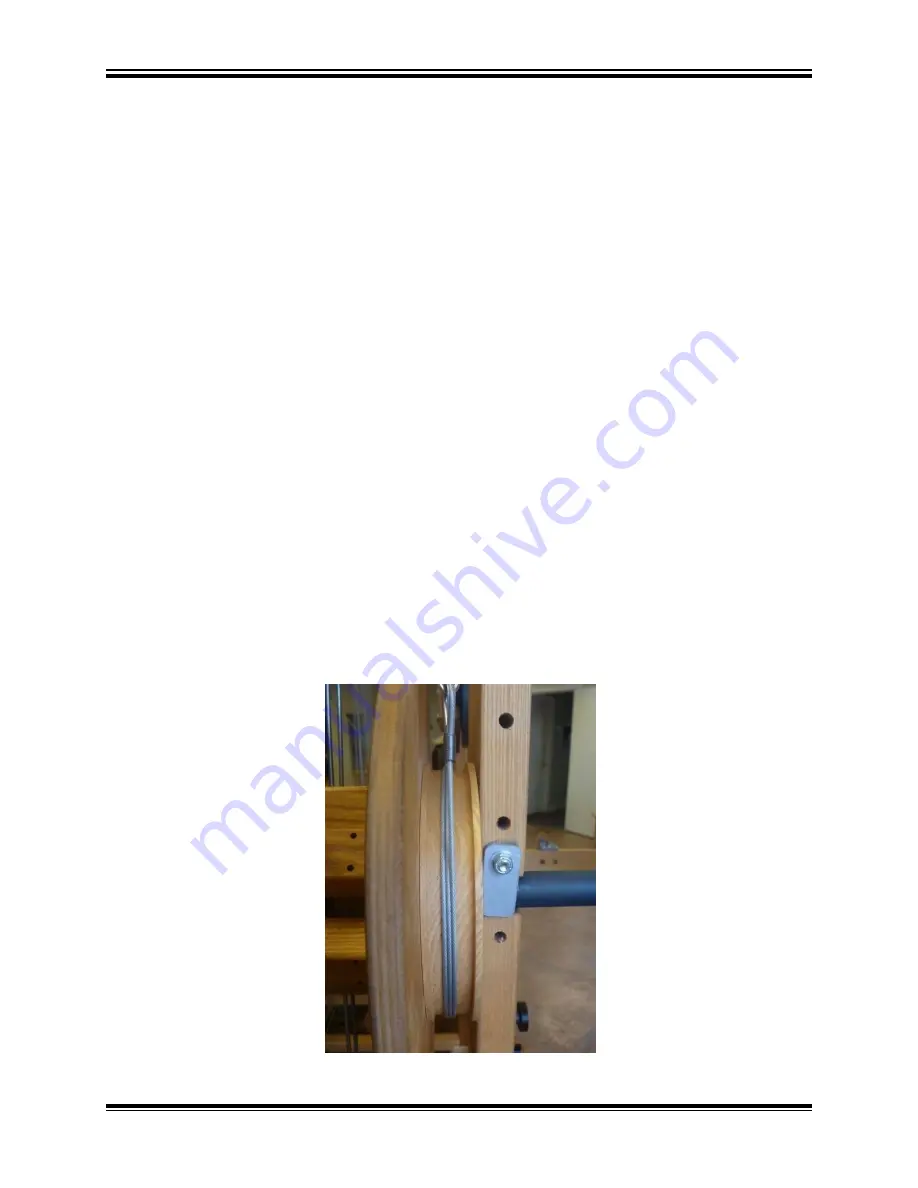
3)
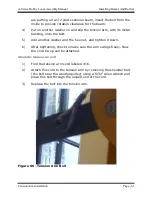
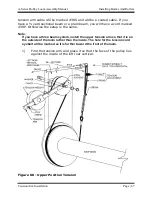
The cable comes from the bolt in the tension arm, over the top of
the tension arm pulley, and down around the front of the sectional
beam brake drum.
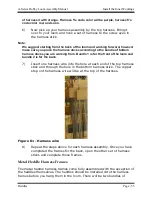
Figure 69 - Tension Cable around Brake Drum
Содержание A Series
Страница 2: ......
Страница 17: ...A Series Dobby Loom Assembly Manual Introductory Information the Loom Page 9 Figure 1 Full Loom Left Side ...
Страница 18: ...Introductory Information A Series Dobby Loom Assembly Manual Page 10 the Loom Figure 2 Full Loom Right Side ...
Страница 19: ...A Series Dobby Loom Assembly Manual Frame Assembly Frame Assembly Page 11 FRAME ASSEMBLY FRAME ASSEMBLY ...
Страница 66: ......
Страница 100: ......
Страница 126: ......
Страница 136: ......
Страница 173: ...A Series Dobby Loom Assembly Manual The Fine Print The Fine Print Page 165 THE FINE PRINT THE FINE PRINT ...
Страница 176: ...The Fine Print A Series Dobby Loom Assembly Manual Page 168 Notice to Users in the European Union ...