Install the Inner Workings
A-Series Dobby Loom Assembly Manual
Page | 38
Dobby Head Installation
2)
Remove these washers and nuts making sure you don’t unseat the
carriage bolt heads.
3)
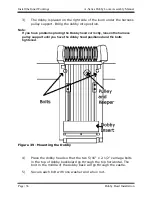
The dobby is placed on the right side of the loom under the harness
pulley support. Bring the dobby into position.
4)
Place the dobby head so that the two 5/16" x 2-1/2" carriage bolts
in the top of dobby backboard go through the top horizontal. The
bolt in the middle of the dobby back will go through the castle.
5)
Secure each bolt with one washer and a hex nut.
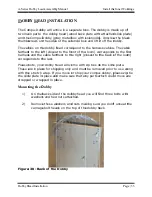
Mounting the Dobby Arm (#19)
1)
Lift the dobby arm and support into place.
2)
Using the 5/16” x 2 3/4” hex bolts provided, attach the dobby arm
support to the outside of the right top horizontal. The heads of the
bolts should be on the outside of the dobby arm support.
3)
Attach the washers and nuts loosely as we will be making an
adjustment to these later.
Содержание A Series
Страница 2: ......
Страница 17: ...A Series Dobby Loom Assembly Manual Introductory Information the Loom Page 9 Figure 1 Full Loom Left Side ...
Страница 18: ...Introductory Information A Series Dobby Loom Assembly Manual Page 10 the Loom Figure 2 Full Loom Right Side ...
Страница 19: ...A Series Dobby Loom Assembly Manual Frame Assembly Frame Assembly Page 11 FRAME ASSEMBLY FRAME ASSEMBLY ...
Страница 66: ......
Страница 100: ......
Страница 126: ......
Страница 136: ......
Страница 173: ...A Series Dobby Loom Assembly Manual The Fine Print The Fine Print Page 165 THE FINE PRINT THE FINE PRINT ...
Страница 176: ...The Fine Print A Series Dobby Loom Assembly Manual Page 168 Notice to Users in the European Union ...

