


54
7.3.1 To Setup Remote Console Setting
Click
OK
to exit and save the setting and
Cancel
to exit without saving the setting.
(1)
(2)
(3)
(4)
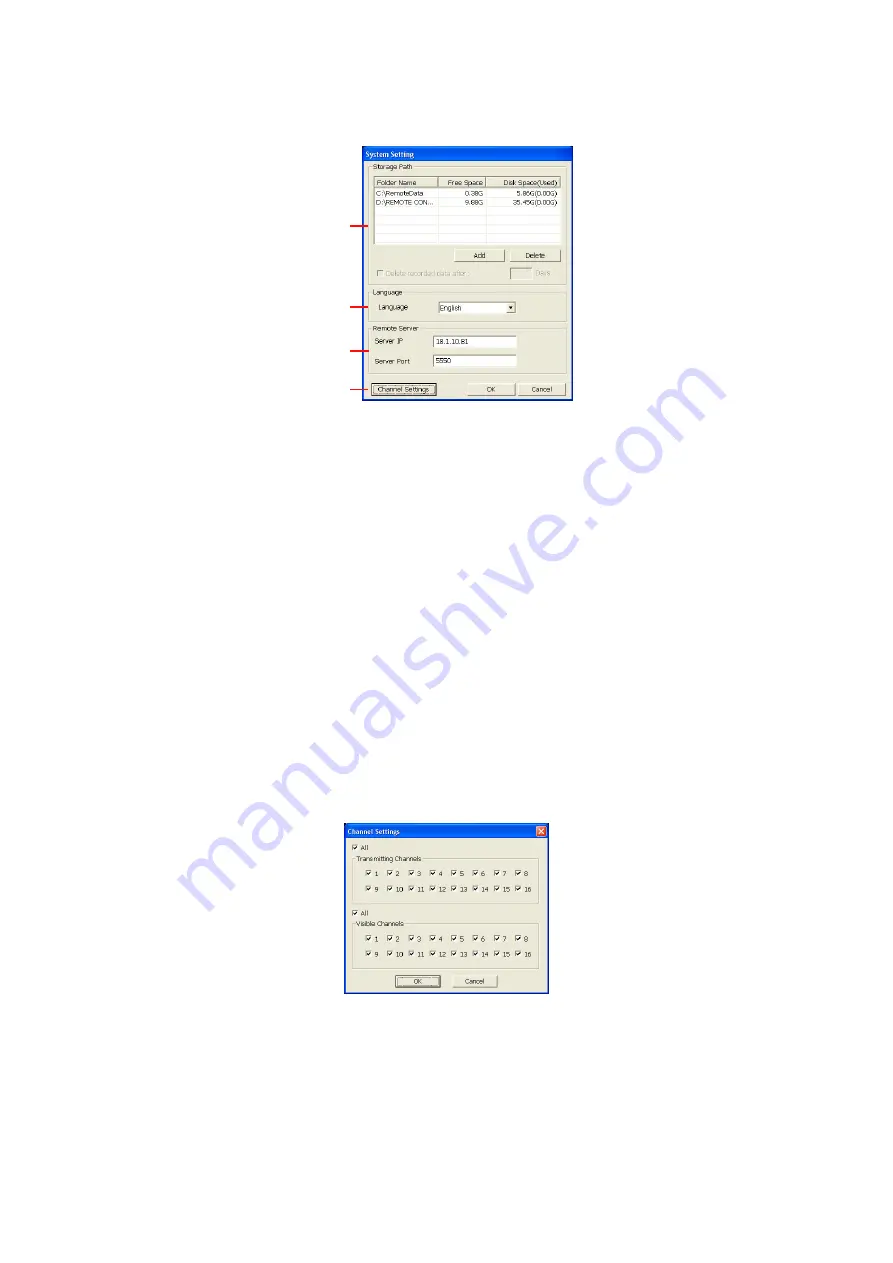
(1) Storage Path
Set the directory on where to save the data. When there is not enough free space to record
one hour data, the system automatically replaces the oldest data. In case you have more
than one storage path, the system automatically saves the data to the next storage path.
By default the data is stored in C:\RemoteData, to insert another storage path, click
Add
. To
remove the selected path, click
Delete
.
If you want the system to automatically erase the data after a certain days, enable the
Delete recorded data after
check box and enter the numbers of days in
Days
text box.
(2) Language
Customize the system to display the tool tips and dialogs based on the selected language.
By default the language is in English.
(3) Remote Server
Enter the SA DVR Server IP and Port number.
(4) Channel Settings
The numbers from 01 to 16 represent the camera ID. In Transmitting Channels section,
enable the camera number to receive the camera signal from the server. In Visible
Channels section, enable the camera number to view the camera signal on Remote
Console screen. To select all the cameras, enable the
ALL
check box.
7.4 Using the Remote Playback
To use this feature, first you need to select the source of the file. In the Select Playback
Mode dialog box, choose
Local Playback
to open the file that is recorded in the Remote
Console, and
Remote Playback
to open the file that is recorded in the SA DVR server.
When you choose Remote Playback, select
RealTime Playback
if your internet bandwidth
is fast and big enough, otherwise choose
Download and Playback
.
Click
OK
to proceed and
Cancel
to void this operation.


