


30
4.5 Schedule Setting
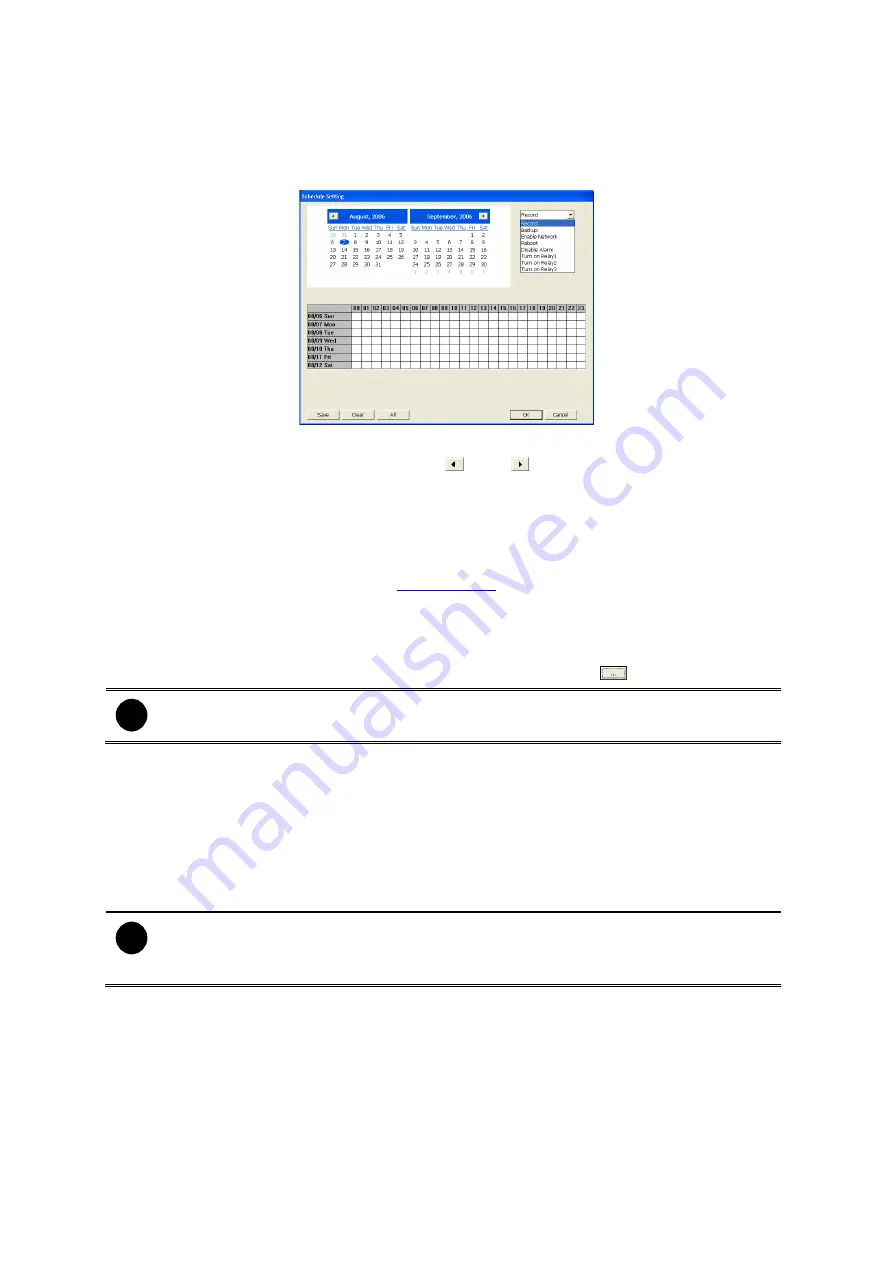
Schedule to record, backup, enable network, reboot and disable alarm of all the
cameras either weekly or one time. The number from 00 to 23 represent the time in
24-hour clock. The left most column display the days in a week.
To Set the Schedule Setting:
1. Select the date in the calendar. Use
and
buttons to shift the calendar to
the left or right.
2. Select the condition you want to schedule in the drop down list.
-
Record
Activate all the cameras to start video recording at the set time based on the
Recording setting (see also
Chapter 4.3
).
-
Backup
Save another copy of all the data at the set time and specified backup path.
SA DVR automatically updates and only backup the data that are not yet
included in the archive. To assign backup path, click
.
i
Make sure the backup folder and storage folder are not on the same drive.
-
Enable Network
Activate SA DVR remote system to access at the set time. After the
appointed time, the Network function will be disabled. If the Network function
is already enabled, the Network function will not be disabled when the
appointed time has ended.
-
Reboot
Restart the PC at the appointed time.
i
Make sure the Windows operating system is set
NOT
to require you to login
user name and password. This way the system will be able to run SA DVR
program.
-
Disable Alarm
Deactivate the alarm at the set time temporarily.
-
Turn on Relay #
Active the Relay at the set time. If there are no Relays are connected, Turn
on Relay # function will not display in drag down list. The Relay number will
depend on how many Relays are connected.
3. Specify to either schedule it weekly or one time. Click
to make a selection.


