


16
4. PROGRAMMING
RegCom-Pro POS / Cash Register Interface
4.3 REGISTER SELECTION
To select a specific register, Select “REGISTER SELECT” Tab and select specific register from drop down menu. The
REGISTER SELECT menu will bring up a sub-menu. REGISTER SELECT automatically formats the RegCom-Pro to
match your register’s communication settings. However, if you need to change these settings, you can do so through the
COMMUNICATION menu described later in this manual.
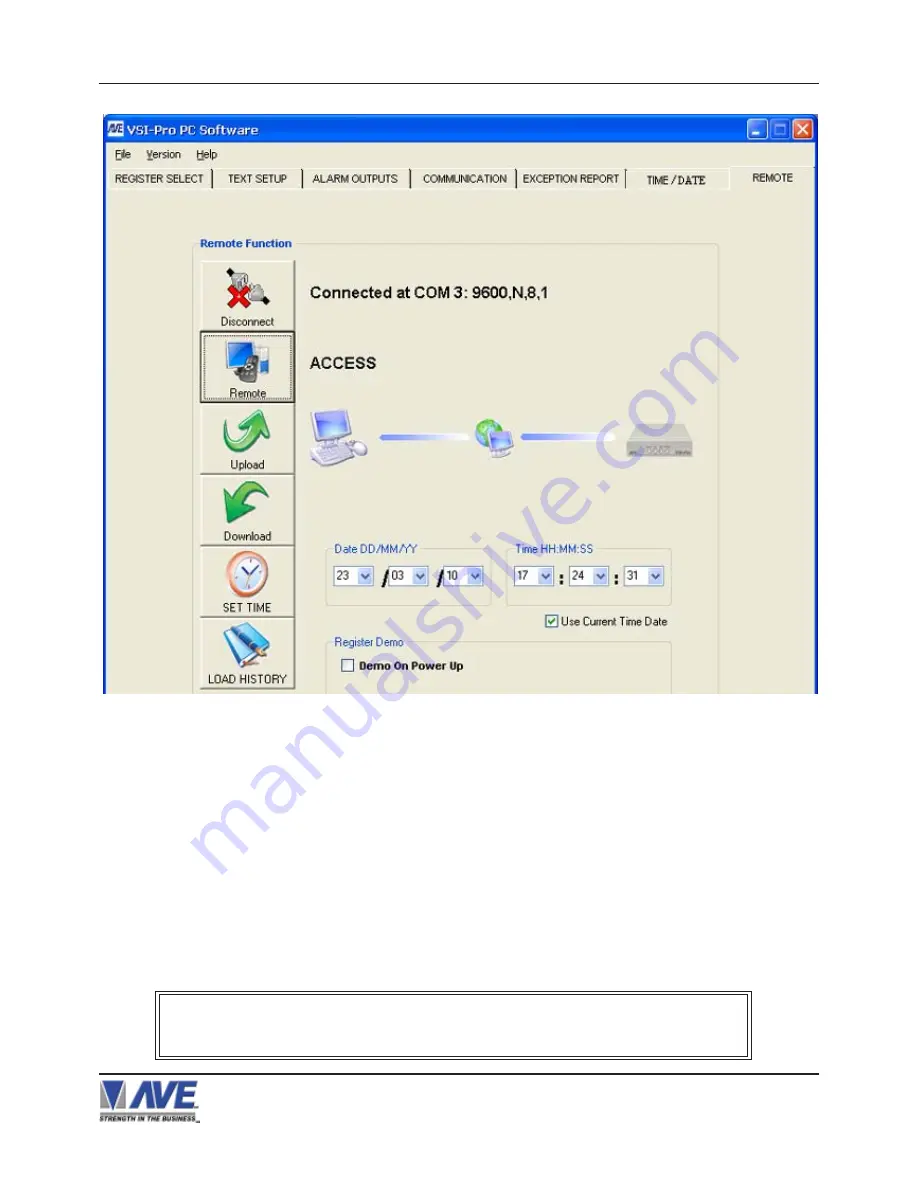
Figure 8 :RegCom-Pro and Computer Can Establish Communication
Once you have “Access” then you can do any function on this menu screen. “Upload” data which reads the current
settings of the RegCom-Pro into the PC. “Download” which sends the PC settings to the RegCom-Pro. “Set Time” can
set a new time or PC sync time to the RegCom-Pro. “Load History” reads the History File of Exceptions from the
RegCom-Pro and saves as a text file on the PC.
Note:
If the cable is disconnected, RegCom-Pro powered down, PC program closed, the PC and/or the RegCom-Pro
has a 30 second timeout and will reset itself for normal operation.
Whenever you select a register in this menu, certain programming features are reset to the
default settings. Always set the register selection first, get the data on-screen, then proceed
with additional programming.


