Installation
18 |
P a g e
STEP 5
– Create a tag
-
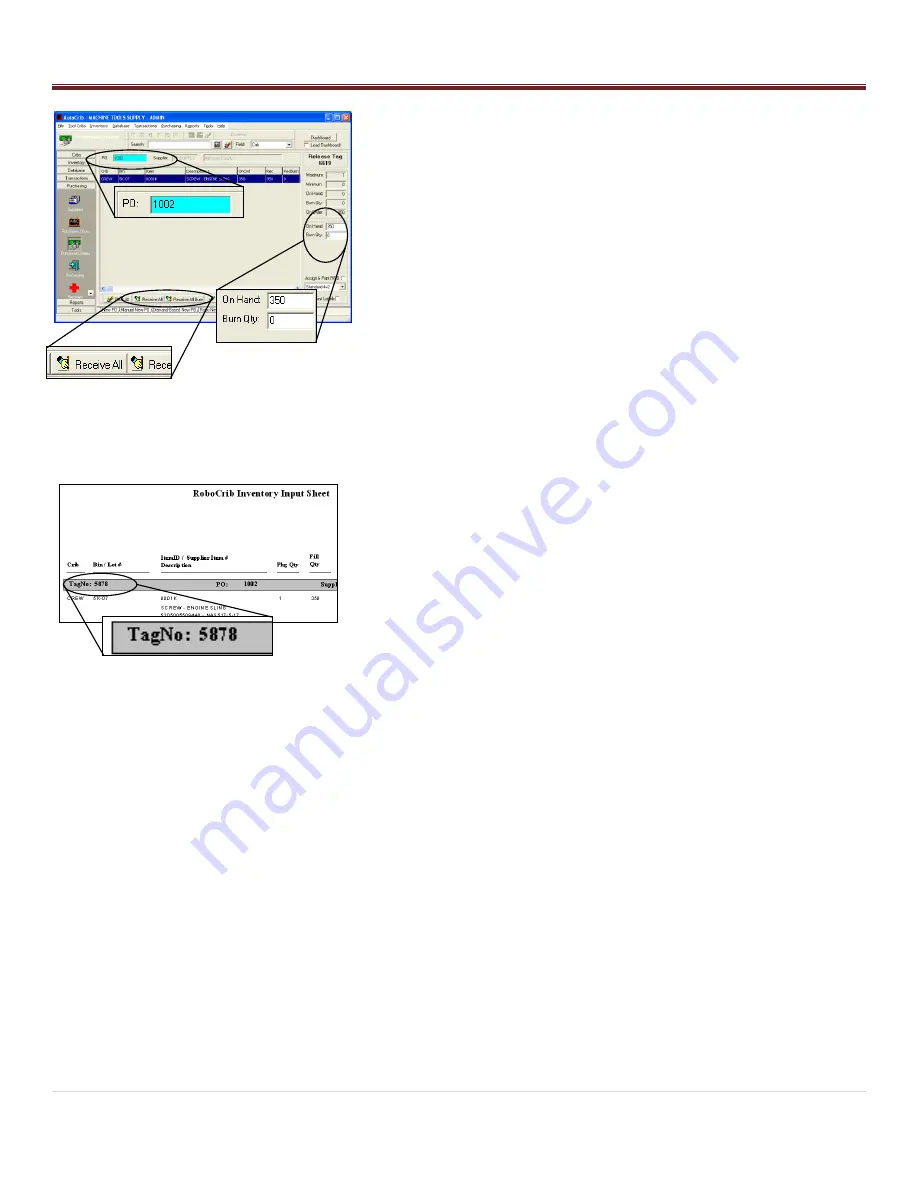
Use the Create Tags tab. This can be found in the Purchase
Orders module within the Purchasing menu.
-
Select the Purchase Order number created in step 5 by double
clicking in the aqua field.
-
If all items can be stocked, choose the „Receive All‟ or
„Receive All Burn‟ button. Otherwise, insert the individual
quantities into the On Hand or Burn Qty fields.
-
Select the „Apply‟ button.
-
Print the Inventory Input Sheet
– RoboCrib report located
within the “Purchasing” report category of the Reports module.
STEP 7
– Stock RoboCrib
-
At the RoboCrib, insert the badge number and PIN. (Note: At
least one employee must be setup as a stocker in the AutoCrib
software.)
-
Select the Stock > Auto > Tag buttons.
-
Insert the tag number noted on the Inventory Input Sheet
report.
-
The RoboCrib will prompt the following:
o
“
Is tag complete?
”
„Yes‟
all items on the tag are available for
stocking.
„No‟
some, but not all items on the tag are
available for stocking.
o
The RoboCrib will turn the platters until the first bin on
the Inventory Input Sheet is in front of the door.
Once the door opens, place the appropriate
item into the bin.
Close the door to stock the next bin.
Содержание RoboCrib 2000 E
Страница 51: ...Appendix 51 P a g e ...
Страница 52: ...Appendix 52 P a g e ...


