165
2467S–AVR–07/09
ATmega128
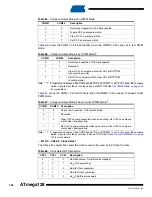
Note:
1. See
“Alternate Functions of Port B” on page 74
for a detailed description of how to define the
direction of the user defined SPI pins.
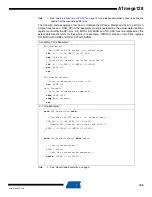
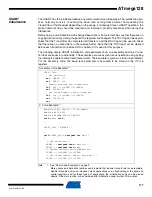
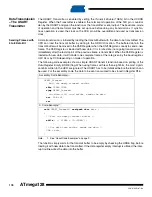
The following code examples show how to initialize the SPI as a Master and how to perform a
simple transmission. DDR_SPI in the examples must be replaced by the actual data direction
register controlling the SPI pins. DD_MOSI, DD_MISO and DD_SCK must be replaced by the
actual data direction bits for these pins. For example, if MOSI is placed on pin PB5, replace
DD_MOSI with DDB5 and DDR_SPI with DDRB.
Note:
1. See “About Code Examples” on page 9.
Assembly Code Example
SPI_MasterInit:
; Set MOSI and SCK output, all others input
ldi
r17,(1<<DD_MOSI)|(1<<DD_SCK)
out
DDR_SPI,r17
; Enable SPI, Master, set clock rate fck/16
ldi
r17,(1<<SPE)|(1<<MSTR)|(1<<SPR0)
out
SPCR,r17
ret
SPI_MasterTransmit:
; Start transmission of data (r16)
out
SPDR,r16
Wait_Transmit:
; Wait for transmission complete
sbis
SPSR,SPIF
rjmp
Wait_Transmit
ret
C Code Example
void
SPI_MasterInit(
void
)
{
/* Set MOSI and SCK output, all others input */
DDR_SPI = (1<<DD_MOSI)|(1<<DD_SCK);
/* Enable SPI, Master, set clock rate fck/16 */
SPCR = (1<<SPE)|(1<<MSTR)|(1<<SPR0);
}
void
SPI_MasterTransmit(
char
cData)
{
/* Start transmission */
SPDR = cData;
/* Wait for transmission complete */
while
(!(SPSR & (1<<SPIF)))
;
}
Содержание ATmega128
Страница 384: ...vi 2467S AVR 07 09 ATmega128 Rev 2467C 02 02 377 Table of Contents i...
Страница 385: ...vii 2467S AVR 07 09 ATmega128...


