33
- Check the rim and the tyre, as described in the specific section of this manual.
- If the rim has been removed, clamp the wheel on the spindle flange, as described in
the WHEEL CLAMPING section.
NOTE: To ensure safety, you are recommended to use a specific tool to replace the
valve.
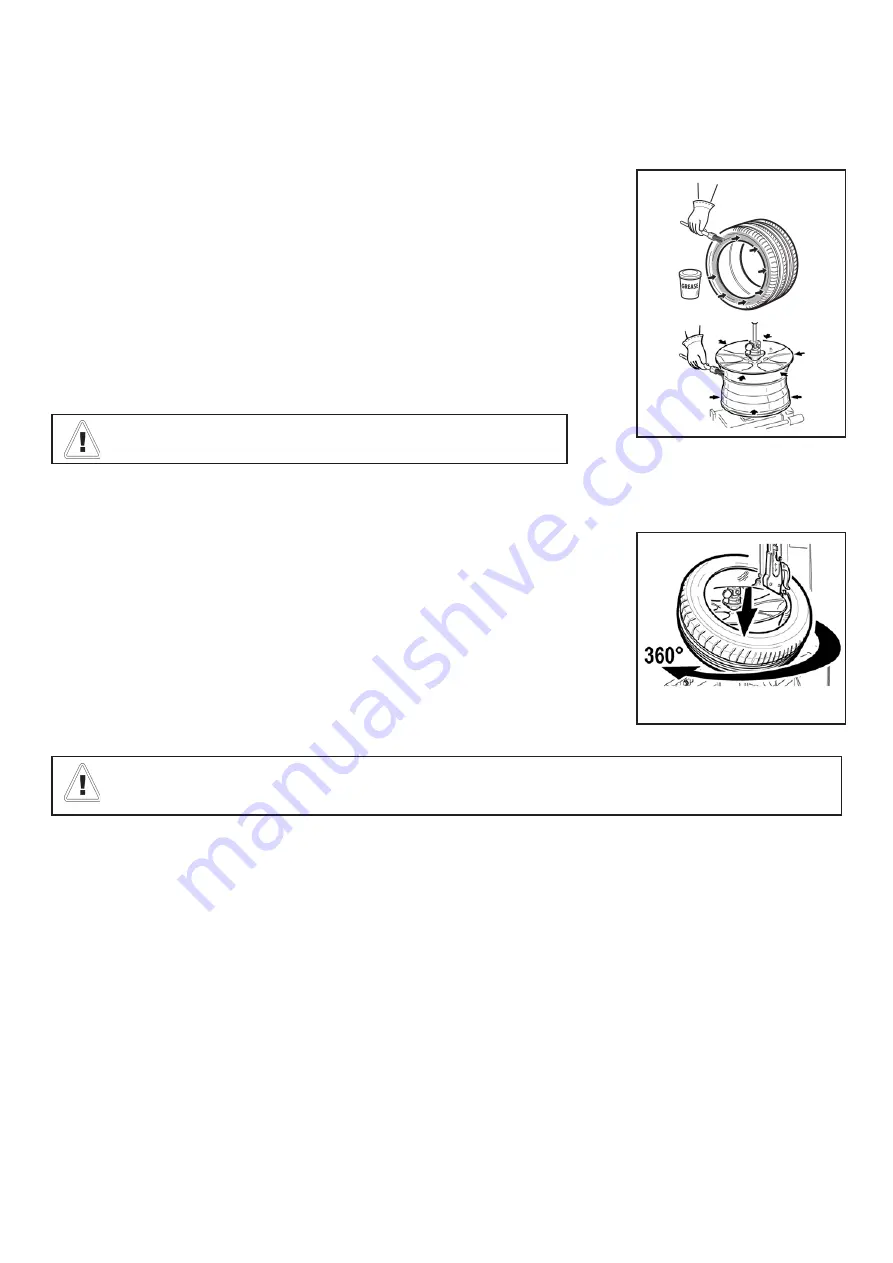
- Carefully lubricate the whole inner surface of the rim and the beads of the tyre, both
externally and internally right around the circumference, for a thickness of at least 30
mm. (Fig. 15)
If there is a sensor, do not let it come into contact with the lubricant
- Swing in the horizontal arm until the tool is positioned correctly compared to the rim.
- Position the tyre horizontally on the rim, slightly tilted downwards to the “3 o’clock”
position (fig. 16).
MOUNTING STANDARD TYRES
Fig. 15
NOTE: If you have difficulties in manually accompanying the bead, you can use the mobile bead presser in the “5
o’clock” position.
Fig. 16
Make sure the bead of the tyre rests on the “shoe” shaped part of the tool and under the grub screw in the
opposite part of the tool.
-Press the rotation pedal to turn the tyre clockwise by 360°
-Manually press the tyre in the “5 o’clock” position until the bead is forced to the height of the channel and keep pressing
it until it reaches position 8 after turning, so that the tyre does not lift while it turns; continue to turn the tyre until the lower
bead has fitted completely in place.
ATTENTION:
Make sure the tyre and the rim move together as one.
LOWER BEAD


