Chapter 2: Hardware Information
2-20
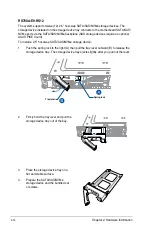
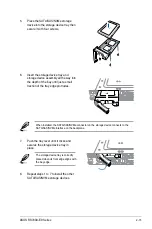
5.
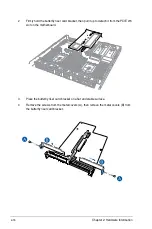
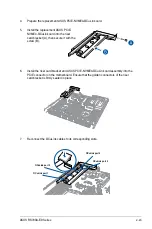
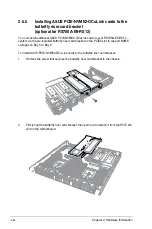
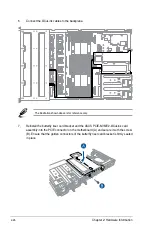
Install the ASUS PIKE II card and the metal cover assembly to the riser card bracket or
butterfly riser card bracket. Ensure that the metal cover is inserted and firmly seated in
place.
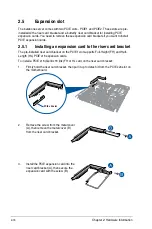
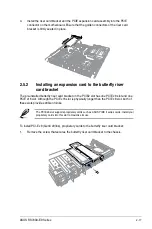
Refer to section
2.5.1 Installing an expansion card to the riser card bracket
or
2.5.2
Installing an expansion card to the butterfly riser card bracket
for the steps on
installing an expansion card to the riser card bracket or butterfly riser card bracket.
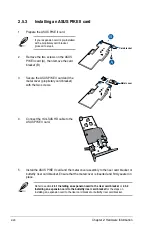
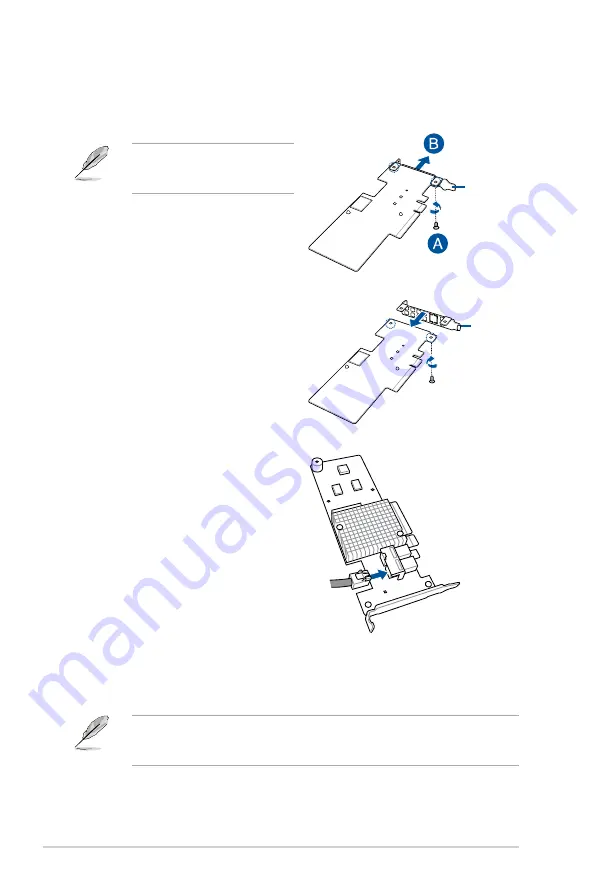
2.5.3
Installing an ASUS PIKE II card
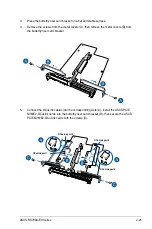
1.
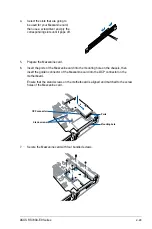
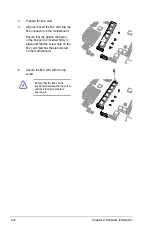
Prepare the ASUS PIKE II card.
2.
Remove the two screws on the ASUS
PIKE II card (A), then remove the card
bracket (B).
If your expansion card is pre-installed
with a proprietary card bracket,
proceed to step 4.
Metal cover
Card bracket
3.
Secure the ASUS PIKE II card and the
metal cover (proprietary card bracket)
with the two screws.
4.
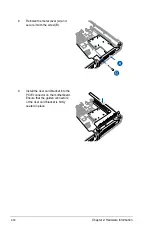
Connect the mini-SAS HD cable to the
ASUS PIKE II card.
Содержание RS700A-E9-RS12
Страница 1: ...1U Rackmount Server User Guide RS700A E9 Series RS700A E9 RS4 RS700A E9 RS12 ...
Страница 70: ...Chapter 4 Motherboard Information 4 2 4 1 Motherboard layout ...
Страница 92: ...Chapter 4 Motherboard Information 4 24 ...
Страница 135: ...ASUS RS700A E9 Series 6 9 6 Click Finish to complete the installation 5 Click Install to start the installation process ...
Страница 136: ...6 10 Chapter 6 Driver Installation ...
Страница 137: ...Appendix Appendix This appendix includes additional information that you may refer to when configuring the motherboard ...
Страница 138: ...A 2 Appendix KNPP D32 block diagram ...
Страница 144: ...A 8 Appendix ...

