

2-26
Chapter 2: Hardware information
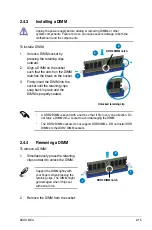
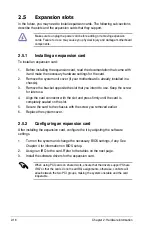
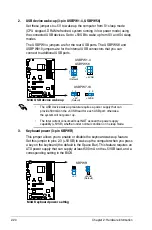
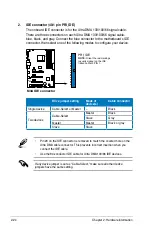
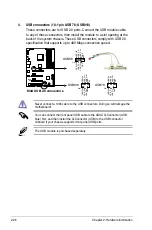
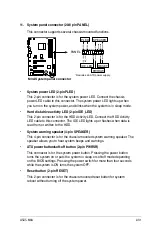
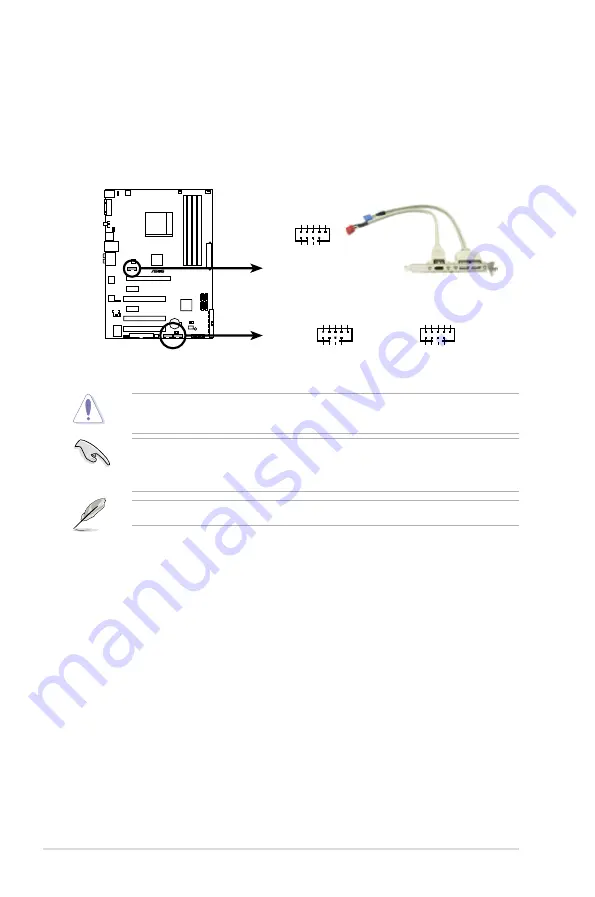
4. USB connectors (10-1 pin USB 78; USB910)
These connectors are for USB 2.0 ports. Connect the USB module cable
to any of these connectors, then install the module to a slot opening at the
back of the system chassis. These USB connectors comply with USB 2.0
specification that supports up to 480 Mbps connection speed.
Never connect a 1394 cable to the USB connectors. Doing so will damage the
motherboard!
M3
A
®
M3A USB 2.0 connectors
USB+5V USB_P8- GND NC
USB+5V USB_P7-
GND
PIN1
USB78
USB+5V USB_P10- GND NC
USB+5V USB_P9-
GND
PIN1
USB910
USB+5V USB_P6- GND NC
USB+5V USB_P5-
GND
PIN1
USB56
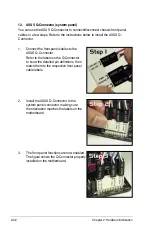
You can connect the front panel USB cable to the ASUS Q-Connector (USB,
blue) first, and then install the Q-Connector (USB) to the USB connector
onboard if your chassis supports front panel USB ports.
The USB module is purchased seperately.
Содержание M3A - Motherboard - ATX
Страница 1: ...Motherboard M3A ...
Страница 13: ...1 Product introduction This chapter describes the motherboard features and the new technologies it supports ...
Страница 14: ...ASUS M3A Chapter summary 1 1 1 Welcome 1 1 1 2 Package contents 1 1 1 3 Special features 1 2 ...
Страница 56: ...ASUS M3A Chapter summary 3 3 1 Starting up for the first time 3 1 3 2 Turning off the computer 3 2 ...
Страница 98: ...4 38 Chapter 4 BIOS setup ...
Страница 134: ...5 34 Chapter 5 Software support ...


