-
8
-
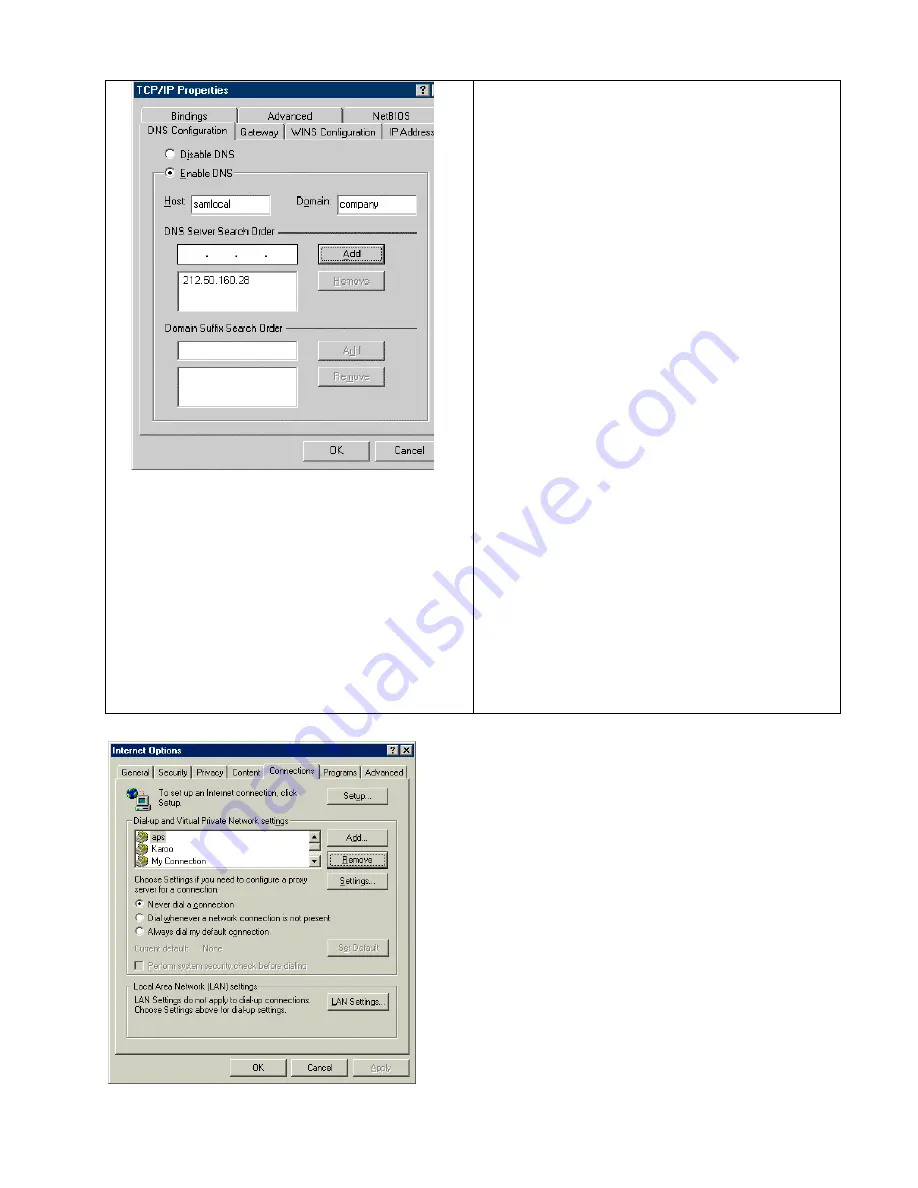
You now need to enter the address for the DNS server from
your ISP. Please ask your ISP for the address of their DNS
(a list of ISP DSN addresses is given at the back of this
guide but it might not be up to date). Enter the DNS
address and then ‘add’ the address to the DNS list.
Finally click on OK and then OK from the main Network
menu.
Windows will now install the revised network settings;
please note that your original Windows installation CD
might be required. You should then reboot your PC.
That’s all there is to the basic set-up. The next section
covers basic testing.
it might not be up to date). Enter the DNS address and then
‘add’ the address to the DNS list.
Finally click on OK, then OK and then Close. The new
TCP/IP settings should take immediate effect.,
That’s all there is to the basic set-up. The next section
covers basic testing.
So now you should have the ethernet and ADSL settings correctly
configured on your router. If you altered the IP address settings of
the router then you may need to now go and change the TCP settings
of your computer (or LAN) to suite.
If you want to use the router via your LAN (i.e. not just connected to
a single computer) then you should now unplug the network cable
from your computer and connect it to an uplink port on your network
hub. If you did this with the router power still on then now press the
reset button on the router. Alternatively now reconnect the power to
the router.
4.1.2 Running your Browser
After checking your connections and TCP settings (see above) you
are ready to run your browser in order to configure the router.
Any browser can be used on any operating system: The
configuration screens are the same. If you are using Explorer then
click on your Explorer icon to start your browser.
When your browser starts up first check that it’s using your LAN for
internet access. To do this in Explorer go to Tools/Internet
Options/Connections.


