5. 1. 15 – Template Parameter Edit 2 Page – Touchpad
If the control is the X/Y Touchpad then the following Template Parameter Edit 2 page is shown:
Here, the
Tch Mode
(Touchpad Mode) options, detailing what happens when contact with the pad is stopped, are as follows:
HOLD
: The X and Y values remain at whatever value was selected when the pad was last touched.
HomeLeft/Down
: When editing X1 or X2, HomeLeft means that the X value returns to whatever value is set to the left extremity of the
pad (the Low value). When editing Y1 or Y2, HomeDown means that the Y value returns to whatever value is set to the bottom extremity
of the pad (the Low value).
HomeCntr
: The X and Y values jump to the middle of the range set by the low and high values.
HomeRght/Up
: When editing X1 or X2, HomeRght means that the X value returns to whatever value is set to the right extremity of the
pad (the High value). When editing Y1 or Y2, HomeUp means that the Y value returns to whatever value is set to the top extremity of the
pad (the High value).
See the next section for more details about Assigning the X/Y Touchpad.
The Naming options on this screen are identical for all types of controls (see section 5.1.13).
5. 2 Assigning the X/Y Touchpad
Editing the X/Y Touchpad is a little different to any other control because four different parameters can be assigned to it, two on each
axis. This means that filter frequency and delay length can both be assigned to the X (horizontal) axis, on X1 and X2 respectively, whilst
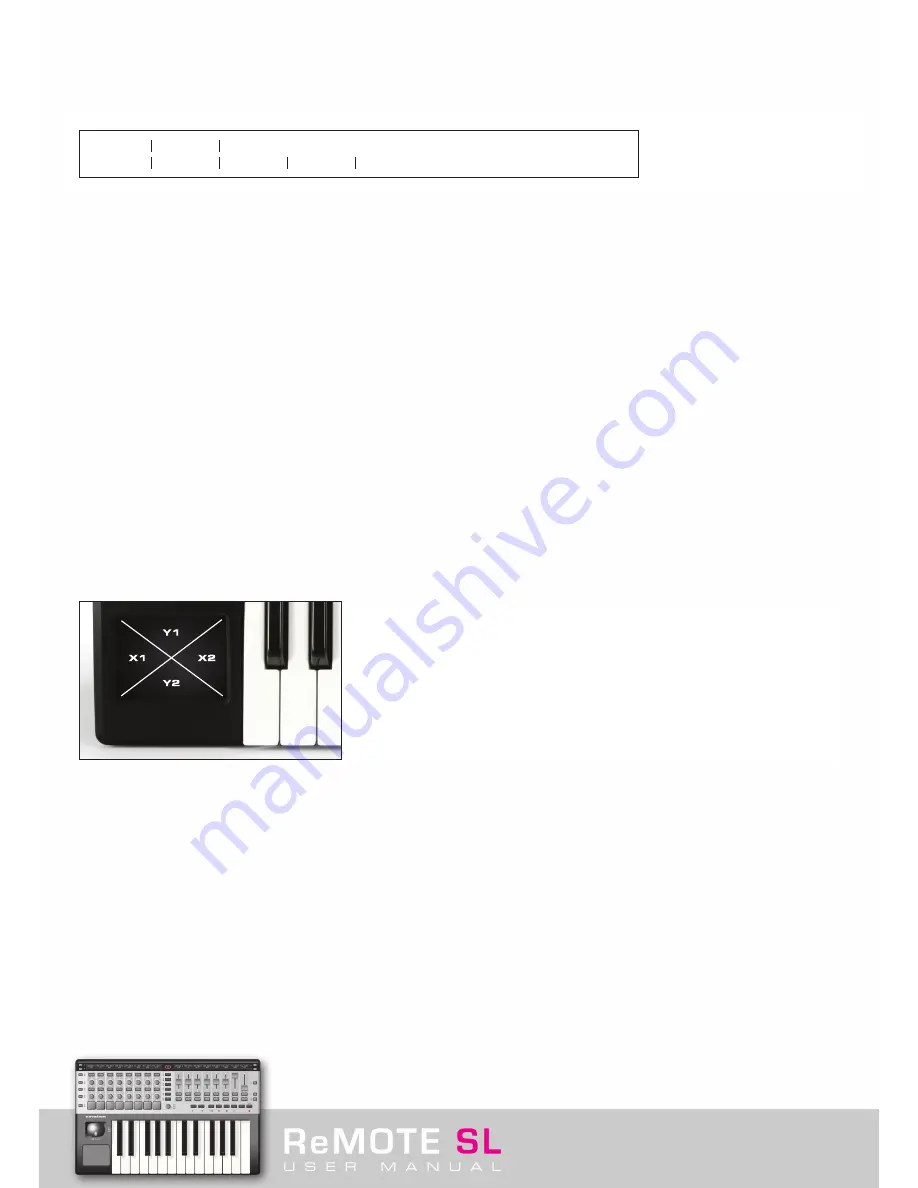
filter resonance and delay feedback could both be assigned to the Y axis. In EDIT Mode, the pad is split into four sections, each
responding to one of the four parameters, as follows:
To call up X1 for edit, hold down the EDIT button and touch the area of the pad relating to X1, as shown in the diagram above. The edit
options will then follow those listed in the previous section (the pages for knobs and sliders, CC-SYSEX, with PITCHBND). On these pages,
the low and high values relate to either extremity of the pad; for the X axis, this relates to left as low and right as high, for the Y axis, this
relates to bottom as low and top as high.
For example, if wanting to set the X (horizontal) axis to control a filter frequency (on CC Number 105) over the range 20 to 60, and when
the Touchpad is released the value jumps to 60, then the following actions must be taken. Hold down the EDIT button and press the area
corresponding to X1 or X2, this calls up this control for edit on the screens above. Next, set the Control to CC and the CC Num to 105,
then the Low Val to 20 and the High Val to 60. Now press either of the SCROLL UP buttons to move to Template Parameter Edit 2 page
and set Tch Mode to HomeRght. Then press PLAY and the control is ready to use.
Note that when trying to assign the Touchpad to an area of software with a MIDI Learn function then only one parameter on the pad (X1/2
or Y1/2) can be active at one time. Then, when each parameter has been ‘learned’ one by one, all areas of the pad can be activated. See
the Novation website, video tutorials and online answerbase for more information.
Tch Mode
HOLD
Change Case Numbers etc Name:
Upper
Lower
Punctu
« CHAR »
Содержание ReMOTE SL
Страница 44: ...Automapping within the Subtractor Synth Transport Controls for Sequencer Click here to return to SL diagram...
Страница 50: ...Automapping within the Malstrom Synth FEnv Invt Click here to return to SL diagram...
Страница 51: ...Automapping within the Malstrom Synth Transport Controls for Sequencer Click here to return to SL diagram...


