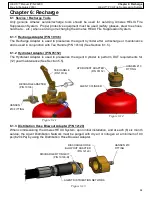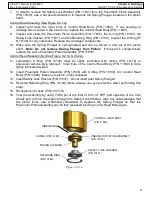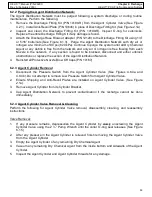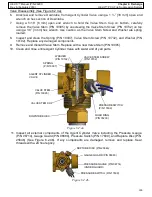
104
HELIX™
Manual (P/N 26291)
Chapter 6: Recharge
Rev A (February 2018)
HELIX™
PCU Fire Suppression System
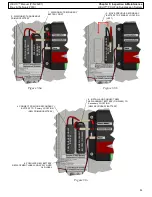
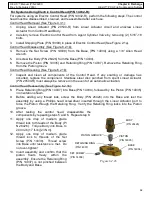
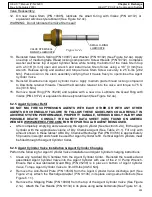
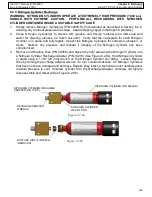
NITROGEN CYLINDER
HEX FITTING
NITROGEN CYLINDER (P/N 09956
-
R)
NITROGEN CYLINDER RECHARGE
ADAPTER (P/N 10270)
RECHARGE ADAPTER
WRENCH
Figure 6.2.9a
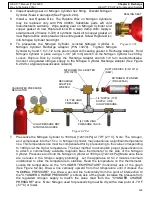
RUPTURE DISC (P/N 09958)
(REMOVED)
Figure 6.2.9b
6.2.9 Nitrogen Cylinder Recharge
WARNING: NITROGEN CYLINDERS OPERATE AT EXTREMELY HIGH PRESSURE (1800 psi).
HANDLE WITH EXTREME CAUTION. PERFORM ALL RECHARGING WITH NITROGEN
CYLINDER CONTAINED INSIDE A SUITABLE SAFETY CAGE
1.
Slowly remove Nitrogen Cylinder(s) (P/N 09956
-
R) from actuator as described in Section 6.2.8,
allowing any residual pressure to escape. Install shipping cap(s) on Nitrogen Cylinder(s).
2.
Clean Nitrogen Cylinder(s) to remove dirt, grease, and foreign material (use mild soap and
water for cleaning process, no harsh solvents). Verify that the nameplate for each Nitrogen
Cylinder is in place and fully legible. Inspect the Nitrogen Cylinders for corrosion, abrasion, or
dents. Relieve any pressure and discard if integrity of the Nitrogen Cylinder has been
compromised.
3.
Remove old Rupture Disc (P/N 09958) and discard by fully screwing the Nitrogen Cylinder into
a Nitrogen Cylinder Recharge Adapter (P/N 10270) (See Figure 6.2.9a). Hold Nitrogen Cylinder
in place using a 1
-
1/8
” [29 mm] wrench
on the Nitrogen Cylinder hex fitting. Loosen Rupture
Disc by turning the recharge adapter wrench 1/4 turn counterclockwise. On Nitrogen Cylinders
that have not been actuated and still have Rupture Disc intact, a technician must carefully allow
residual pressure to vent. Unscrew cylinder from the Recharge Adapter. Unscrew old rupture
disc assembly and discard (See Figure 6.2.9b).

