88
HELIX™ Manual
(P/N 26291)
Chapter 4: System Installation
Rev A (February 2018)
HELIX™ PCU
Fire Suppression System
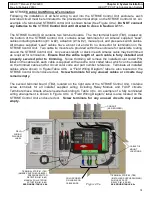
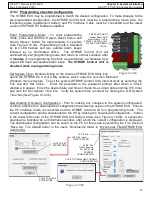
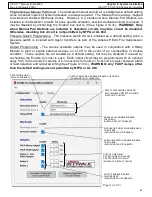
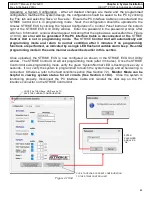
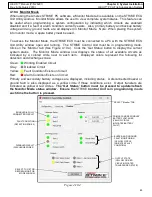
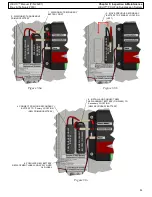
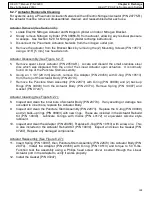
Figure 4.12.2
2. CONNECT INCLUDED SECONDARY
BATTERY
LAST IN ‘Secondary’ LOCATION
ON STRIKE CONTROL
UNIT
1. CONNECT INCLUDED
PRIMARY BATTERY FIRST IN
‘Primary’ LOCATION
ON STRIKE
CONTROL UNIT
3. POPULATE EMPTY FIELDS ON
BATTERY REPLACEMENT LABEL
IN
C
LU
D
E
D
P
R
IM
A
R
Y
B
A
T
T
E
R
Y
INCL
UDE
D
S
E
C
ONDA
R
Y
B
A
T
T
E
R
Y
1.
Verify the STRIKE Control Unit is functioning properly and the green ‘System Normal’ LED is
flashing once every 4 seconds.
2.
Remove all Fire Alarm Modules (P/N 23651) used during function testing from the actuation
circuits and reconnect all Linear Actuators (P/N 20500
-
R).
3.
Disconnect the batteries used for programming (Section 4.10) and initial commissioning
(Section 4.11) from the STRIKE Control Unit in the following order:
Disconnect the
secondary battery first, then disconnect the temporary spare Replacement Battery from
the ‘Primary’ location. The
STRIKE
Control Unit will turn off completely.
4.
Locate the original two batteries, included with the STRIKE Control Unit. Verify each is
installed in the provided battery brackets in the STRIKE Control Unit enclosure.
First, connect
the left battery to the ‘Primary’ battery connection port and then the right battery to the
‘Secondary’ battery connection port (See Figure 4.12.2).
Verify the STRIKE Control Unit
returns to normal condition with green ’System Normal’ LED is flashing once every 4 seconds.
5.
Locate the included Battery Replacement Label. Populate the following information:
•
Primary battery serial number
•
Secondary battery serial number
•
Current date of commissioning (Installation date)
•
Battery replacement date (6 months from current date of commissioning).
The Amerex
STRIKE
Electronic Control
System is now in service.

