


Mini Amazing Box II
22
Installation
Introduction
FAQs
File Formats
Main Screen
Color Editor
Quick Start
Reme
ber
m
Remember, the box is a design file transfer
system for finished file sewing formats. You
cannot read .bmp, .jpg, or any kind of clip art into
this program. There is no digitizing software
included. For autodigitizing capability, see your
dealer about Click ‘n Stitch Xtra from Amazing
Designs.
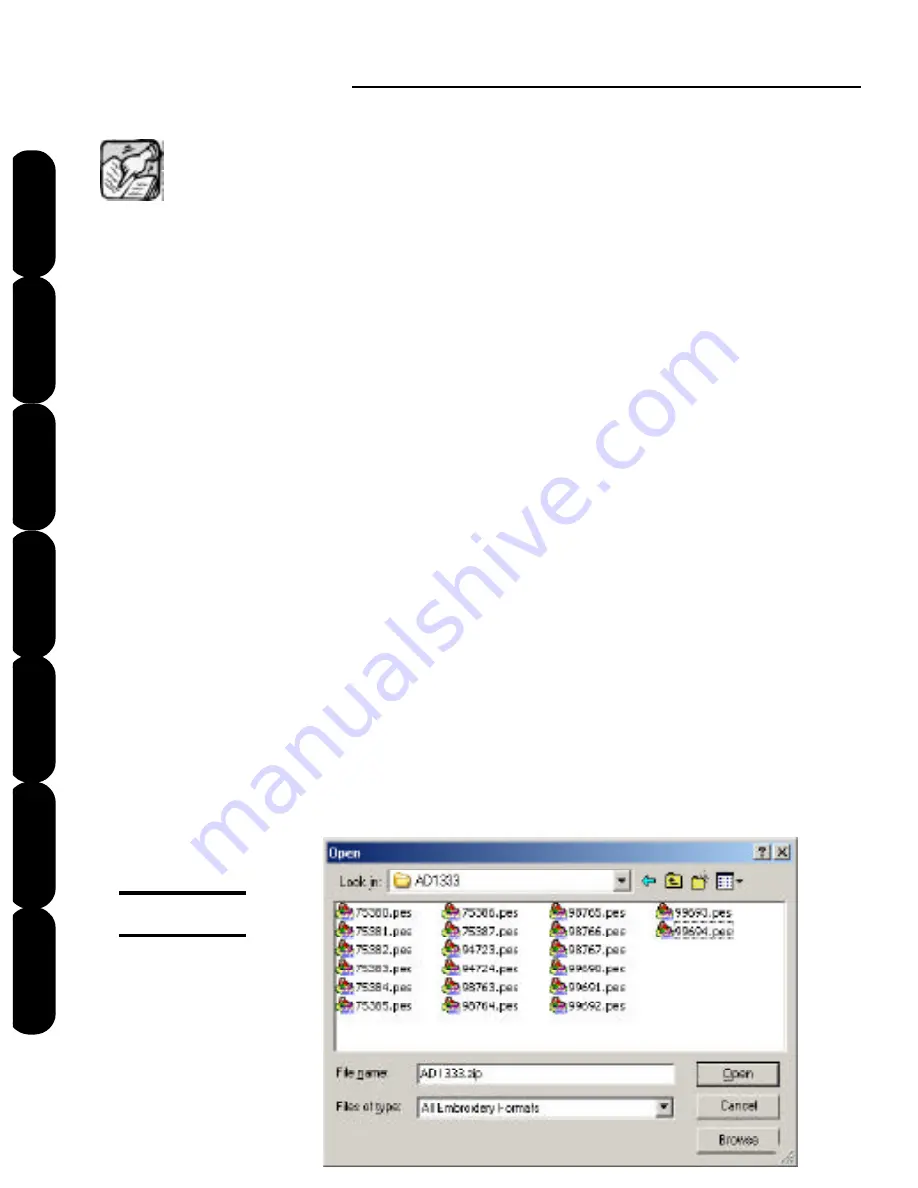
Click the
Read
button, and the standard “Open”
window appears (Figure QS-2). Click the down
arrow to the right of the “Look in” box and follow
the path to the folder or drive where your designs
are stored. Once you have the appropriate
folder in the “Look in” box and the file information
displayed below it, you can select the design you
want, or click on the
Browse
button to see
pictures of the designs. Double click on the
picture and the design will load into a square on
the main screen. You can keep choosing files
until all 6 squares are full.
Figure QS-2
Содержание Mini Amazing Box II
Страница 12: ...Mini Amazing Box II 4 Installation Introduction Quick Start Main Screen Color Editor FAQs File Formats...
Страница 23: ...File Formats...
Страница 82: ...Mini Amazing Box II 74 Installation Introduction FAQs Quick Start File Formats Main Screen Color Editor...
Страница 83: ...Frequently Asked Questions...
Страница 88: ...Mini Amazing Box II 80 Installation Introduction FAQs Quick Start File Formats Main Screen Color Editor...