8
www.Observint.com
server. These settings are compatible with your network. If the fields are not populated, they will be blank as shown
above.
c. Enter (or modify, if necessary) the IPv4 Address, IPv4 Subnet Mask, IPv4 Default Gateway fields to settings compatible
with your network using the virtual keyboard. You can also enter a Preferred DNS Server address (optional, ex. 8.8.8.8 and
8.8.4.4 [Google] DNSs). Consult with your network administrator to determine the best network settings for your NVR.
d. Open the
Main NIC
drop-down list and select the LAN port you prefer to be the primary network port. You can select
either LAN1 .. LAN 8. The network settings you configured above will be applied to that port.
e. Click
Next
to continue.
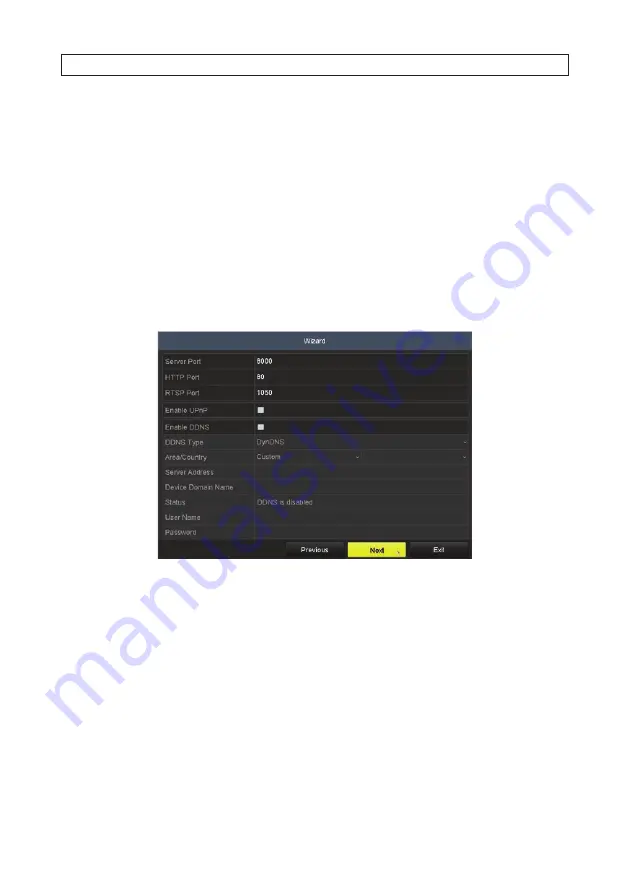
7. You can reconfigure the network ports you prefer to use and DDNS access. Before changing your port configuration, consult
with your network administrator or your vendor for product support.
a. To change the Server, HTTP or RTSP port numbers, click on the entry field, and then use the pop-up virtual keyboard to
enter a new value.
b. Check the select boxes to use Universal Plug and Play (UPnP) and DDNS as needed. If you enable DDNS, open the Type
drop-down list and select either DynDNS, PeanutHull or NO-IP, and then enter the required information in the fields
below.
c. After completing the settings in this window, click
Next
to advance to the next window.
8. In the window shown below, you can check the select box to enable RAID for the HDDs storage in the NVR. By default in the
Wizard, RAID 5 is used.
SECTION 2: INITIAL NVR SETUP
Содержание ALI-NVR71128R
Страница 8: ...viii www Observint com NOTES ...
Страница 232: ...224 www Observint com ...


