17
290 XF
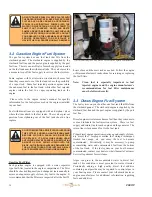
Draining Oil from Engines
Place the drain/fill hose in an empty container. Remove the
protective caps and connect the oil drain pump hose to the
quick connect fitting for the engine or transmission. Open
the valve on the manifold which connects to the engine to be
serviced. Switch the pump to draw oil from the engine. (Press
the “DRAIN” position on the switch) Repeat this process for
each engine to be serviced or the generator.
Filling/ Adding Oil to Engines:
Place the drain/fill hose into a container of new oil. Open
the valve on the manifold which connects to the engine to
be serviced and make sure the pump hose is connected to the
proper sump drain hose. Switch the pump to draw oil from the
new oil container. (Press the “FILL” position on the switch)
NOTE: Operate pump with only one valve open at a time.
Be sure that a valve is open prior to pump operation. Be sure
to close all valves, disconnect the drain pump hoses from the
quick connect fittings and replace the protective caps when oil
change is completed. (Handle vertical - valve open) (Handle
horizontal - valve closed)
Refer to the oil change system owner’s manual for specific
information on the system installed in you boat. It is important
that you completely understand the operation of the pump and
valves before using the system.
1.6 Propellers
The propellers are shipped with the boat and installed by your
dealer. Should it be necessary to change propellers, always
use an appropriate removal tool or “Prop Puller.” Do not
attempt removal using a hammer. Damage to the propeller,
propeller shaft, or transmission can result.
A few simple steps will enable you to install a propeller. First,
make sure that no burrs or rough edges exist on the shaft, key,
and both keyways. Try the key into the keyways. It must
slide freely into position without having side play. It might
be necessary to file the key with a flat file to create the correct
tolerance.
To ensure the proper fit of your propeller, follow these
procedures:
Step 1: Without the key installed, slip the propeller on the
shaft by hand as far as it will go. Mark the location
at the front of the hub with a dry-marker and remove
the propeller.
Step 2: Install the key in the shaft.
Step 3: Again, slide the propeller into position by hand.
Please note that the key should not extend beyond
the forward edge of the propeller hub. The propeller
should reach the same spot as before. If it does
not, the key has probably moved up the keyway, or
the key does not fit properly in one or both of the
keyways.
Step 4: Install the propeller nuts. When installing the shaft
nuts, take care not to tighten them too much. Do
not force the nut into a tighter position by using
a hammer or extension on the arm of the wrench.
Tighten the thin nut, then lock the wide nut tight
against the thin nut and insert the cotter pin.
If not properly installed, the propeller will be off balance and
this is a frequent cause of vibration. It could also cause the
propeller hub to split.
Propeller Installation
Oil Drain System Quick Disconnect Fittings Near Each Engine
Содержание 290 EXPRESS FISHERMAN
Страница 1: ...290 EXPRESS FISHERMAN Albemarle Boats 140 Midway Dr P O Box 349 Edenton NC 27932 OWNER S MANUAL...
Страница 2: ...290 XF 2 Print Date 4 07 2009 THIS PAGE WAS LEFT BLANK INTENTIONALLY...
Страница 6: ...290 XF 6 THIS PAGE WAS LEFT BLANK INTENTIONALLY...
Страница 8: ...290 XF 8 THIS PAGE WAS LEFT BLANK INTENTIONALLY...
Страница 10: ...290 XF 10 THIS PAGE WAS LEFT BLANK INTENTIONALLY...
Страница 22: ...290 XF 22 THIS PAGE WAS LEFT BLANK INTENTIONALLY...
Страница 28: ...290 XF 28 THIS PAGE WAS LEFT BLANK INTENTIONALLY...
Страница 34: ...290 XF 34 THIS PAGE WAS LEFT BLANK INTENTIONALLY...
Страница 56: ...290 XF 56 THIS PAGE WAS LEFT BLANK INTENTIONALLY...
Страница 80: ...290 XF 80 THIS PAGE WAS LEFT BLANK INTENTIONALLY...
Страница 88: ...290 XF 88 THIS PAGE WAS LEFT BLANK INTENTIONALLY...
Страница 91: ...91 290 XF...
Страница 104: ...290 XF 104 THIS PAGE WAS LEFT BLANK INTENTIONALLY...
Страница 110: ...290 XF 110 THIS PAGE WAS LEFT BLANK INTENTIONALLY...
Страница 112: ...290 XF 112 MAINTENANCE LOG Hours Date Dealer Service Repairs...
Страница 113: ...113 290 XF MAINTENANCE LOG Hours Date Dealer Service Repairs...
Страница 114: ...290 XF 114 MAINTENANCE LOG Hours Date Dealer Service Repairs...
Страница 115: ...115 290 XF MAINTENANCE LOG Hours Date Dealer Service Repairs...
Страница 116: ...290 XF 116 MAINTENANCE LOG Hours Date Dealer Service Repairs...
Страница 118: ...290 XF 118 THIS PAGE WAS LEFT BLANK INTENTIONALLY...
Страница 119: ...119 290 XF Appendix C BOATING ACCIDENT REPORT...
Страница 120: ...290 XF 120 BOATING ACCIDENT REPORT...
Страница 121: ...121 290 XF...
Страница 122: ...290 XF 122 THIS PAGE WAS LEFT BLANK INTENTIONALLY...
Страница 133: ...133 290 XF THIS PAGE WAS LEFT BLANK INTENTIONALLY...
Страница 134: ...Albemarle Boats 140 Midway Dr P O Box 349 Edenton NC 27932...


