background image

- 2 -

Features

DVD,  CD,  MP3,  Picture  CD  compatible
CD-R,  CD-RW  capable

TV  format:

PAL/NTSC color system

4:3/  16:9  Screen  format  select

Video  output:

Scart  (AV,  R-G-B)  output

Composite Video output

S-Video output

Audio output:

Down-mix stereo output

Dolby Digital down mixed stereo power output

Dolby Digital digital output

Headphone jack x 1

DVD  features:

Multi Subtitle select
Multi Language select
Multi Angle select

Radio Features:

RDS FM/AM digital PLL tuning

40 Radio channels preset memory

Amplifier features:

Speaker  outputs  2  x  20W  (4  Ohms)
Loudness selection

Treble  /  Bass/  Balance/  Sound  Effect/  Volume

Other  features:

On screen control menu

Remote volume
Digital zooming

Slow motion forward

Child lock

Auto screen saver

Sleep function

Manufactured under license from Dolby Laboratories.
Dolby and the doubled-D symbol are trademarks of

Dolby Laboratories,. Confidential Unpublished Works.

1992-1997 Dolby Laboratories. All rights reserved.

Safety Information

TO  REDUCE  THE  RISK  OF  FIRE  OR  ELECTRIC  SHOCK,  DO  NOT  EXPOSE  THIS  UNIT  TO  RAIN  OR  MOISTURE.

CAUTION:

To reduce the risk of fire and electric shock, do not

remove the cover (or back) of the unit. Refer servicing

only to qualified service personnel.
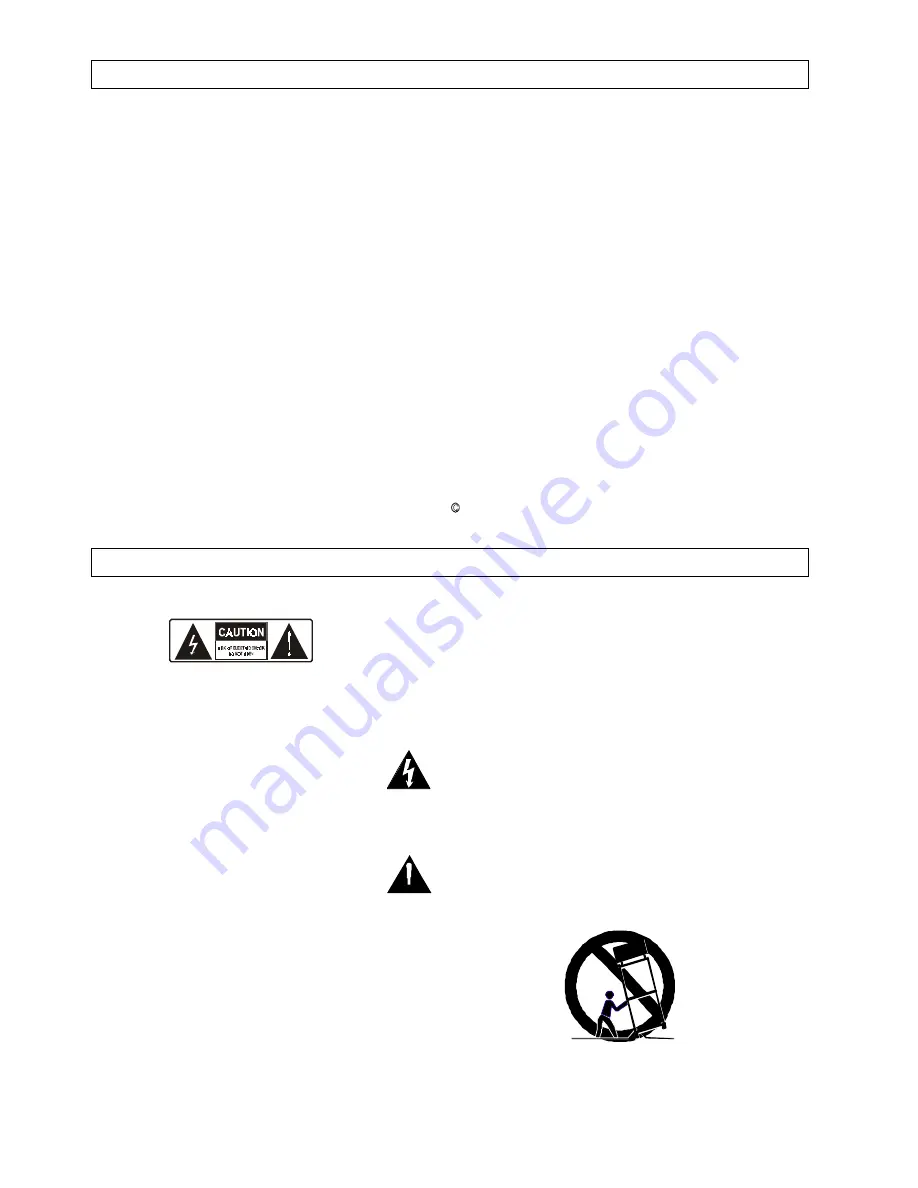
The lightning flash with arrowhead

symbol, within an equilateral triangle,

is intended to alert the user to the

presence of uninsulated dangerous

voltage within the product enclosure

that may be of sufficient magnitude to

constitute a risk of electric shock.
The exclamation point within an

equilateral triangle is intended to alert

the user to the presence of important

operating and maintenance (servicing)

instructions in the literature

accompanying the appliance.

1. Read and Follow Instructions - All the safety and

operation  instructions  should  be  read  before  the  product

is  operated.  Follow  all  operating  instructions.

2. Retain  Instructions-The  safety  and  operation  instructions

should  be  retained  for  future  reference.

3. Heed Warnings-All warnings on the product and in the

operating  instructions  should  be  adhered  to.

4.  Water  and  Moisture-do  not  use  this  video  product  near

water for example, near a bath tub, wash bowl, kitchen

sink  or  laundry  tub,  in  a  wet basement, or near a

swimming pool and the like.

5.  Accessories-Do  not  place  this  product  on  an  unstable

cart,  stand,  tripod,  bracket,  or  table,  the  product  may  fall,

causing serious injury to a child or adult as well as

serious damage to the product. Use this product only with

a  cart,  stand  tripod,  bracket,  or  table  recommended  by

the manufacturers or sold with the product. Any mounting

of  the  product  should  follow  the  manufacturers

instructions and use of a mounting accessory

recommended by the manufacturer.

A product and cart combination should be moved with

care.  Quick  stops.  excessive  force,  and  uneven  surfaces

may  cause  the  product  and  car  combination  to  overturn.

Содержание QX-3700DV

Страница 1: ...Digital DVD Home Theatre DVD CD MP3 Micro System Cuadrado 4t DVD HiFi System QX 3700DV Operator manual 5 Operator manual GB 1 34 S ...

Страница 2: ...g the Antenna 9 Connecting to External Amplifier 10 Connecting a Headphone 10 Setting up the player 11 Video port setup 11 TV System 11 Set up the Timer 12 Getting started 13 Selecting a function DVD TUNER 13 Sound Adjustment 14 DVD Mode 15 Problem disc messages 15 Tuner Mode 16 Screen saver 18 Power management In DVD mode only 18 Function buttons 18 On Screen Display 25 Setup Menu 28 System 28 Vi...

Страница 3: ...nce of uninsulated dangerous voltage within the product enclosure that may be of sufficient magnitude to constitute a risk of electric shock The exclamation point within an equilateral triangle is intended to alert the user to the presence of important operating and maintenance servicing instructions in the literature accompanying the appliance 1 Read and Follow Instructions All the safety and ope...

Страница 4: ... product during a lightning storm or when it is left unattended and unused for long periods of time unplug it from the wall outlet and disconnect the antenna or cable system This will prevent damage to the product due to lightning and power line surges 13 Object and Liquid Entry Never push objects of any kind into this product through openings as they may touch dangerous voltage points do short ou...

Страница 5: ...nal Code About MP3 MP3 MPEG 1 Audio Layer 3 is a digital audio format for quick downloading files that sound as good as CDs MP3 uses entropy encoding to reduce the number of redundant sounds in an audio signal to a minimum It takes music from a CD and reduces it by a factor of 12 with no noticeable loss of quality On a normal CD of 74 minutes you can store over 130 songs Disc information Sampling ...

Страница 6: ...sed outside the application country PC application on CD R CD RW CD ROM for PC interface only MP3 CD R CD RW of not proper format Care of disc Video disc contains high density compressed data that needs proper handling Hold the disc with fingers Hold the disc outer edge and or the center spindle hole Do not touch the disc surface Do not bend or press the disc Do NOT expose the disc to direct sunli...

Страница 7: ... Radiopresetchannelsskip Display panel Disc Tray Eject button DVD mode Disc Search buttons Tuner mode Radiofrequencysearch Main volume Turn to adjust level Change selection Remote sensor Function button DVDorAM FMTuner Treble Bass Balance SoundEffect Volume FM antenna input System Connection Speaker outputs FrontRight Left Down Mix Audio Right Left S Video Composite Video Scart V L R R G B Coaxial...

Страница 8: ...ard Radio channel 28 DVD mode Disc search forward Tuner mode Press tune frequency up Press and hold auto search next channel up 29 DVD mode Disc search backward Tuner mode Press tune frequency down Press and hold auto search next channel down 30 Zoom Radio Band FM AM select 31 Slow forward Radio Mono Stereo select 32 Screen Chart Display selection 33 Mute Speaker 34 Set the clock selection 35 Conf...

Страница 9: ...ut port select Enter the SETUP menu to select the suitable video port If the TV set has more than one composite input you may choose either one to connect Make sure you have properly connected the video and audio ports and switch the TV channel to the corresponding input e g AV1 AV2 etc Default setting Video and Scart AV R G B Yellow White Red Inptut 1 Inptut 2 Outptut Video Video Video L L L R R ...

Страница 10: ... Front R Right and Front L Left Connecting the Antenna Connecting the AM antenna to the player s AM antenna input Note EXtend the FM antenna as long as you can so as to maximize the receiving power Turn the antenna to different directions in order to reach the best receiving position L R FM AM ...

Страница 11: ... not included select the corresponding mode of the amplifier Note The player is equipped with DOLBY DIGITAL digital output and DOLBY DIGITAL down mixed stereo power output When digital output is in use enter the SETUP menu to set the digital output to RAW or PCM Stereo amplifier Digital decording amplifier Connecting a Headphone Insert the headphone to the PHONE input jack When a headphone has bee...

Страница 12: ...o change setting Press SETUP button to quit IMPORTANT NOTE Either ONE of RGB or S Video output can be selected as the optional video output 1 2 RGB Scart output S VIDEO 3 1 PAL AUTO NTSC 2 3 TV System For TV System setting TV System menu is to set up the output TV system to PAL or NTSC Default setting is PAL AUTO Auto switch to PAL or NTSC system according to the disc NTSC NTSC TV system PAL PAL T...

Страница 13: ...button to confirm and jump to next setting Press SET button to increase the time for 1 hour each The range of time is 1 to 12 hours Press CL ENTER button to confirm and jump to next setting Press SET button to increase the time for 1 minute each The range of time is 0 to 59 minutes Press CL ENTER button to confirm and jump to next setting Press SET button to set Auto On function active or disable ...

Страница 14: ... disc s packing or follow the instructions of the Discs on screen menu Selecting a function DVD TUNER Switch on the player Press the main power button to turn on the DVD unit Power on the TV set and the amplifier if connected Set up the system Select the corresponding setting of the TV set AV1 AV2 S Video etc and the amplifier until the DVD power on screen appears The function mode will be memoriz...

Страница 15: ...OLUME button To adjust the output volume down Turn the volume knob on the front panel anti clockwise or Press the lower edge of the remote VOLUME button Select the sound effect Press FUNCTION button on the front panel repeatedly until the VFD display show the word of sound effect To select the next sound effect Turn the volume knob clockwise To select the previous sound effect Turn the volume knob...

Страница 16: ...RSOR buttons to select the desired feature in the menu And then press the ENTER button to confirm a selection For more DVD features see in the chapter FUNCTION BUTTONS NOTE Normally when a MP3 disc is loaded the unit will take longer time to download the initial data Returning to the disc main menu press MENU button on the remote Problem disc messages Incorrect disc format When a DVD disc of incor...

Страница 17: ...rol until the VFD display shows the word AUTO or press and hold the SEARCH button on the remote control until the VFD display shows the word AUTO Press the FREQUENCY button on the front panel slightly or press the SEARCH button on the remote control slightly to fine tune the frequency up or down To store a preset program The player provide 20 preset program memory for each radio bands To store a p...

Страница 18: ...e the display will switch as below Programme Service name mode Frequency mode Setting in Station name mode and Frequency mode will change the broadcast source but this is cancelled when the unit is turned off PRESET CHANNEL PTY Program Type list for reference 1 NEWS News 15 OTHER M Other music 2 AFFAIRS Current affairs 16 WEATHER Weather 3 INFO Information 17 FINANCE Finance 4 SPORT Sport 18 CHILD...

Страница 19: ...Press Once STOP memorizes the interrupt position May resume with play button b Press Twice To stop completely Will NOT resume with play button STANDBY EJECT Screen saver The player is equipped with an automatic screen saver for the purpose of protecting the TV screen The TV screen will be black and a screen saver will appear on screen if No disc is loaded for 15 seconds In STOP mode and no button ...

Страница 20: ...the previous preset channel in tuner mode Search Forward Backward Press SEARCH button to search forward Search the next higher frequency channel Repeat pressing the button to change search speed Press SEARCH button to search backward Search the next lower frequency channel Repeat pressing the button to change search speed Press PLAY button to resume normal playback Player will not advance or rever...

Страница 21: ... T Input title number C Input chapter number Press ENTER button CD disc Press the GOTO button to Time search mode Press the GOTO button again to Track search mode Input time hh mm ss Hour Minute Second T Input track number XXX Track Number Press ENTER button Note GOTO functionality depends on different DVD discs format Some DVD discs do not allow GOTO function GOTO will cancel program playback Rep...

Страница 22: ...playback Zoom In DVD mode Press the ZOOM button For DVD and Picture CD playback only to enlarge viewable picture Press the button repeatedly to change the zoom scale Press the CURSOR buttons to adjust the zooming position NOTE The picture quality is degraded as the picture is increased The function is applicable to DVD and picture CD playback only Random Program access Input the desired Chapter or...

Страница 23: ...ed on a DVD disc start up menu press cursor button to select and ENTER button to confirm Multi Angle If a DVD disc contains Multi Angle feature viewing angles may be selected While in playback repeat pressing ANGLE button to select the desired viewing angle Status will be displayed on screen Note A DVD disc may contain up to 9 selectable viewing angles Multi Subtitle If a DVD disc contains the Mul...

Страница 24: ... audio output speakers Volume Mode Adjust the audio quality Press MODE button on the remote Repeat pressing the MODE button on the remote to select different audio adjustment mode To increase the level Press the upper edge of the remote VOLUME button To decrease the level Press the lower edge of the remote VOLUME button Adjust the output volume Press MODE button on the remote repeatedly until the ...

Страница 25: ...ess CL ENTER button on the remote to confirm Clock function selection Set Press SET button on the remote to set Clock desired selection Memory To store a preset program The player provide 20 preset program memory for each radio bands To store a preset program tune a channel Press BAND button on remote to switch between FM and AM receiving Press SEARCH button on the remote to tune the desired frequ...

Страница 26: ...ram menu Press PLAY button to rum Program Play Press STOP button to cancel the program 1 2 3 4 5 Note Some DVD discs do not allow programming Program playback does not function during Repeat function and Repeat A B playback Input Track Range of selection Program setting Program to play a DVD CD disc in a desired sequence automatically This function does NOT apply to MP3 Picture CD DVD program menu...

Страница 27: ...press cursor LEFT RIGHT button to switch between file browse and selection box Press cursor UP DOWN button to highlight the desired item Press ENTER button to change selection Selected file highlight After you have selected a file press PLAYbutton to play this file When the file is playing press STOP button to return selection Playback time Total time Current folder Upper folder Browse display mod...

Страница 28: ...from a Kodak Picture CD disk When a Kodak Picture CD has been loaded in the player an automatic slide show will be launched Each picture in the Kodak Picture CD will be displayed consecutively in a slide show fashion and will be scaled to fit in the whole TV screen Press PAUSE button to display an image indefinitely Press SKIP button to view the next or previous picture Press PLAY button to resume...

Страница 29: ...rious features of the player can be adjusted in the SETUP menu Press SETUP button SETUP menu appears Press cursor RIGHT button to switch to the desired setting menu System Enter this menu to setup the OSD language screen saver ON OFF reset to default setting TV output system and video output ports Press SETUP button SETUP menu appears High light the system menu icon Highlight the desired item and ...

Страница 30: ...inal aspect ratio will be display full screen Note Depending on the DVD disc format e g 2 35 1 the wide screen setting may still having black margins above and below the picture Angle mark Show or hide the display of ANGLE MARK when playing a DVD disc with multi angle Parental control To setup the rating level of the player The player will require a password to play any disc with rating level high...

Страница 31: ... The disc is dirty or damaged Clean the disc or try another disc Reset the color system of the player or the TV set Try to direct the player to the TV set instead of via other components such as a VCR Select the screen format from the player s SETUP MENU see SETUP MENU of this manual Select the screen format from DVD disc menu Press and hold the power button on the front panel until the player pow...

Страница 32: ...sampling rate of the file is 44 1 kHz and the bit rate is within the range from 128 Kbps to 256 Kbps Check if the JPEG file is not CMYK format and the image size within 3840 pixels x 3840 pixels Remove the obstacles between the remote control and the player Point the remote control towards the remote sensor on the player Check if the batteries of the remote control have been loaded with correct po...

Страница 33: ...ideo Output 1 Vpp at 75 ohm Audio Output Stereo 2 Vrms RMS 13W X 2 4 ohm at 10 THD FM 87 5MHz to 108MHz AM 531kHz to 1620 kHz 90 dB LINE 0 05 LINE Scart output AV R G B X 1 Video composite output X 1 S Video output X 1 Down Mix Stereo output Left and Right X 1 2 channels power output X 1 Headphone jack X 1 Digital audio coaxial output X 1 Digital audio optical output X 1 FM antenna X 1 AM antenna ...

Страница 34: ...AKAI ELECTRIC CO LTD JAPAN www akai com ...

Отзывы: