17
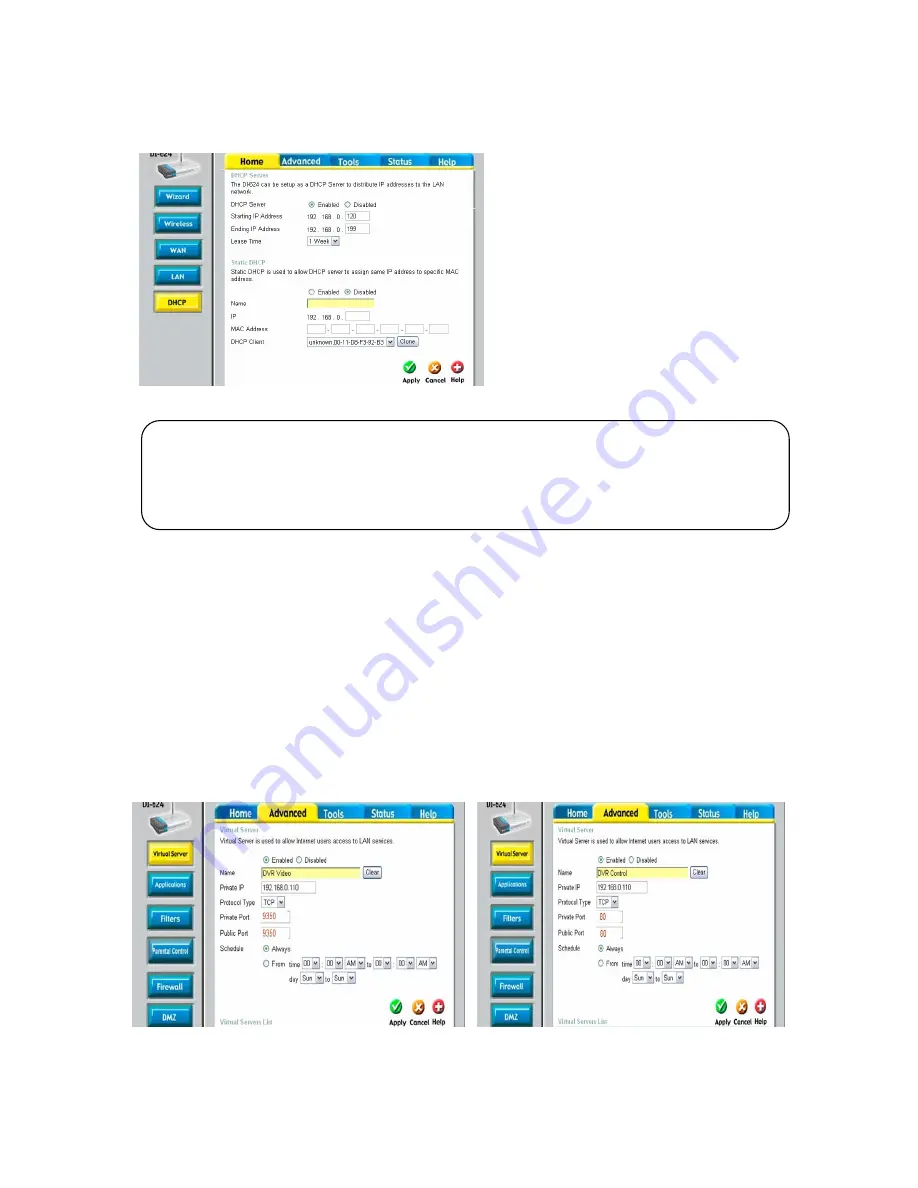
2.2.3.2. DHCP & IP Address Setting
To assign a unique private IP address to
NVR in your intranet environment
automatically, you can enable DHCP option
in the Network Setup menu of your NVR and
your Router. In this case, you can skip the
procedures described on this page.
We recommend assigning IP address to
NVR manually to prevent unexpected
change of IP address.
*A router from D-Link is quoted as an
example in this manual. The images of
setup menu above may not always match
another router’s setup menu.
2.2.3.3. Virtual Server Setting
You should register your NVR as a virtual server. Please enter the information into IP address
field of the router (e.g. 192.168.0.110).
Protocol Type should be TCP. Private/Public Port numbers should be the same with the Port
numbers assigned in NVR. You can change port numbers in Network Setup menu to avoid conflict
with other network servers.
Your NVR uses 3 port numbers and the default Port numbers are 9350~1 and 80.
9350~1 are
for controlling the video, audio and commands of Net Viewer, and 80 is for Web Viewer. You need to
register 3 port numbers into the router as network servers. Please make sure that your router does
not block those port numbers to/from the NVR with filter and firewall features.
The image is only for your reference. Depending on the Router manufacturer, the setting can vary.
If you have any problem with DHCP function or want to assign the private IP address, please
disable DHCP option in the Network Setup menu of your NVR and check the starting and ending
IP used by DHCP server of the Router.
You can assign any private IP address to your NVR
even if it is out of the DHCP range, but the IP address should match with the one entered in
the Network Setup menu of your NVR.
Содержание NVR16P
Страница 66: ...66 ...
Страница 97: ...97 ...
Страница 109: ...109 APPENDIX ...
Страница 125: ...125 8 16 Channel PoE Network Video Recorder ...


