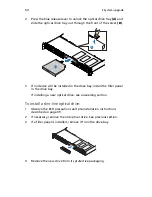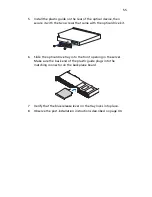
3 System upgrade
52
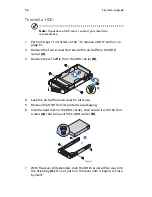
To install a HDD:
Note:
To puchase a HDD carrier, contact your local Acer
representative.
1
Perform steps 1 to 4 listed on the “To remove a HDD” section on
page 51.
2
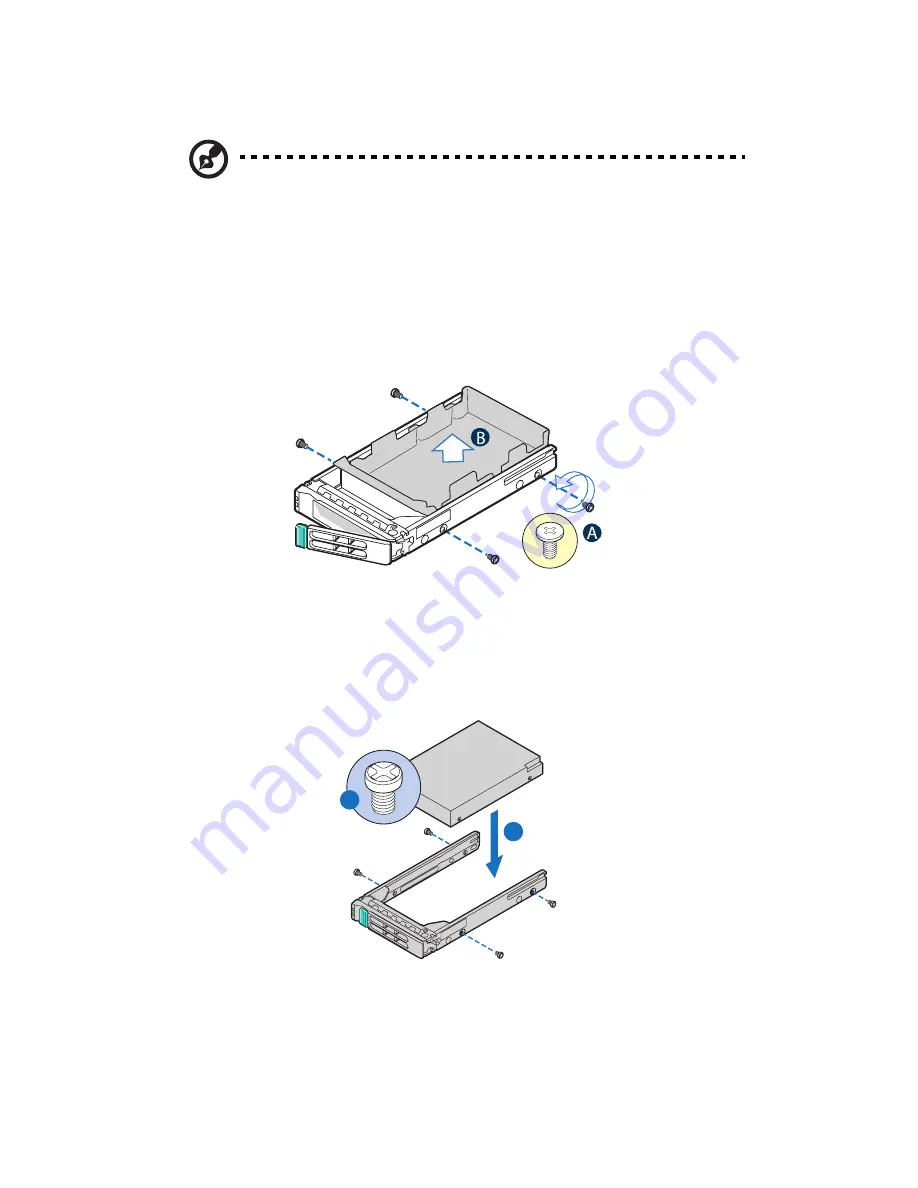
Remove the four screws that secure the air baffle to the HDD
carrier
(A)
.
3
Remove the air baffle from the HDD carrier
(B)
.
4
Save the air baffle and screws for later use.
5
Remove the HDD from its protective packaging.
6
Install a hard disk on the HDD carrier, then secure it with the four
screws
(A)
that came with the HDD carrier
(B)
.
7
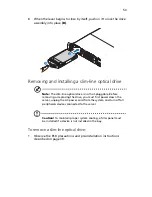
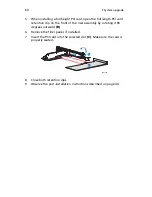
With the lever still extended, slide the HDD carrier all the way into
the drive bay
(A)
. Do not push on the lever until it begins to close
by itself.
TP02231
A
B
Содержание Network Device Altos R520
Страница 1: ...Acer Altos R520 Series User s Guide...
Страница 10: ...x...
Страница 11: ...1 System tour...
Страница 38: ...1 System tour 28...
Страница 39: ...2 System setup...
Страница 47: ...3 System upgrade...
Страница 99: ...4 BIOS setup...
Страница 109: ...99 Processor Information The screen below appears when you select the Processor 1 or 2 Information menu...
Страница 127: ...117 System Information The System Information submenu displays basic information about the server unit...
Страница 132: ...4 BIOS setup 122 Error Manager The Error Manager menu lets you view the system POST errors detected by the system...
Страница 136: ...4 BIOS setup 126...
Страница 137: ...5 Troubleshooting...
Страница 158: ...5 Troubleshooting 148...
Страница 159: ...Appendix A Acer Altos R520 rack installation guide...
Страница 160: ...This appendix shows you how to set up the Acer Altos R520 server in a rack mount configuration...
Страница 168: ...Appendix A Acer Altos R520 rack installation guide 158 6 Fully extend the mounting rails on the rack...
Страница 172: ...Appendix A Acer Altos R520 rack installation guide 162...
Страница 173: ...Appendix B RAID configuration...
Страница 184: ...174...


