28
Chapter 1
optimal enjoyment of the following scenario: Standard TV, Movie, Sport, Concert, Game, and
User.
Favorite Channel Mode in TV
Pressing the
Empowering Key
for less than
two seconds
will toggle
between the different modes.
Mode
Information
Standard
Standard mode allows you to watch your favorite channels with sharp,
brilliant imagery via adaptive brightness and contrast adjustments, and
listen to clear-sounding audio.
Movie
For comfortably enjoying movies at home, Move mode displays dim
scenes in clear detail; compensates for color; and smoothly presents
motion images. This is accomplished through optimal Gamma correction
plus saturation, brightness and contrast adjustments. Movie mode
makes the most of high-definition movie sound tracks.
Game
Game mode carefully details the exquisite graphics of modern video
games, providing lifelike entertainment while protecting your eyesight
by adjusting brightness and contrast. What’s more, Game mode
provides a heightened audio experience.
Sports
Sports mode us suited for outdoor sports program, with accurate
background depth and clear gradation between the bright, outdoor
playing field and darker auditoriums. Sports mode also brilliantly
enhances colors and preset swiftly moving pictures without residual
images. All of this is achieved via specific Gamma corrections and
saturation adjustments. Precise audio can be heard.
Concert
Concert mode places you in a virtual concert hall, opera house or other
dim environment by means of adaptive brightness and contrast
adjustments. Concert mode accentuates symphonic harmonies and the
tenor audio range.
Storing Favorite channels
1
Select your desired channel, then press
the
MENU
key on the remote control.
2
Use the directional keys to navigate the
menu and select the Empowering
Technology icon.
Содержание AT4220
Страница 10: ...4 Chapter 1 LCD Main Board Block Diagram ...
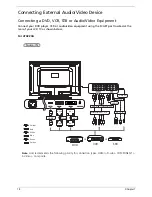
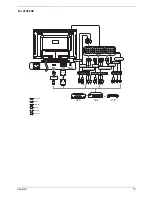
Страница 25: ...Chapter 1 19 For AT4220B Y Yellow Red White Blue Green R W 6 YLGHR 6 ...
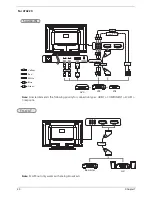
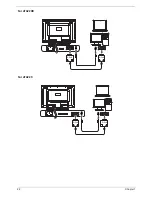
Страница 28: ...22 Chapter 1 For AT4220B For AT4220 ...
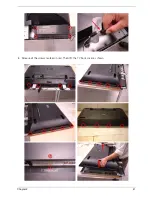
Страница 47: ...Chapter 2 41 8 Release all the screws marked in red Then lift the TV back cover as shown ...
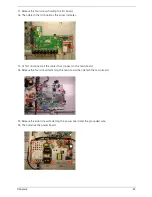
Страница 48: ...42 Chapter 2 9 Release all screws securing the PCB holder 10 Then remove the PCB holder as the arrows indicate ...
Страница 56: ...50 Chapter 2 ...

