


20
Chapter 2
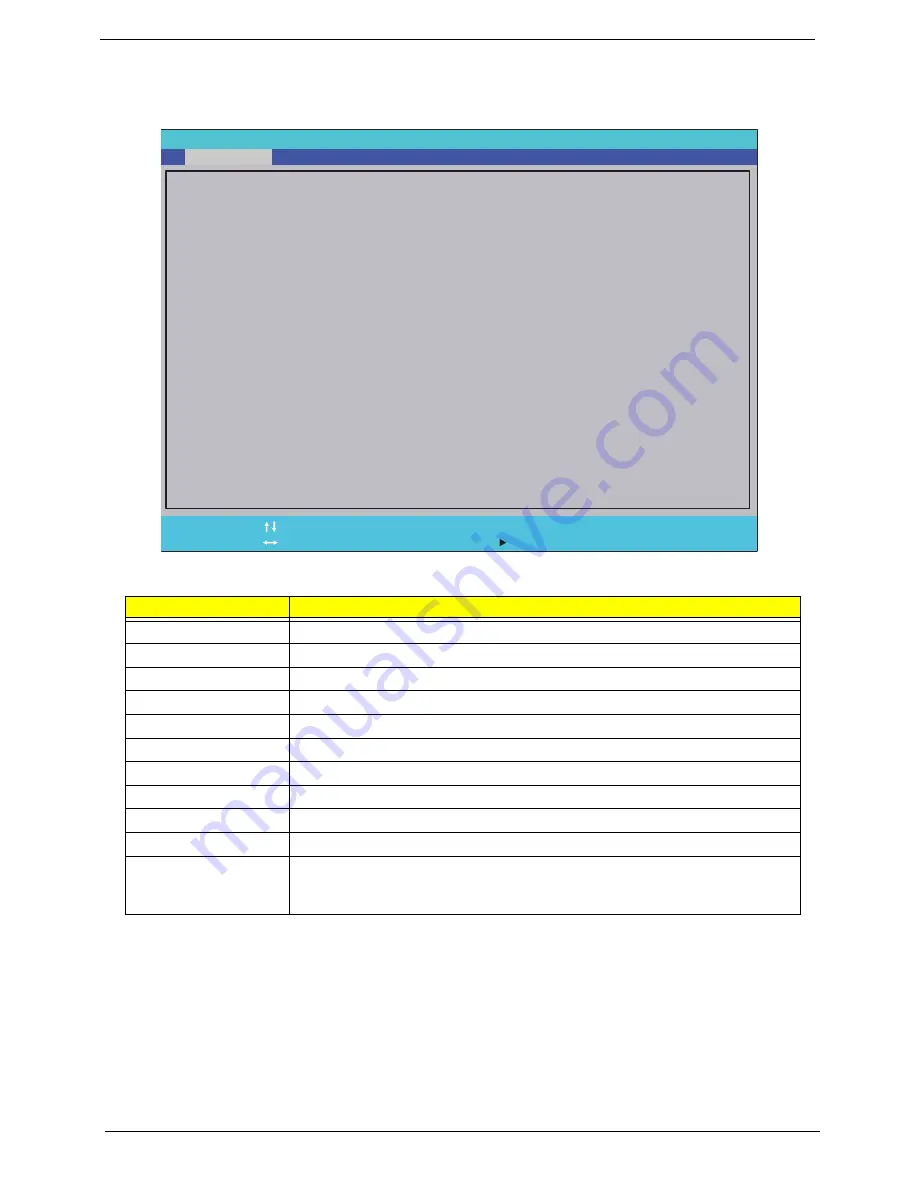
Information
The Information screen displays a summary of your computer hardware information.
NOTE:
The system information is subject to different models.
Parameter
Description
CPU Type
This field shows the CPU type of the system.
CPU Speed
This field shows the speed of the CPU.
HDD Model Name
This field shows the model name of SSD installed on primary IDE master.
HDD Serial Number
This field displays the serial number of SSD installed on primary IDE master.
System BIOS Version
Displays system BIOS version.
VGA BIOS Version
This field displays the VGA firmware version of the system.
Serial Number
This field displays the serial number of this unit.
Asset Tag Number
This field displays the asset tag number of the system.
Product Name
This field shows product name of the system.
Manufacturer Name
This field displays the manufacturer of this system.
UUID Number
Universally Unique Identifier (UUID) is an identifier standard used in software
construction, standardized by the Open Software Foundation (OSF) as part of
the Distributed Computing Environment (DCE).
InsydeH2O Se t u p U t i l i t y
M a i n
C P U Ty p e :
C P U S p e e d :
H D D M o d e l N a m e :
H D D S e r i a l N u m b e r :
S y s t e m B I O S Ve r s i o n :
V G A B I O S Ve r s i o n :
S e r i a l N u m b e r :
A s s e t Ta g N u m b e r :
P r o d u c t N a m e :
M a n u f a c t u r e r N a m e :
U U I D :
I n t e l ( R ) ATO M ( T M ) C P U N 2 8 0 @ 1 . 6 6 G H z
1 . 6 6 G H z
S A M S U N G M M B R E 1 6 G S M P P - M VA
S Y 9 0 6 A 5 0 8 9
V 0 . 0 6
I n t e l V 1 5 85
X X . X X
X X X X X X X X X X X X X X X X X X X X X X X
A c e r
FA 5 9 3 1 4 9 A 0 3 0 11 D D 8 7 F 4 0 0 2 3 5 A 6 6 A 6 8 E
F1
Es c
H e l p
E x i t
S e l e c t I t e m
S e l e c t M e n u
C h a n g e Va l u e s
S e l e c t
S u b - M e n u
-/+
Ente r
F9
F1 0
S e t u p D e f a u l t s
S a v e a n d E x i t
I n f o r m a t i o n
S e c u r i t y
B o o t
E x i t
Содержание Aspire One AOP531h
Страница 6: ...VI ...
Страница 10: ...X Table of Contents ...
Страница 41: ...Chapter 2 31 Clear User or Supervisor Password 1 Open the RAM door 2 Short RTC_RST ...
Страница 54: ...44 Chapter 3 Removing the SIMM card 1 Press the SIMM card in to eject it 2 Pull the card out from the slot ...
Страница 62: ...52 Chapter 3 7 Lift the Keyboard FFC securing latch as shown 8 Disconnect the FFC and remove the Keyboard ...
Страница 83: ...Chapter 3 73 Pull the cable completely away from the bezel ...
Страница 93: ...Chapter 3 83 Replacing the Camera Board 1 Reconnect the connector as shown 2 Place the camera pcb ...
Страница 95: ...Chapter 3 85 4 Replace the four screws and screw caps ...
Страница 107: ...Chapter 3 97 The upper cover is now ready to attach to the bottom cover ...
Страница 109: ...Chapter 3 99 Turn the unit over and affix the five screws in the top cover ...
Страница 115: ...Chapter 3 105 Replacing the SIMM Card Insert the SIMM Card into the slot ...
Страница 130: ...120 Chapter 4 ...
Страница 138: ...128 Chapter 4 ...
Страница 152: ...142 Chapter 6 ...
Страница 153: ...Chapter 6 143 ...
Страница 267: ...257 Appendix A ...
Страница 268: ...Appendix A 258 ...
Страница 274: ...264 Appendix B ...
Страница 276: ...266 Appendix C ...
Страница 279: ...269 W Windows 2000 Environment Test 260 Wireless Function Failure 119 WLAN Antennas Removing 77 Replacing 79 ...
Страница 280: ...270 ...


