


Chapter 4
107
Troubleshooting
Common Problems
Use the following procedure as a guide for computer problems.
NOTE:
The diagnostic tests are intended to test only Acer products. Non-Acer products, prototype cards, or
modified options can give false errors and invalid system responses.
1.
Obtain the failing symptoms in as much detail as possible.
2.
Verify the symptoms by attempting to re-create the failure by running the diagnostic test or by repeating
the same operation.
3.
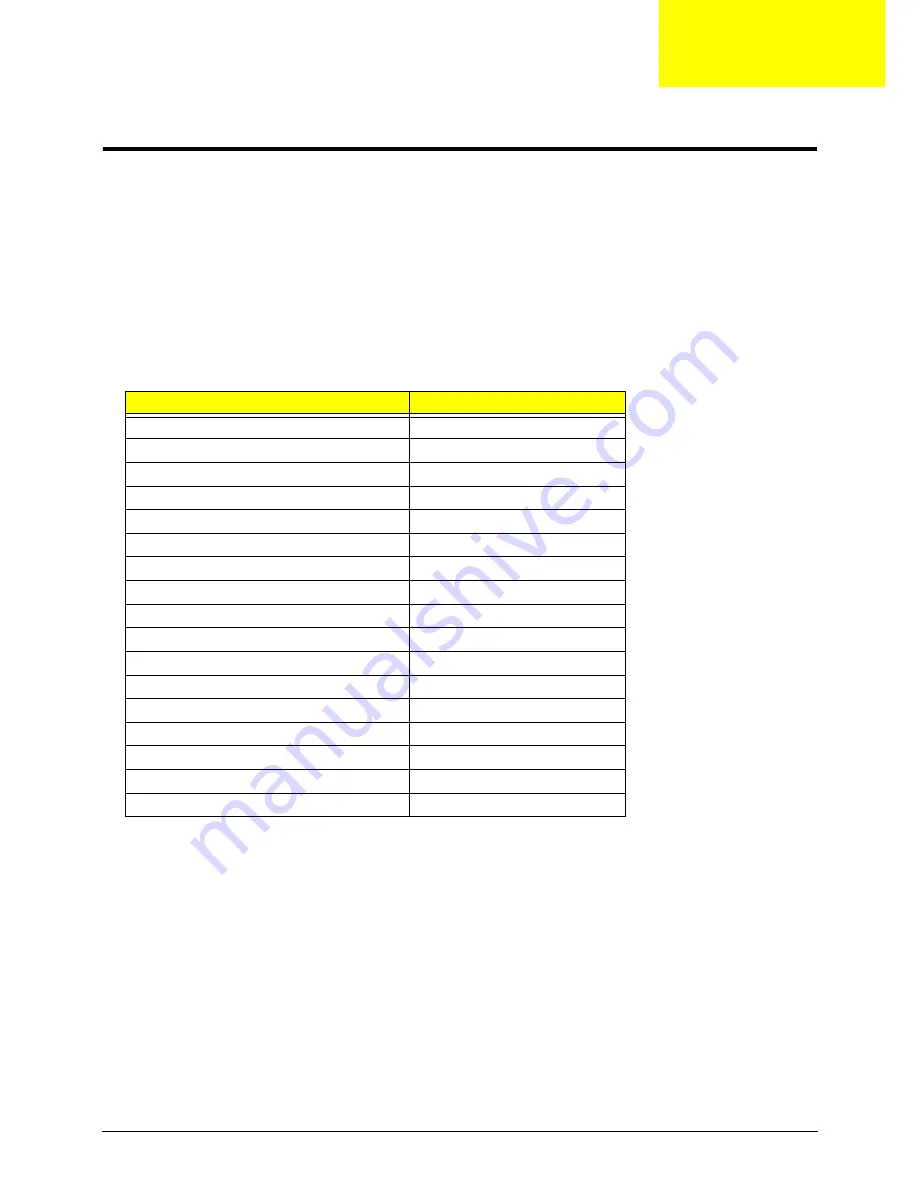
Use the following table with the verified symptom to determine which page to go to.
4.
If the Issue is still not resolved, see “Online Support Information” on page 265.
Symptoms (Verified)
Go To
Power On Issue
Page 108
No Display Issue
Page 109
LCD Failure
Page 110
Internal Keyboard Failure
Page 111
TouchPad Failure
Page 112
Internal Speaker Failure
Page 112
Internal Microphone Failure
Page 114
Rightside USB Failure
Page 116
Wireless Function Failure
Page 116
3G Function Failure
Page 117
Switch Failure
Page 117
Cosmetic Failure
Page 118
Thermal Units Failure
Page 118
External Mouse Failure
Page 119
Other Function Failures
Page 119
Intermittent Problems
Page 121
Undetermined Problems
Page 121
Chapter 4
Содержание Aspire One AOP531h
Страница 6: ...VI ...
Страница 10: ...X Table of Contents ...
Страница 41: ...Chapter 2 31 Clear User or Supervisor Password 1 Open the RAM door 2 Short RTC_RST ...
Страница 54: ...44 Chapter 3 Removing the SIMM card 1 Press the SIMM card in to eject it 2 Pull the card out from the slot ...
Страница 62: ...52 Chapter 3 7 Lift the Keyboard FFC securing latch as shown 8 Disconnect the FFC and remove the Keyboard ...
Страница 83: ...Chapter 3 73 Pull the cable completely away from the bezel ...
Страница 93: ...Chapter 3 83 Replacing the Camera Board 1 Reconnect the connector as shown 2 Place the camera pcb ...
Страница 95: ...Chapter 3 85 4 Replace the four screws and screw caps ...
Страница 107: ...Chapter 3 97 The upper cover is now ready to attach to the bottom cover ...
Страница 109: ...Chapter 3 99 Turn the unit over and affix the five screws in the top cover ...
Страница 115: ...Chapter 3 105 Replacing the SIMM Card Insert the SIMM Card into the slot ...
Страница 130: ...120 Chapter 4 ...
Страница 138: ...128 Chapter 4 ...
Страница 152: ...142 Chapter 6 ...
Страница 153: ...Chapter 6 143 ...
Страница 267: ...257 Appendix A ...
Страница 268: ...Appendix A 258 ...
Страница 274: ...264 Appendix B ...
Страница 276: ...266 Appendix C ...
Страница 279: ...269 W Windows 2000 Environment Test 260 Wireless Function Failure 119 WLAN Antennas Removing 77 Replacing 79 ...
Страница 280: ...270 ...


