


Chapter 3
29
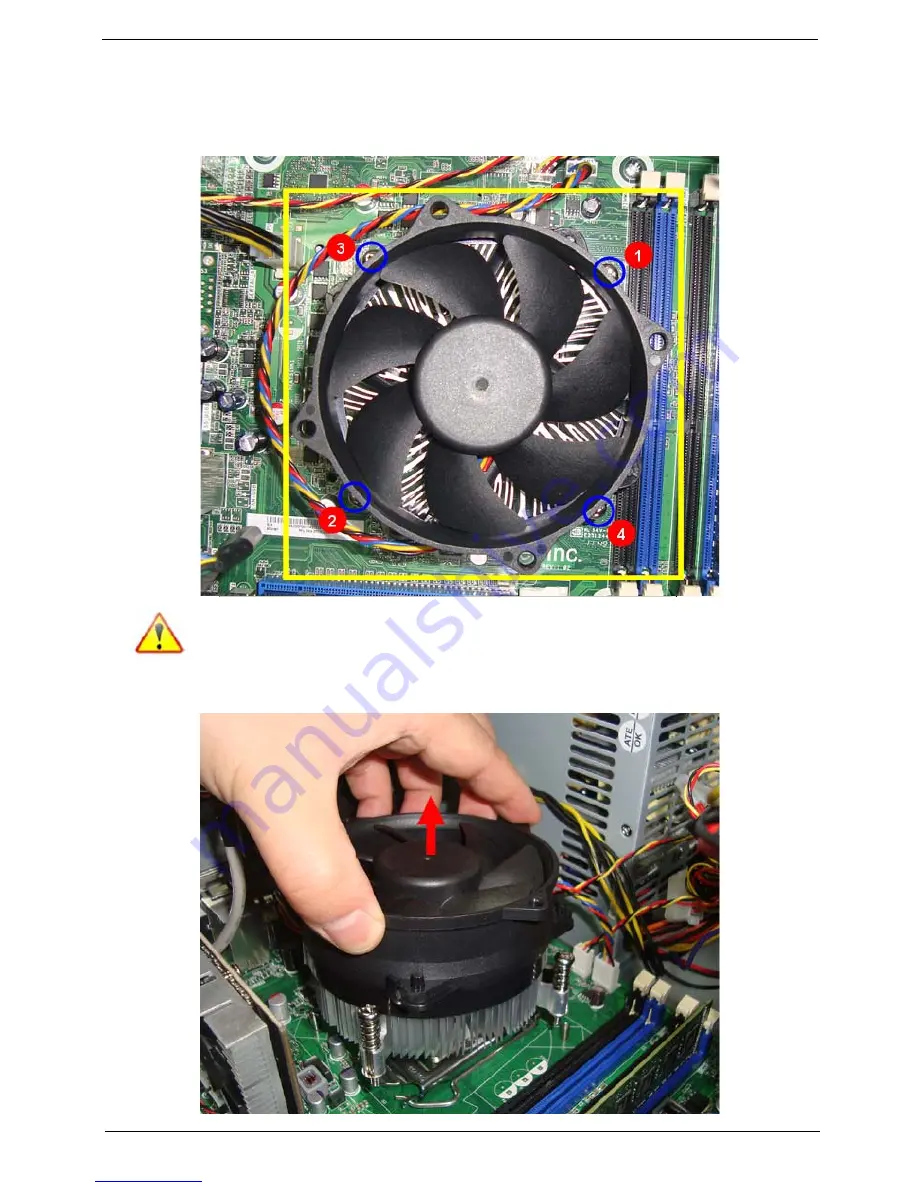
Removing the Heat Sink Fan Assembly
WARNING:
The heat sink becomes very hot when the system is on. NEVER touch the heat sink with any metal
or with your hands.
1.
Use a long-nosed screwdriver to loosen the four screws on the heat sink, in the order as shown below.
Note
:CPU Fan has been highlighted with the yellow rectangle as above image shows.Please detach the CPU
Fan and follow local regulations for disposal.
2.
Lift the heat sink fan assembly away from the mainboard.
Содержание Aspire M3985
Страница 1: ...Acer Aspire M3985 Service Guide PRINTED IN TAIWAN ...
Страница 13: ...Chapter 1 5 Block Diagram ...
Страница 41: ...Chapter 3 33 Removing the VGA Card 1 Remove the screw that secures the card to the chassis 2 Open PCI Latch ...
Страница 46: ...38 Chapter 3 4 Pull the Pull the optical drive out of the chassis ...
Страница 50: ...42 Chapter 3 7 Lift the power supply module out of the chassis ...
Страница 53: ...Chapter 3 45 3 Lift the board from the chassis 4 Punching in IO Shield then you can remove it ...
Страница 68: ...60 Chapter 3 Reinstalling the Power Supply 1 Install the power supply to chassis 2 Fix the four screws ...
Страница 69: ...Chapter 3 61 Reinstalling the I O Shielding 1 Install I O shielding into chassis ...
Страница 77: ...Chapter 3 69 3 Close the PCI Latch fix the three screws ...
Страница 80: ...72 Chapter 3 3 Connect the cooler cable to the main board connector ...
Страница 82: ...74 Chapter 3 3 Make sure the front bezel retention tabs are securedly fastened to the chassis interior ...
Страница 83: ...Chapter 3 75 Reinstalling the Side Panel 1 Install the side Panel then fix two screws ...
Страница 91: ...83 Chapter 4 b Select Proceed with flash update and Press Enter ...


