96
Chapter 5
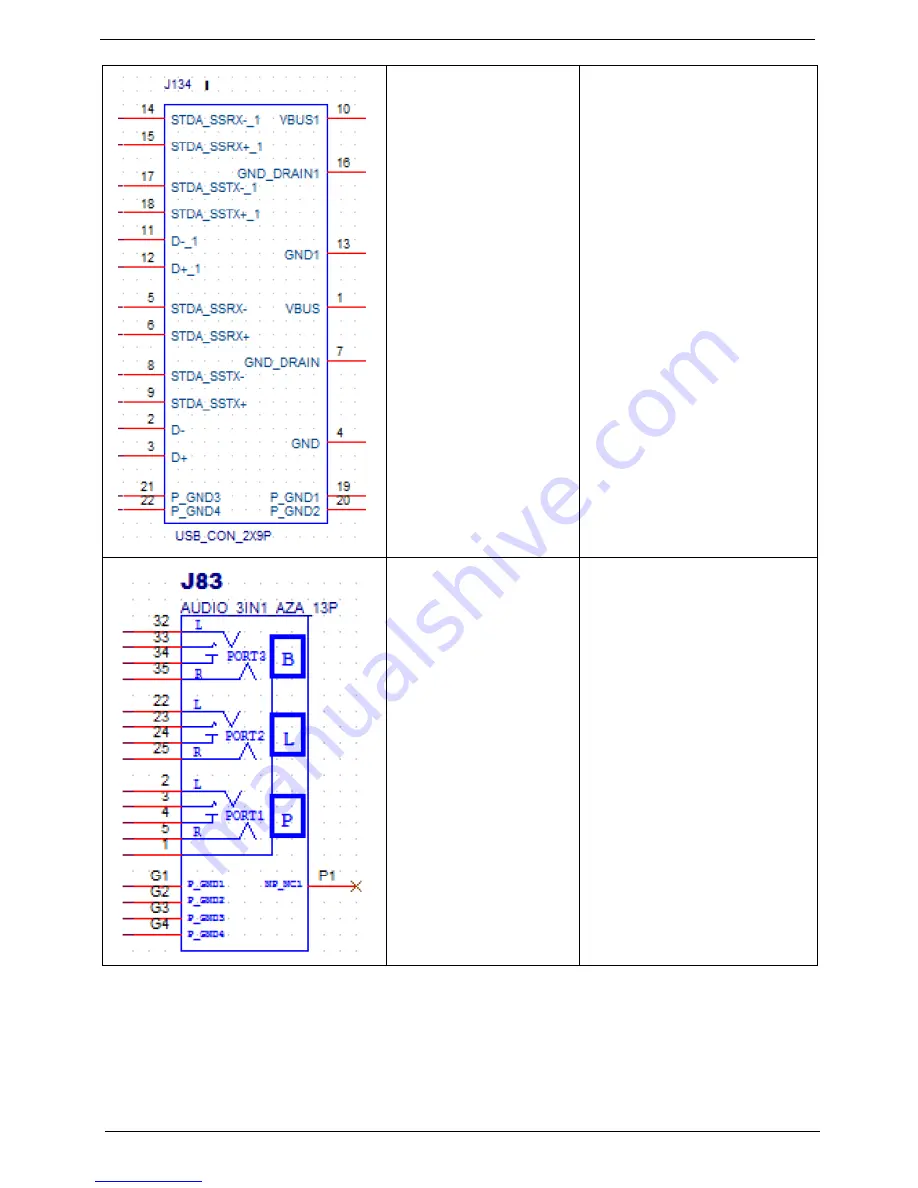
USB_CON_2X9P
1: +5V_DUAL_USB_B
2: LP2- 3: LP2+
4: GND
5: USB3_SS_RXN3
6: USB3_SS_RXP3
7: GND
8: USB3_SS_TXN3
9: USB3_SS_TXP3
10: +R_VBUS_OUT
11:LP3-
12: LP3+ 13: GND
14: USB3_SS_RXN4
15: USB3_SS_RXP4
16: GND
17: USB3_SS_TXN4
18: USB3_SS_TXP4
19,20: GND
AUDIO_3IN1_AZA_13P 1:
GND
2: MIC1_L
3: MIC1_JD
4: GND
5: MIC1_R
22: FRONT_L
23: FRONT_JD
24:GND
25: FRONT_R
32: LIN1_L
33: LIN1_JD-
34:GND
35: LIN1_R
G1~G4:AGND
Содержание Aspire M3985
Страница 1: ...Acer Aspire M3985 Service Guide PRINTED IN TAIWAN ...
Страница 13: ...Chapter 1 5 Block Diagram ...
Страница 41: ...Chapter 3 33 Removing the VGA Card 1 Remove the screw that secures the card to the chassis 2 Open PCI Latch ...
Страница 46: ...38 Chapter 3 4 Pull the Pull the optical drive out of the chassis ...
Страница 50: ...42 Chapter 3 7 Lift the power supply module out of the chassis ...
Страница 53: ...Chapter 3 45 3 Lift the board from the chassis 4 Punching in IO Shield then you can remove it ...
Страница 68: ...60 Chapter 3 Reinstalling the Power Supply 1 Install the power supply to chassis 2 Fix the four screws ...
Страница 69: ...Chapter 3 61 Reinstalling the I O Shielding 1 Install I O shielding into chassis ...
Страница 77: ...Chapter 3 69 3 Close the PCI Latch fix the three screws ...
Страница 80: ...72 Chapter 3 3 Connect the cooler cable to the main board connector ...
Страница 82: ...74 Chapter 3 3 Make sure the front bezel retention tabs are securedly fastened to the chassis interior ...
Страница 83: ...Chapter 3 75 Reinstalling the Side Panel 1 Install the side Panel then fix two screws ...
Страница 91: ...83 Chapter 4 b Select Proceed with flash update and Press Enter ...


