


Chapter 6
108
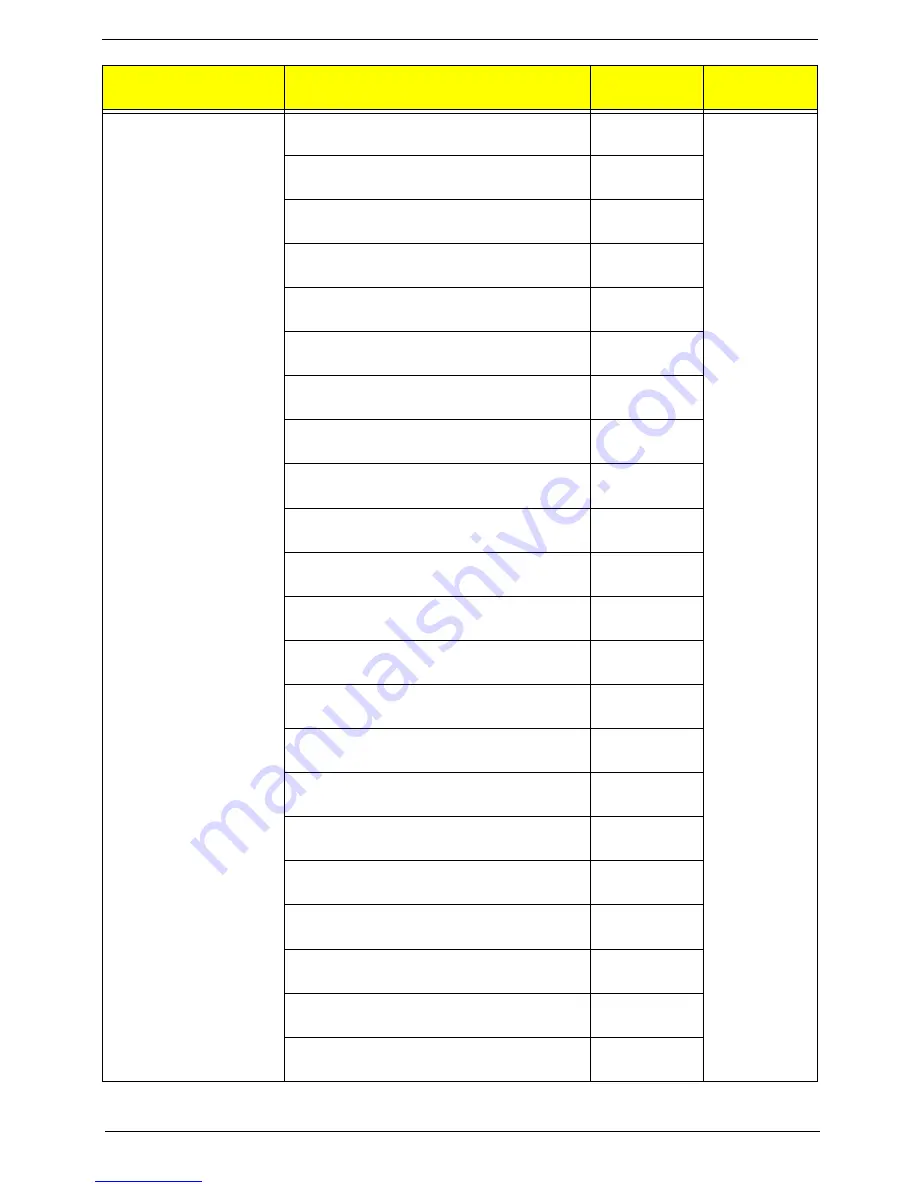
Keyboard LITE-ON SK-9660B RF2.4 Black Nordic
with new acer logo
KB.RF40B.203
Keyboard LITE-ON SK-9660B RF2.4 Black
English/Canadian French with new acer logo
KB.RF40B.204
Keyboard LITE-ON SK-9660B RF2.4 Black Czech/
Slovak with new acer logo
KB.RF40B.205
Keyboard LITE-ON SK-9660B RF2.4 Black Swiss/
FR with new acer logo
KB.RF40B.206
Keyboard LITE-ON SK-9660B RF2.4 Black Korean
with new acer logo
KB.RF40B.207
Keyboard LITE-ON SK-9660B RF2.4 Black
Spanish Latin with new acer logo
KB.RF40B.208
Keyboard LITE-ON SK-9660B RF2.4 Black
Spanish Latin without battery;with new acer logo
KB.RF40B.209
Keyboard LITE-ON SK-9621B USB Black US with
new acer logo
KB.USB0B.448
Keyboard LITE-ON SK-9621B USB Black
Traditional Chinese with new acer logo
KB.USB0B.449
Keyboard LITE-ON SK-9621B USB Black
Simplified Chinese with new acer logo
KB.USB0B.450
Keyboard LITE-ON SK-9621B USB Black US
International with new acer logo
KB.USB0B.451
Keyboard LITE-ON SK-9621B USB Black Arabic/
English with new acer logo
KB.USB0B.452
Keyboard LITE-ON SK-9621B USB Black Thailand
with new acer logo
KB.USB0B.453
Keyboard LITE-ON SK-9621B USB Black Spanish
with new acer logo
KB.USB0B.454
Keyboard LITE-ON SK-9621B USB Black
Portuguese with new acer logo
KB.USB0B.455
Keyboard LITE-ON SK-9621B USB Black
Canadian French with new acer logo
KB.USB0B.456
Keyboard LITE-ON SK-9621B USB Black Brazilian
Portuguese with new acer logo
KB.USB0B.457
Keyboard LITE-ON SK-9621B USB Black
Japanese with new acer logo
KB.USB0B.458
Keyboard LITE-ON SK-9621B USB Black German
with new acer logo
KB.USB0B.459
Keyboard LITE-ON SK-9621B USB Black Italian
with new acer logo
KB.USB0B.460
Keyboard LITE-ON SK-9621B USB Black French
with new acer logo
KB.USB0B.461
Keyboard LITE-ON SK-9621B USB Black Swedish
with new acer logo
KB.USB0B.462
Category
Part Number
Acer P/N
Exploded
Diagram Item
Содержание Aspire M3985
Страница 1: ...Acer Aspire M3985 Service Guide PRINTED IN TAIWAN ...
Страница 13: ...Chapter 1 5 Block Diagram ...
Страница 41: ...Chapter 3 33 Removing the VGA Card 1 Remove the screw that secures the card to the chassis 2 Open PCI Latch ...
Страница 46: ...38 Chapter 3 4 Pull the Pull the optical drive out of the chassis ...
Страница 50: ...42 Chapter 3 7 Lift the power supply module out of the chassis ...
Страница 53: ...Chapter 3 45 3 Lift the board from the chassis 4 Punching in IO Shield then you can remove it ...
Страница 68: ...60 Chapter 3 Reinstalling the Power Supply 1 Install the power supply to chassis 2 Fix the four screws ...
Страница 69: ...Chapter 3 61 Reinstalling the I O Shielding 1 Install I O shielding into chassis ...
Страница 77: ...Chapter 3 69 3 Close the PCI Latch fix the three screws ...
Страница 80: ...72 Chapter 3 3 Connect the cooler cable to the main board connector ...
Страница 82: ...74 Chapter 3 3 Make sure the front bezel retention tabs are securedly fastened to the chassis interior ...
Страница 83: ...Chapter 3 75 Reinstalling the Side Panel 1 Install the side Panel then fix two screws ...
Страница 91: ...83 Chapter 4 b Select Proceed with flash update and Press Enter ...