


3 System upgrades
46
4
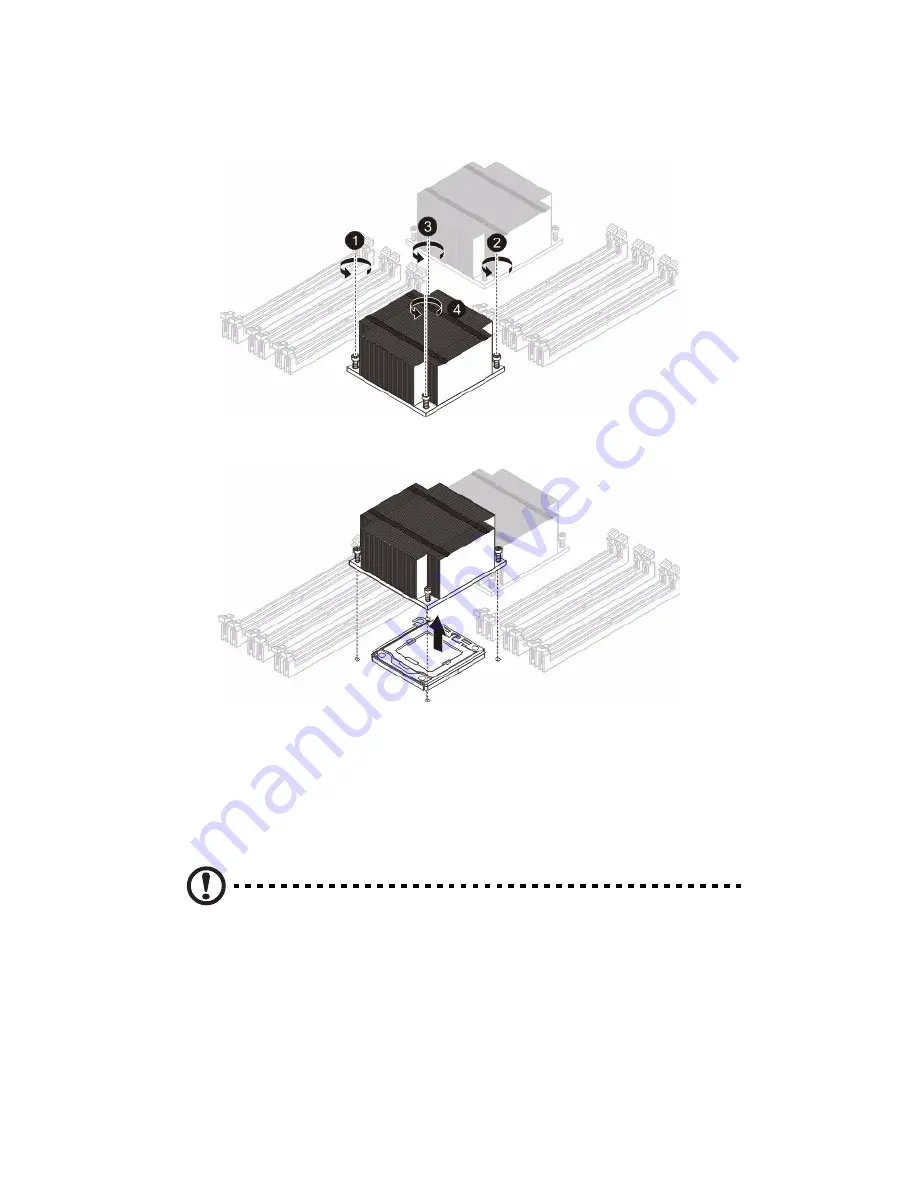
Using a screwdriver, loosen the heatsink screws from the
mainboard.
5
Lift the heat sink away from the processor.
6
Lay down the heat sink in an upright position — with the thermal
patch facing upward. Do not let the thermal patch touch the work
surface.
Installing a heatsink
Caution: The heat sink has a thermal interface material (TIM) on
the underside. Use caution so that you do not damage the TIM. If
a protective film is installed on the TIM, remove it.
1
Remove power from the system and unplug the AC power cord
from the power supply.
Содержание AR360 F1 Series
Страница 1: ...AR360 F1 Series User Guide ...
Страница 16: ...xvi ...
Страница 17: ...1 System tour ...
Страница 32: ...1 System tour 16 ...
Страница 33: ...2 System setup ...
Страница 40: ...2 System setup 24 ...
Страница 41: ...3 System upgrades ...
Страница 42: ...3 System upgrades 26 ...
Страница 54: ...3 System upgrades 38 5 Pull the tab away from the drive and push the drive out of the system 3 ...
Страница 80: ...3 System upgrades 64 2 Insert the riser into the mainboard 1 and fasten the two 2 screws 2 ...
Страница 84: ...3 System upgrades 68 The figure below shows the server in a rack mount position ...
Страница 89: ...73 b Align and insert the tabs on the left and right mounting rails to the rear rack post mounting holes 2 ...
Страница 92: ...3 System upgrades 76 ...
Страница 93: ...4 System BIOS ...
Страница 130: ...4 System BIOS 114 ...
Страница 131: ...5 System troubleshooting ...
Страница 141: ...Appendix A Server management tools ...
Страница 146: ...Appendix A Server management tools 130 ...
Страница 147: ...Appendix B Rack mount configuration ...
Страница 157: ...Appendix C Acer Smart Console ...
Страница 185: ...169 Exit Yes At the prompt click Yes to exit from remote redirection No Click No to return to the current session ...
Страница 186: ...Appendix C Acer Smart Console 170 ...


