


3 System upgrades
36
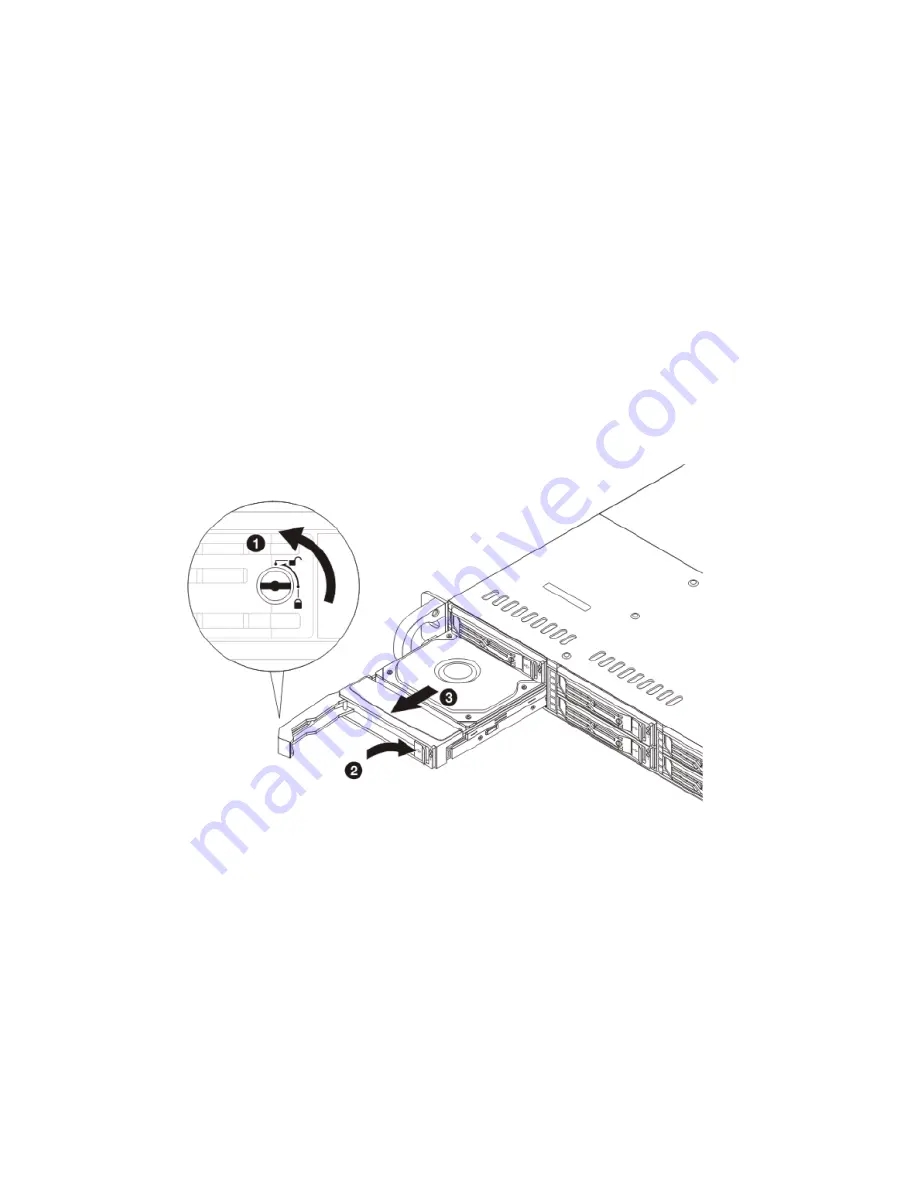
Removing and installing a 2.5” hard disk
drive
Removing a 2.5” hard disk drive with carrier
1
Observe the ESD precautions described on page 27.
2
Remove the carrier with failed HDD.
3
Remove the HDD carrier.
(1) Unlock the HDD carrier latch.
(2) Slide the HDD carrier latch to release the lever.
(3) Pull the lever up.
(4) Grasp the lever and pull the carrier from the chassis.
4
Observe the post-installation instructions described on page 28.
Installing a 2.5” hard disk drive with carrier
1
Slide the HDD carrier all the way into the drive bay.
2
Use the lever to push the HDD carrier into the chassis until it locks
in place, then close the HDD carrier lever.
Содержание AR360 F1 Series
Страница 1: ...AR360 F1 Series User Guide ...
Страница 16: ...xvi ...
Страница 17: ...1 System tour ...
Страница 32: ...1 System tour 16 ...
Страница 33: ...2 System setup ...
Страница 40: ...2 System setup 24 ...
Страница 41: ...3 System upgrades ...
Страница 42: ...3 System upgrades 26 ...
Страница 54: ...3 System upgrades 38 5 Pull the tab away from the drive and push the drive out of the system 3 ...
Страница 80: ...3 System upgrades 64 2 Insert the riser into the mainboard 1 and fasten the two 2 screws 2 ...
Страница 84: ...3 System upgrades 68 The figure below shows the server in a rack mount position ...
Страница 89: ...73 b Align and insert the tabs on the left and right mounting rails to the rear rack post mounting holes 2 ...
Страница 92: ...3 System upgrades 76 ...
Страница 93: ...4 System BIOS ...
Страница 130: ...4 System BIOS 114 ...
Страница 131: ...5 System troubleshooting ...
Страница 141: ...Appendix A Server management tools ...
Страница 146: ...Appendix A Server management tools 130 ...
Страница 147: ...Appendix B Rack mount configuration ...
Страница 157: ...Appendix C Acer Smart Console ...
Страница 185: ...169 Exit Yes At the prompt click Yes to exit from remote redirection No Click No to return to the current session ...
Страница 186: ...Appendix C Acer Smart Console 170 ...


