


89
"+" or "-" on your keyboard to change this value.
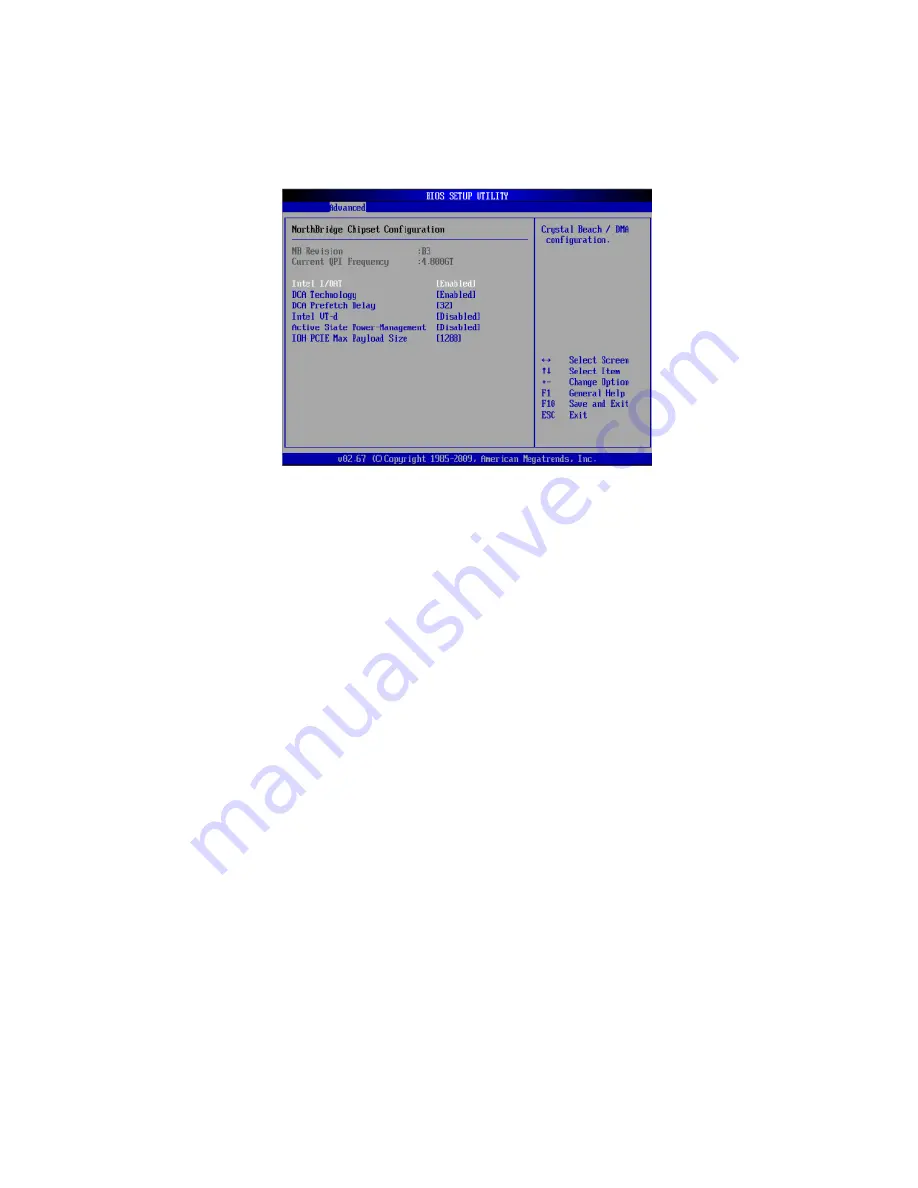
NorthBridge Chipset Configuration
Intel I/OAT: Significantly reduces CPU overhead by leveraging CPU
architectural improvements, freeing resources for other tasks.
DCA Technology: Select Enabled to use Intel's DCA (Direct Cache
Access) Technology to improve data transfer effi ciency.
DCA Prefetch Delay: A DCA Prefetch is used with TOE components to
prefetch data in order to shorten execution cycles and maximize data
processing effi ciency. A TOE device is a specialized, dedicated
processor that is installed on an add-on card or a network card to
handle some or all packet processing of this add-on card. Prefetching
too frequently can saturate the cache directory and delay necessary
cache accesses. This feature reduces or increases the frequency the
system prefetches data. The options are [8], [16], [32], [40], [48], [56],
[64], [72], [80], [88], [96], [104], [112], and [120].
Intel VT-d: Select Enabled to enable Intel Virtualization Technology
support for Direct I/O VT-d by reporting the I/O device assignments to
VMM through the DMAR ACPI Tables. This feature offers fully-
protected I/O resource-sharing across the Intel platforms, providing
you with greater reliability, security and availability in networking and
data-sharing.
Active State Power-Management: Uses power management for signal
transactions between the PCI Express L0 and L1 Links. Select Enabled to
configure PCI Express L0 and L1 Link power states.
IOH PCIE Max Payload Size: Some add-on cards perform faster with the
coalesce feature, which limits the payload size to 128 MB. Others
Содержание AR360 F1 Series
Страница 1: ...AR360 F1 Series User Guide ...
Страница 16: ...xvi ...
Страница 17: ...1 System tour ...
Страница 32: ...1 System tour 16 ...
Страница 33: ...2 System setup ...
Страница 40: ...2 System setup 24 ...
Страница 41: ...3 System upgrades ...
Страница 42: ...3 System upgrades 26 ...
Страница 54: ...3 System upgrades 38 5 Pull the tab away from the drive and push the drive out of the system 3 ...
Страница 80: ...3 System upgrades 64 2 Insert the riser into the mainboard 1 and fasten the two 2 screws 2 ...
Страница 84: ...3 System upgrades 68 The figure below shows the server in a rack mount position ...
Страница 89: ...73 b Align and insert the tabs on the left and right mounting rails to the rear rack post mounting holes 2 ...
Страница 92: ...3 System upgrades 76 ...
Страница 93: ...4 System BIOS ...
Страница 130: ...4 System BIOS 114 ...
Страница 131: ...5 System troubleshooting ...
Страница 141: ...Appendix A Server management tools ...
Страница 146: ...Appendix A Server management tools 130 ...
Страница 147: ...Appendix B Rack mount configuration ...
Страница 157: ...Appendix C Acer Smart Console ...
Страница 185: ...169 Exit Yes At the prompt click Yes to exit from remote redirection No Click No to return to the current session ...
Страница 186: ...Appendix C Acer Smart Console 170 ...


