3 Automatic Needle Alignement
3-14
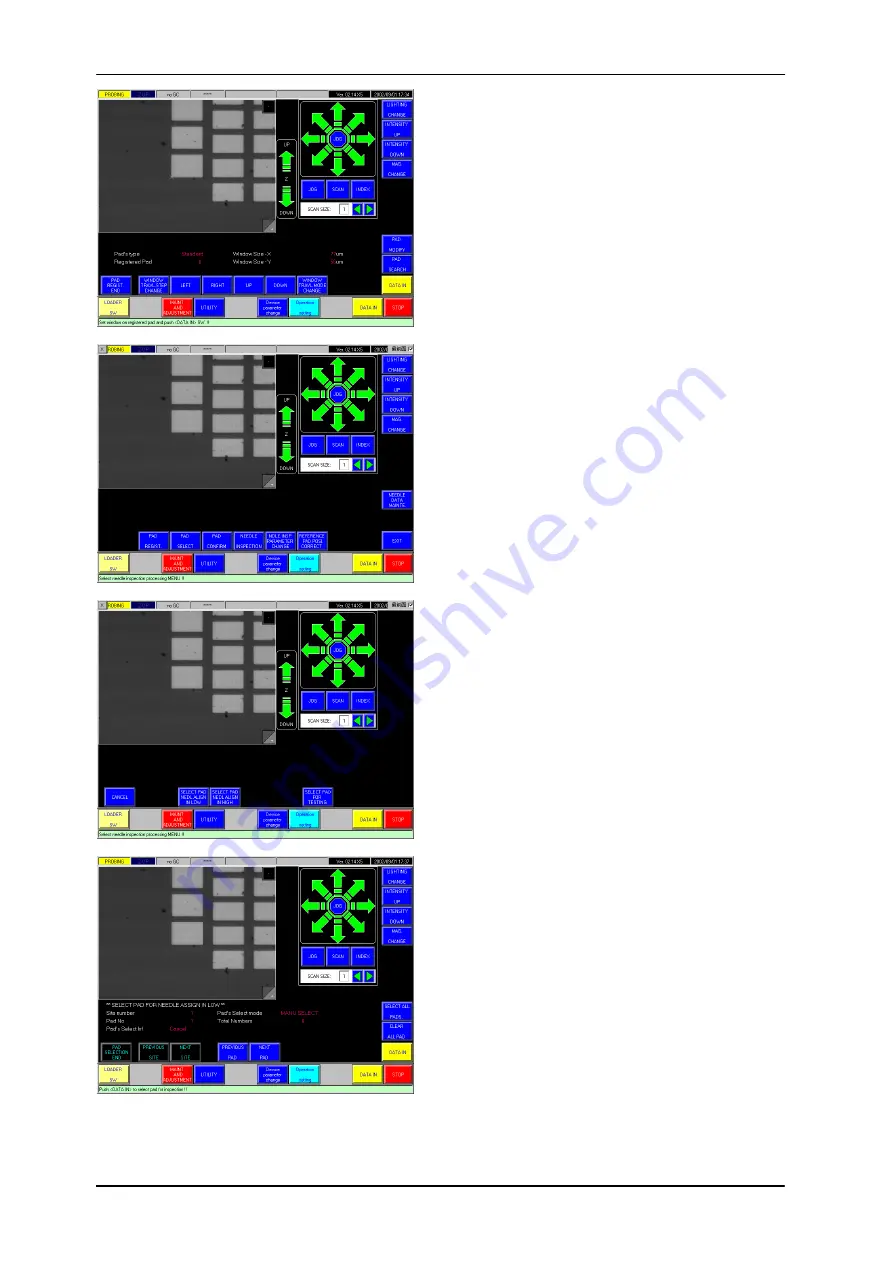
Touching <Pad Regist. End> button on the pad
registration screen will bring up the pad selection/
probe-mark inspection utility screen as shown left in
the second.
Touch <Pad Select> button when you want to
reselect pads for the pad alignment or especially for
selecting suitable pads of particular sites with a
multi-site card.
Now the display changes to the screen as shown in
the third. Here push <Select Pad NDLE Align in
Low> or <Select Pad NDLE Align in High> button;
you can choose different target pads for the low
and high magnification alignment processes. Then
the display again changes to the screen shown in
the fourth.
<Next pad> and <Previous Pad> buttons make the
individual registered pads brought up in the screen
center. At this time "Pad No.:" indication in the
upper left corner changes accordingly.
<Next Site> and <Previous Site> buttons have
Chuck index-driven, when "Site No.:" indicated in
the upper left changes also.
Push <Data-in> for the pad reselection.
<Pad Select End> button will bring back the screen
shown in the above third for the high/low
magnification choice. <Cancel> button there is for
returning to the utility screen shown in the second
(not canceling the pad reselection). Pushing <Exit>
button on the utility screen will start the pad
alignment with the registered/ reselected pads.


