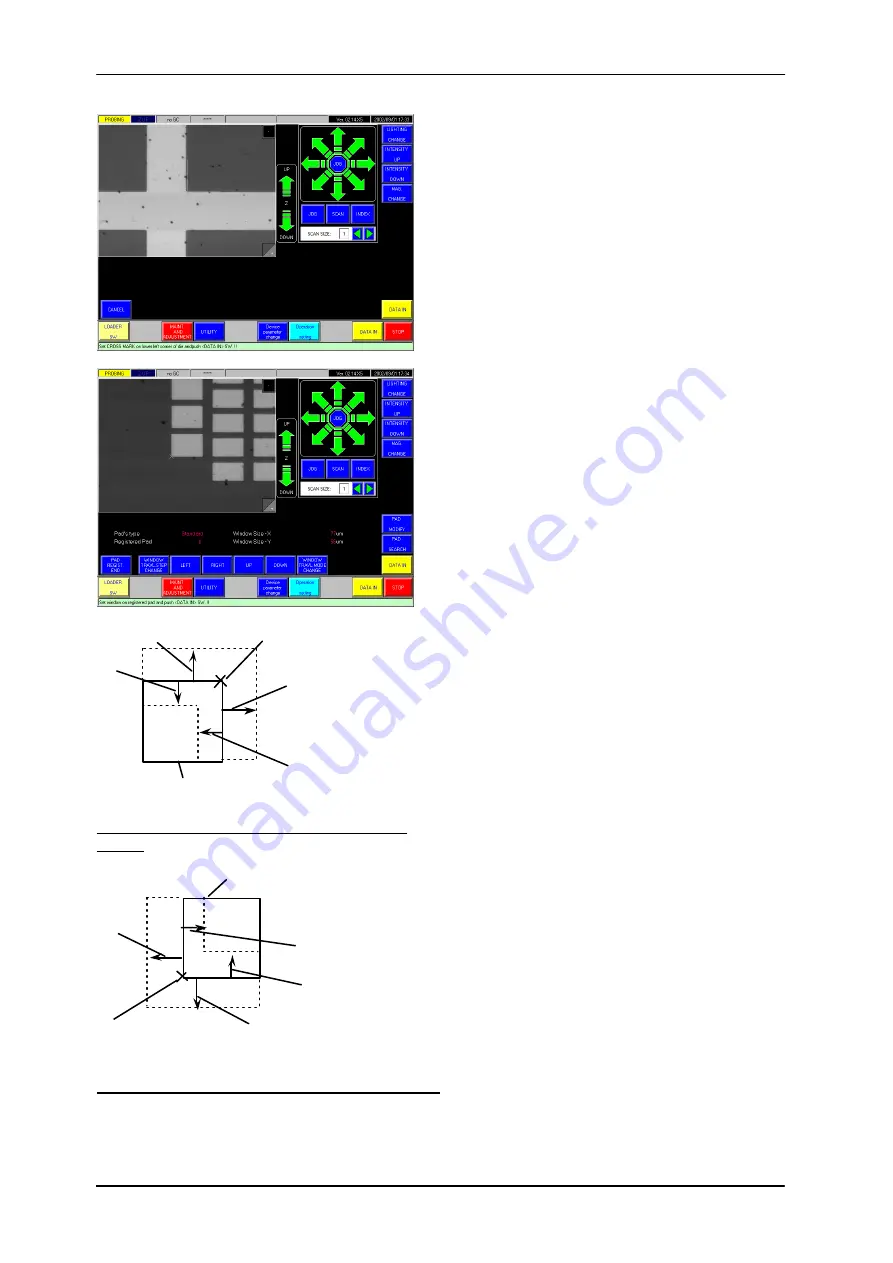
3 Automatic Needle Alignement
3-12
[
↑
]
[
↓
]
[→]
[←]
Original window
Cross mark for
changing direction
Changing window size with the upper right
corner
[
↑
]
[
↓
]
[→]
[←]
Original window
Cross mark for
changing direction
Changing window size with the lower left corner
Again, accurately align the lower left corner to the
hair crossing lines and push <Data-in> button; the
display changes to the pad registration screen.
On this pad registration screen, the pad registering
window appears in the center.
With Joy Stick, bring the center of a pad to the
center of the registering window at first. (If the
camera focus is not good enough, you can operate
Z UP/DOWN switches to change the Chuck height).
When pads are made of Aluminum that shines in
the pattern, <PAD SEARCH> button can make the
window automatically determine the location and
sizes of a pad existing near the window. Otherwise,
operate the arrow buttons shown on the screen.
[LEFT]:
For making the window horizontal size smaller
[RIGHT]:
For making the window horizontal size larger
[UP]:
For making the window vertical size larger
[DOWN]:
For making the window vertical size smaller
<WINDOW TRVL. STEP CHANGE>
For selecting the larger or smaller step at the
window size change alternately
<WINDOW TRAVL. MODE CHANGE>
For selecting the reference corner to the lower
left or upper right corner at the window size
change alternately
When the window alignment to a pad pattern has finished, push <Data-in>; then, bring the next
pad into the view with Joy Stick and align the window to the pad image again.


