


Managed Industrial Ethernet Switch User Manual
3onedata proprietary and confidential 33
Copyright © 3onedata Co., Ltd.
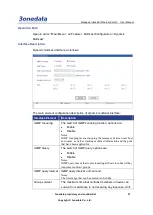
Interface Element
Description
enabled ToS and CoS priority. The value range is 0-7. The
higher the value, the higher the priority.
Description:
By default, switch would use port priority in place of the 802.1p
priority the port comes with when receiving message to control
the quality of service the messages deserve.
When the ToS and CoS are not enabled, queuing and scheduling are in the order of port
priority.
When the ToS or CoS are enabled, queuing and scheduling according to ToS or CoS
instead of considering port priority.
If the ToS and CoS are enabled at the same time, queuing according to ToS priority.
When the ToS values are the same, queuing according to CoS priority.
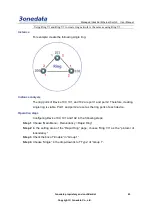
Instance: QoS configuration
For example:
Set port 1’s queuing mechanism as “Weight Fair (8:4:2:1)”, adopts ToS priority.
Operation steps
Open “Main Menu > QoS > QoS Classification”.
Step 1
On the page of classification, choose “Weight Fair (8:4:2:1)” in queuing mechanism.
Step 2
On the line of port 1, check the checkbox of “inspect ToS”.
Step 3
Click “apply”.
Step 4
Ends.
Step 5
5.2 CoS Mapping
Function Description
On the page of “CoS Mapping”, user can configurate mapping between CoS value
and priority queues.
Operation Path
Open in order: “Main Menu > QoS > QoS Mapping”.


