TMA Grand Master 2.6 – User’s Guide
5 Using TMA Grand Master
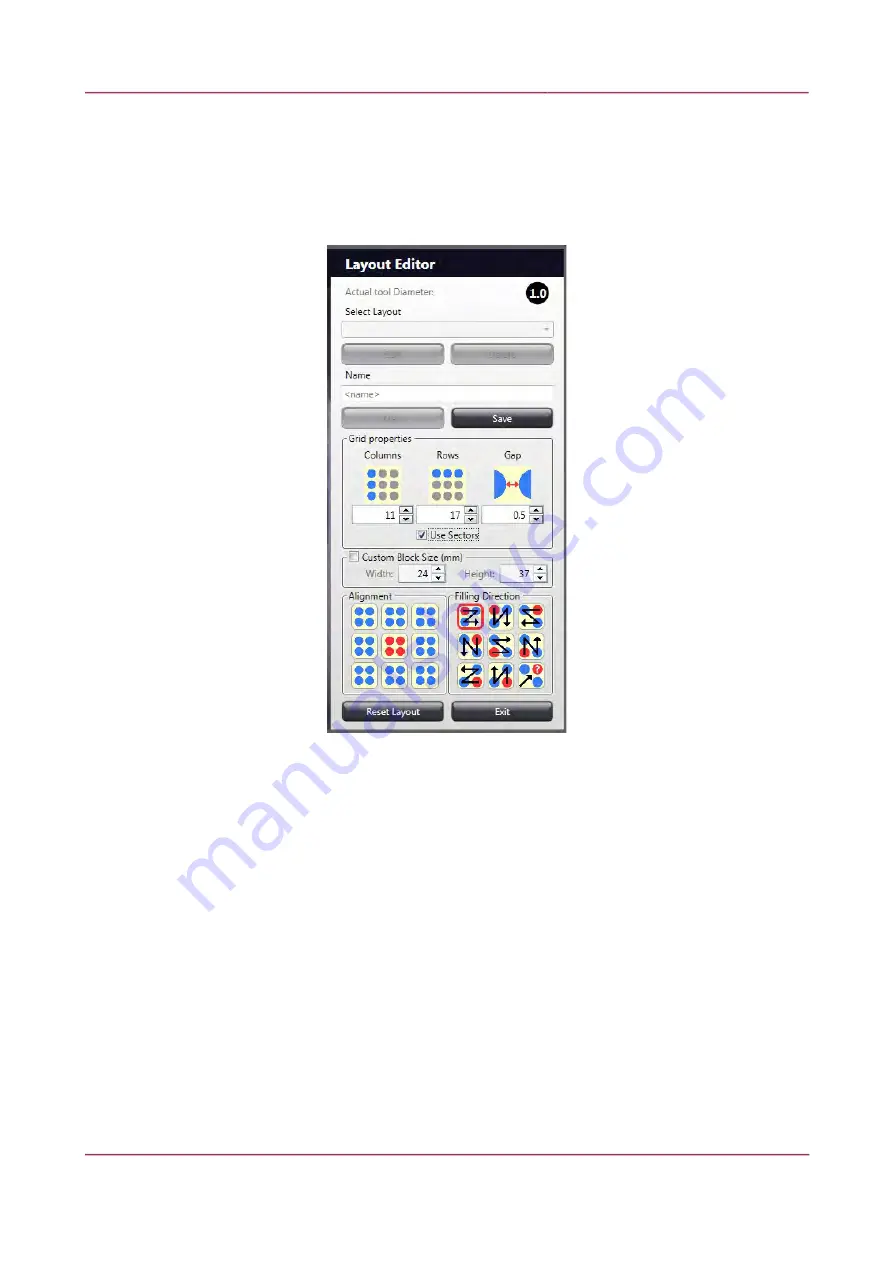
New layout (TMA block array) can be created or edited in the Layout Editor window. Already existing
layout can be selected from the
Select Layout
drop-down list.
When you create a new pattern, you define the block layout. Type the name of your new layout into
the
Name
textbox (maximum length is 20 characters).
•
The
Actual tool Diameter
field at the top of the Layout Editor panel informs you about the
tool diameter of the puncher and the drill bit inserted into the device. This value cannot be
modified, and will be applied for the layout to be created.
•
Set the number of
Columns
,
Rows
, and
Gap
value in the Grid properties section.
NOTE:
After insertion the puncher moves sideways to break the core. As this movement is
not possible in some cases (without contacting with an already inserted core), please raise
the
Gap
value to prevent contamination and the core from being damaged. If setting a lower
value than advised, the software informs you to raise the value, but it does not prohibit the
usage of a lower
Gap
value.
•
If you want to create a pattern in which some of the grid positions (column/row intersection)
are not marked as a hole to drill, disable those positions you want
TMA Grand Master
to skip
during drilling.
•
Single hole: in the layout, click a core position that you want to leave out.
•
Columns, rows, or field selection: while keeping the mouse button pressed, select
the unwanted area on the layout.
December 9, 2016 – Rev. 1
3DHISTECH Ltd.
38(92)


