UP Mini 3D Printer User Manual
21.
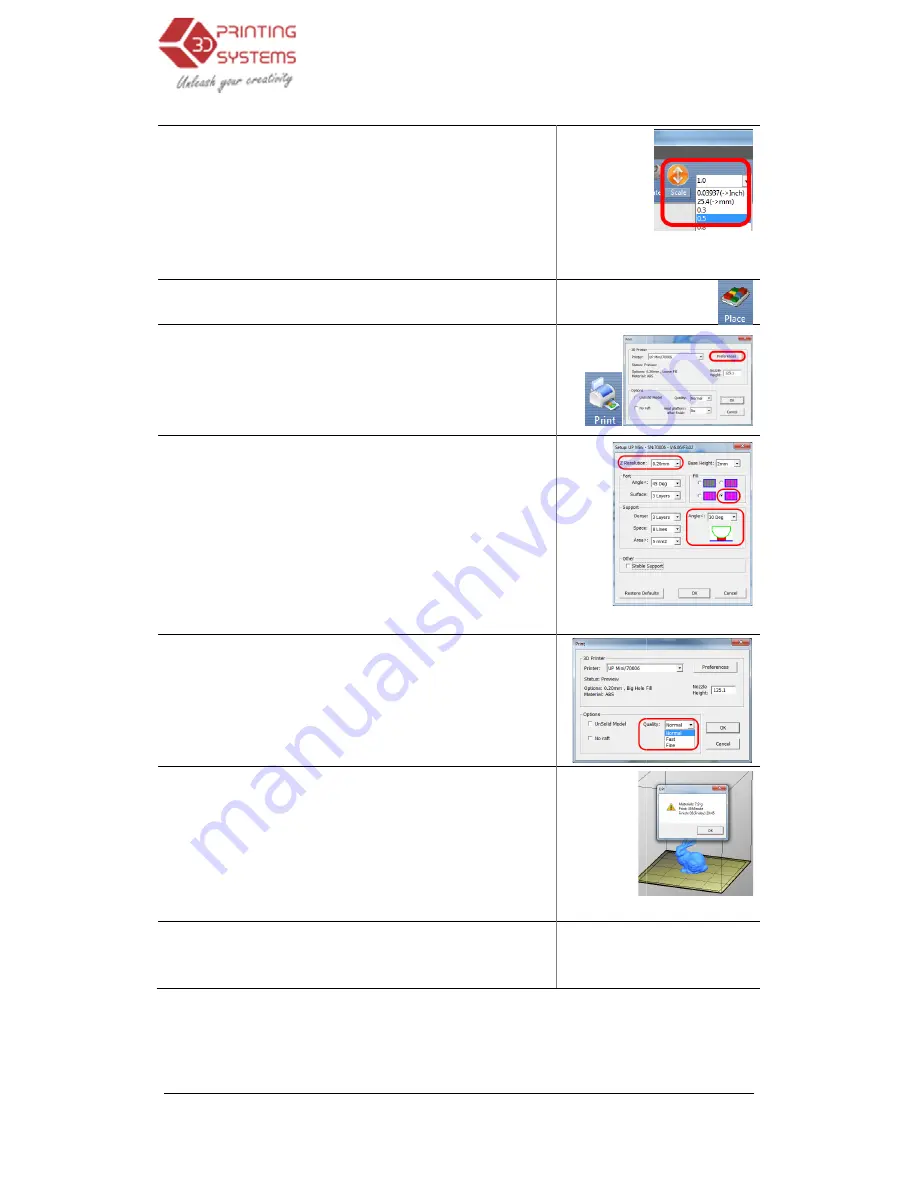
Scale the bunny by 50%, click “Scale” and select “0.5”.
22.
Click “Place” this will centre the model
the base of the print area
23.
Click the “Print” icon
24.
Select the following:
Z Resolution:
“0.2mm”
Fill:
Hollow Honeycomb (bottom right)
Support Angle:
30 degrees
Typically these are the only values you’ll need to
change.
Click “OK”
25.
Select the overall print quality
Normal
= Average quality
Fine
= Good quality and takes longer
Fast
= Draft quality and takes less time
Now click “OK” to start your first print!
26.
The software will now spool the print job to printer.
Once finished spooling, the printer will
then disconnect the USB cable from your computer if
you wish.
27.
The printer will now start to preheat the platform and
the extruder. You can watch the temperature raise by
clicking “3D Print” and “Maintenance”
3D Printer User Manual
Scale the bunny by 50%, click “Scale” and select “0.5”.
Chapter 3.2.4 Model
this will centre the model or models on
print area on the software.
Click the “Print” icon and click “Preferences”
the following:
“0.2mm”
Hollow Honeycomb (bottom right)
30 degrees
these are the only values you’ll need to
Chapter 3.3.6 Print Preferences
Select the overall print quality
= Average quality
= Good quality and takes longer
= Draft quality and takes less time
Now click “OK” to start your first print!
The software will now spool the print job to printer.
Once finished spooling, the printer will
beep
, you can
then disconnect the USB cable from your computer if
Chapter
The printer will now start to preheat the platform and
the extruder. You can watch the temperature raise by
clicking “3D Print” and “Maintenance”
16
Chapter 3.2.4 Model
Transformations
Chapter 3.3.6 Print Preferences
Chapter 4. Printing


