background image

68

C

HAPTER

 4: S

TANDARD

 F

EATURES

Содержание NBX

Страница 1: ...NBX Cordless Telephone Guide NBX Networked Telephony Solutions System Release 6 0 http www 3com com Part Number 900 0340 01 Published July 2006 ...

Страница 2: ... LICENSE TXT or LICENSE TXT If you are unable to locate a copy please contact 3Com and a copy will be provided to you UNITED STATES GOVERNMENT LEGENDS If you are a United States government agency then this documentation and the software described herein are provided to you subject to the following United States Government Legend All technical data and computer software is commercial in nature and ...

Страница 3: ...ity 16 Setting Your Accessibility Options 16 Quick Reference Guides 17 2 3COM 3106C AND 3107C CORDLESS TELEPHONES Telephone Buttons and Controls 20 3Com 3106C 20 3Com 3107C 23 Programmable Access Buttons 25 Status Lights for System Appearance Buttons 26 Base Unit Controls and Functions 27 Using the Handset 27 Handset Controls 28 Using the Handset 29 Using the Optional Headset 31 3 NBX MESSAGING NB...

Страница 4: ...41 Using Voice Mail Group Lists 42 Viewing System Groups 42 Creating Personal Groups 42 Modifying or Deleting Groups 43 Marking a Message as Private or Urgent 45 Other Ways to Manage Your Voice Mail Messages 45 Other Kinds of Mailboxes 46 Greeting Only Mailbox 46 Phantom Mailbox 47 Group Mailbox 47 4 STANDARD FEATURES Answering a Call 49 Caller ID 49 Answering a Second Call 50 Dialing a Call 51 An...

Страница 5: ...ct Camp On 64 More About Camp On 64 Using Automatic Callback 66 Initiating Automatic Callback 66 More About Automatic Callback 66 5 PERSONALIZING YOUR TELEPHONE Guidelines About Features on 3Com Telephones 69 Ringer Tones 70 Button Mapping 70 Button Mapping Notes 74 Speed Dials 76 Personal Speed Dials 76 System wide Speed Dials 77 Special Case One Touch Speed Dials 78 Printing Speed Dial Lists 78 ...

Страница 6: ...ed Call Pickup on a Specific Telephone 99 Group Call Pickup 100 Automatic Call Distribution Groups Hunt Groups and Calling Groups 100 Automatic Call Distribution 100 Hunt Groups 103 Calling Groups 105 Group Membership 106 Supervisory Monitoring 106 Agent Role for 3Com Cordless Telephones 107 Supervisory Monitoring Terminology 107 Call Privacy 108 More About Supervisory Monitoring 109 WhisperPage 1...

Страница 7: ...ents 127 Connecting the Telephone Cords 127 Applying Power to the Base and Charging Units 128 Installing on the Wall 129 Installing the Base Unit on the Wall 130 Installing the Charging Unit on the Wall 131 Attaching the Beltclip to the Handset 134 Installing the Handset Battery Pack 135 3Com 3106C 135 3Com 3107C 136 Charging the Handset Battery Pack 137 Charging an Optional Spare Battery Pack 3Co...

Страница 8: ...8 Telephone Specifications 147 INDEX FCC CLASS B VERIFICATION STATEMENT INDUSTRY CANADA NOTICE ...

Страница 9: ...in the release notes How to Use This Guide Table 1 shows where to look for specific information in this guide Table 1 Where to Find Information If you are looking for information about Turn to How to get started with your new telephone Chapter 1 The 3Com 3106C and 3107C Cordless Telephones Chapter 2 NBX Voice Messaging features Chapter 3 Using standard telephone features Chapter 4 Personalizing yo...

Страница 10: ...ed Telephony Solution Receptionist The person who answers the majority of incoming telephone calls In some business environments this person may be a switchboard operator User A person who has a single 3Com Telephone or an analog telephone connected to the NBX system through an ATC card or the single port ATA device Table 3 Icons Icon Type Description Information note Information that describes im...

Страница 11: ...e Quick Reference Guide by clicking the Telephone Quick Reference link The NBX NetSet utility also includes a searchable Help system with Help buttons on each screen An administrator who logs in can also see the NBX Installation Guide and the NBX Administrator s Guide Comments on the Documentation Your suggestions are important to us They help us to make the NBX documentation more useful to you Pl...

Страница 12: ...12 ABOUT THIS GUIDE ...

Страница 13: ...by which you set up your password and voice mailbox for the first time depends on The kind of telephone that you have The kind of voice messaging system on your NBX system Ask your administrator what kind of voice messaging is active on your system For details on tones and feature codes see Chapter 6 To set your password for the first time if your system uses NBX Messaging 1 Press the Message butt...

Страница 14: ... 10 digit numbers Do not use letters or as part of your password To change your password if your system uses NBX Messaging 1 Press the Message button on your telephone and login to your mailbox 2 Follow the NBX voice prompts to change your NBX password which changes your NBX NetSet utility password because they are the same Message button old password 9 2 follow the prompts To change your password...

Страница 15: ...igure system wide telephone settings and many of the settings for your telephone User As a telephone user you log in to the NBX NetSet utility with your own system ID your extension and password to View and change your telephone s personal settings such as speed dials ringer tone and specify where you want your calls to go when you cannot answer them your call coverage point Listen to and delete y...

Страница 16: ...on always your 3 digit or 4 digit telephone extension and your NBX NetSet utility password and then click OK Navigating the NBX NetSet Utility Once you log in to the NBX NetSet utility you can easily locate the information you need to use your NBX telephone features Start by clicking the category you want in the left hand column Tabs indicating the specific topics for this category appear at the t...

Страница 17: ...Log in to the NBX NetSet utility See Starting the NBX NetSet Utility earlier in this chapter 2 Go to Resources Telephone Quick Reference and click Telephone Quick Reference The quick reference guide that pertains to your telephone appears Adobe Reader 5 0 or higher is required to view the file Adobe Reader is available free from the Adobe Web site www adobe com ...

Страница 18: ...18 CHAPTER 1 GETTING STARTED ...

Страница 19: ...less Telephones The chapter covers these topics Telephone Buttons and Controls Programmable Access Buttons Status Lights for System Appearance Buttons Base Unit Controls and Functions Using the Handset Using the Optional Headset The 3Com 3106C and 3107C Cordless Telephones 3C10406C and 3C10407C do not support speaker phone operation ...

Страница 20: ...e For many operations the 3Com 3106C makes a sound when you press a button Figure 1 3Com 3106C Cordless Telephone 1 Headset jack See Using the Optional Headset later in this chapter 2 Display panel Displays telephone status messages Caller ID information if enabled and the number of messages that you have in your voice mail mailbox 1 2 3 4 5 6 7 8 9 10 11 12 13 14 15 16 ...

Страница 21: ...n the second calling line Lights steadily when an outgoing call is ringing or when you are using the NBX Messaging system Blinks to indicate an incoming call or that you have placed a call on hold 7 System Appearance button Indicates activity on the first calling line Lights steadily when an outgoing call is ringing or when you are using the NBX Messaging system Blinks to indicate an incoming call...

Страница 22: ... volume when you are not on a call Controls the audio volume through the handset or headset during a call See Handset Ringer Tone and Volume later in this chapter 16 Ringer ON OFF and MUTE switch Turns the handset ringer on and off When the ringer is disabled an Off icon appears on the display panel Also lets you prevent a caller from hearing what you are saying during a telephone call although yo...

Страница 23: ... Display panel Displays telephone status messages Caller ID information if enabled and the number of messages that you have in your voice mail mailbox You can also use it to view icons that indicate A message has arrived MSG The phone is on for placing calls Talk This icon flashes during call transfers The handset ringer is off Off The handset battery needs recharging Low 3 Hold button Places a ca...

Страница 24: ...s chapter 10 R VOL button Controls the ringer alert volume when you are not on a call Controls the audio volume through the handset or headset during a call See Handset Ringer Tone and Volume later in this chapter 11 MUTE button Lets you prevent a caller from hearing what you are saying during a telephone call although you can still hear the caller Press the button to turn off Mute the telephone s...

Страница 25: ...assigned you to a group that allows you to change your button mappings you also can assign other functions to these buttons such as call park extensions See Button Mapping in Chapter 5 Otherwise you cannot change their functions unless your administrator defines one or more buttons as User Speed Dials See Speed Dials in Chapter 5 Figure 3 TAccess Buttons Access buttons have these default settings ...

Страница 26: ...a new label for the label area below these Access buttons Status Lights for System Appearance Buttons An Access button that is set up for incoming and outgoing calls is called a System Appearance button Each System Appearance button lights as follows to indicate a line s status See Table 4 Table 4 Status Indicator Lights for System Appearance Buttons If the light is The line is Off Available for u...

Страница 27: ...ordless Telephone base unit Figure 4 3Com Cordless Telephone Base Unit 1 Power status LED 2 DC Power Jack 3 RJ45 port for connecting to the LAN Using the Handset Before using your 3Com Cordless Telephone raise the antenna to the vertical position To use your Cordless Telephone lift the handset out of the charging unit 2 1 3 ...

Страница 28: ...tings Volume Low Volume Medium Volume High Volume Maximum 2 Stop pressing the RING VOL 3106C button or the R VOL 3107C button when the handset reaches the desired volume Handset Ringer ON OFF Switch Use the ON OFF MUTE 3106C switch or the ON OFF 3107C switch on the side of the handset to turn the handset ringer on or off When the ringer is off the Off icon appears on the display panel When the rin...

Страница 29: ... the ringer off and the handset is not on the charger the handset vibrates when there is an incoming call If you set the ringer off and the handset is on the charger the handset uses Ring Type A Low 2 Stop pressing the RING VOL 3106C button or the R VOL 3107C button when the handset ringer reaches the desired volume You can also turn the handset s ringer tone on and off using the NBX NetSet utilit...

Страница 30: ...display panel if you enter a number that the phone does not recognize or cannot process 3 When you finish the call press the Talk button again to hang up the phone and put it in AutoStandby LCD Display Condition Indicator NO SERVICE or Connect to the phone port No LAN connection or no power to the base unit Error Tone LINE IN USE Line in use Error Tone NO SERVICE Handset at the phone s range limit...

Страница 31: ...en the receiving party answers press the Xfer button again to complete the transfer Using the Optional Headset The optional headset provides a hands free option for the 3Com Cordless Telephone With the headset installed you can use the beltclip to carry the handset and conduct a conversation using the headset To install the headset open the cover over the headset jack and plug in the headset No ot...

Страница 32: ...32 CHAPTER 2 3COM 3106C AND 3107C CORDLESS TELEPHONES ...

Страница 33: ...lboxes NBX Messaging Components A key component of the NBX Networked Telephony Solution is the NBX Messaging system which includes voice mail off site notification and several administrative features Voice mail allows callers to leave voice messages in your voice mailbox when you are not able to answer your telephone You can listen to save and forward those messages from any touch tone telephone I...

Страница 34: ...sages in your voice mailbox See Off Site Notification in Chapter 5 You can bypass system messages using option buttons if you are configuring passwords and greetings However you cannot bypass voice mail messages in this manner Changing Your Password You use the same 4 digit to 10 digit password to log in to the NBX NetSet utility and to access your NBX voice mail You can change this password with ...

Страница 35: ... also review delete or choose which to make active with the NBX NetSet utility If appropriate you may also want to change the greeting for an extension that is a greeting only mailbox so that callers do not attempt to leave messages See Greeting Only Mailbox later in this chapter To change your name announcement or personal greetings 1 Log in to your mailbox at your telephone or remotely 2 Press 9...

Страница 36: ...BX NetSet Utility in Chapter 1 If your system uses a messaging application other than NBX Messaging use the documentation for your messaging application instead of these instructions Message Indicators To tell if you have messages in your mailbox On a 3Com 3106C or 3107C Cordless Telephone The display panel shows the number of messages Example 3 Msgs 2 New In the NBX NetSet utility Log in as a use...

Страница 37: ...es from any 3Com Telephone other than your own within your NBX system 1 Press the Message button 2 Press and dial your extension You hear your name announcement 3 Dial your password and press 4 See page 38 for the buttons that you use to manage your messages Listening from an External Location To listen to your messages from an external telephone If you can dial your telephone extension directly P...

Страница 38: ...to listen to date time and sender information about the message See Information About Your Messages next Press 7 to back up 3 5 seconds in the current message Press 8 to pause the current message for up to 20 seconds Press 9 to move ahead 3 5 seconds when playing a message Press to move to the next message Press to return to the main menu Information About Your Messages To listen to date time and ...

Страница 39: ...ssage after you listen to it 1 Press 4 If the message has been sent to more than one person press 1 to reply only to the sender or press 2 to reply to all of the recipients 2 After the tone record your reply 3 Hang up or press for more options 4 If you press press one of these buttons Press 1 to send your reply Press 2 to re record your reply Press 3 to listen to your reply Press 9 mark the messag...

Страница 40: ...a Message as Private or Urgent later in this chapter Press to cancel your message 5 When you are ready to forward the message press 1 6 Dial one of these destination numbers plus The internal extension or mailbox number of the recipient A speed dial number See Speed Dials in Chapter 5 A voice mail group list number See Using Voice Mail Group Lists later in this chapter A site code plus extension t...

Страница 41: ...ent later in this chapter Press cancel the message 5 When you are ready to send the message press 1 6 Dial one of these destination numbers plus The internal extension or mailbox number of the recipient A speed dial number See Speed Dials in Chapter 5 A voice mail group list number See Using Voice Mail Group Lists later in this chapter A site code plus extension to send to a user on another NBX sy...

Страница 42: ... NBX NetSet utility To view System Voice Mail Groups 1 Log in to the Netset Utility and go to NBX Voice Mail Settings System Group List A list of System Group IDs and Names displays 2 To view the membership of any group click the Group ID A list of the system group members displays Creating Personal Groups You can create your own Personal Voice Mail Group either through the telephone or through th...

Страница 43: ... list through the NBX NetSet utility 1 Log in to the NetSet utility and go to NBX Voice Mail Settings Personal Group List You see a list of your current personal voice mail groups with Group IDs and Group Names 2 Click Add 3 Enter a Group ID a number from 01 99 that is not used for a current group 4 Enter a Name for the new group 5 Enter any VPIM extensions in the VPIMs box 6 Select members from t...

Страница 44: ... on the other system For valid site codes for your organization see your administrator c To delete one or more members from the group dial the destination number that you want to delete and then press 1 5 When you have added or deleted all of the destination numbers press 1 to save the modified group list 2 to cancel this modification to the group to return to the previous menu OR hang up To revie...

Страница 45: ...sage is sent as a Normal message Private Messages The recipient cannot forward the message to others Urgent Messages Places the message at the beginning of the recipient s message queue Urgent messages are heard first 1 Follow the steps in Replying to a Message Forwarding a Message or Creating and Sending a Message earlier in this chapter 2 In step 4 of those instructions press 9 3 To mark the mes...

Страница 46: ...box check box so that callers can leave messages again If you are a teacher you can create a new personal greeting on the school s NBX system every day to explain homework assignments Students call in to the greeting only mailbox to get the homework information but cannot leave a message for you on this mailbox If you are the administrator you can create a greeting only mailbox and use the persona...

Страница 47: ...ave messages in the your phantom mailbox and you can call in to the NBX system to retrieve them or you can listen to them from the NBX NetSet utility You retrieve messages from a phantom mailbox in the same way that you retrieve messages from a personal mailbox See Listening to NBX Messages earlier in this chapter Group Mailbox A group mailbox is a voice mailbox from which a group of users can ret...

Страница 48: ...48 CHAPTER 3 NBX MESSAGING ...

Страница 49: ...hapter Answering a Call To answer an incoming call remove the handset from the charging unit An unanswered call on any telephone on the NBX system is forwarded to the call coverage point that you specify in the NBX NetSet utility Call Forward Call Forward or Call Forward Override page To specify the number of times that your telephone rings before the call is forwarded or to specify where you want...

Страница 50: ...have placed one call on hold And you do not hang up the handset and the other line rings press the blinking System Appearance button for the call that is on hold to return to it Then press the blinking System Appearance button for the incoming call to answer it And you do hang up the handset and the other line rings remove the handset from the charging unit to connect to the incoming call Then pre...

Страница 51: ...e handset from the charging unit 2 Press the Talk button 3 If necessary dial 9 8 or whatever to access an external line If one of the Access buttons is configured to access an external line directly you can press that button 4 Dial the number Or use a personal or system wide speed dial number 5 When you are finished hang up the handset or press the Talk button again to end the call Redialing a Cal...

Страница 52: ...e destinations you forward your calls to when you do not answer They can be telephone extensions or external telephone numbers your voice mail box or an automated attendant Condition to Forward Calls You can choose when to forward calls Default Forwards unanswered incoming calls to your default call coverage point after a specified number of rings if you have not specified another condition Call F...

Страница 53: ...panel shows your current call forward destination Forward to Mail From the telephone you can set your 3Com Telephone so that all incoming calls go directly to your default call coverage point usually your voice mailbox You can change the destination to the Auto Attendant or receptionist or a different telephone number This feature is referred to as FWD MAIL Forward to Mail Forward All Calls to Voi...

Страница 54: ... Call Forward No Answer To set Call Forward No Answer 1 Remove the handset from the charging unit 2 Press the Talk button 3 Press Feature 466 4 Dial the extension that you want to forward calls to 5 Press You can specify the number of rings before the call is forwarded by logging in to the NBX NetSet utility and selecting the Call Forward Call Forward Override page You specify the number of rings ...

Страница 55: ...ility you can set default call forwarding or choose to override the default with the condition for call forwarding No Answer Busy or All and the destination For telephone numbers do not use parentheses hyphens or spaces When you specify an external telephone number start by entering a 9 or 8 or whatever is required to access an outside line Example 912815551212 dials 281 555 1212 You can enter a i...

Страница 56: ...you check the box calls that are not answered at the number you forward them to are passed on to your choice of User Voicemail Your voicemail box Default Menu The default automated attendant usually extension 500 Voicemail AA The default system voicemail usually extension 501 If you leave the box unchecked calls that are unanswered at the number you forward them to are passed on to the destination...

Страница 57: ...fications of the Call Forward page 3 Click Apply to enter your changes Call Forward Precedence Five features can interact to affect call forwarding Forward to Mail Call Forward No Answer Call Forward Busy Call Forward All and Do Not Disturb If they are enabled at the same time the NBX system determines precedence which call forwarding path is in effect according to the following rules If Call Forw...

Страница 58: ...NetSet utility Putting a Call On Hold To put a call on hold 1 Press the Hold button 2 To return to the call press the appropriate System Appearance button Dialing Another Call To place a call on hold and dial a new call 1 Press the Hold button 2 Press the System Appearance button that is currently not being used Typically the first two System Appearance buttons on the left of a 3Com Cordless Telep...

Страница 59: ...nd go to My Calling Privileges Call Permissions Your administrator can change your call permissions Announced Screened Transfer Before you complete a transfer you can announce to the recipient that you are transferring a call The recipient can then decide whether to take the call To announce a transfer 1 While on a call press the Xfer Transfer button The system places the call on hold and selects ...

Страница 60: ...Telephone 1 While you are on a call press Feature 441 2 Dial the voice mail extension to which you want to transfer the call 3 Hang up the handset Establishing a Conference Call Using Feature Codes You can establish a Conference Call with up to four parties including yourself depending on your NBX system configuration You must be using a telephone on the NBX system to establish the call The other ...

Страница 61: ...You cannot establish a conference call with an NBX user s voice mailbox 4 Repeat steps 2 and 3 to conference in a fourth party For details about the Mute features see Telephone Buttons and Controls in Chapter 2 Disconnecting the Last Person That You Called Use the Conference Drop feature to disconnect the last person that you add to a conference call This feature is helpful if when you add a party...

Страница 62: ...tomatically rings that extension While a call is camped on the caller hears either Music On Transfer MOT or silence if no music is provided The destination extension becomes available when the user ends the current call or puts the current call on Hold You initiate a Camp On call through Feature code 468 or a programmed system access button Examples 1 and 2 show two different ways for a user to in...

Страница 63: ...e call from extension 1001 Initiating Camp On With Call Transfer You can initiate Camp On with Call Transfer to queue a call to an in use destination extension 1 While on a call initiate a screened call transfer as described in Announced Screened Transfer earlier in this chapter 2 When you see On Another Call on your display panel for the destination extension press Feature 468 or press the Camp O...

Страница 64: ...out Camp On in this chapter More About Camp On These usage tips and limitations apply to Camp On A system wide Camp On Return Interval determines how long a caller can stay camped on to an extension The default Camp On Return Interval is 180 seconds three minutes The NBX administrator can configure it to be anything from 30 seconds to 10 minutes If the Camp On Return Interval expires the camped ca...

Страница 65: ...ation Extension is In Use One or more but not all of its system appearance lines are presently being used In this condition you can use either Camp On with Call Transfer or Direct Camp On to queue a call on to the destination extension If the Destination Extension is Busy All of its system appearance lines are presently being used In this condition you can use only Direct Camp On to queue a call o...

Страница 66: ... call to an extension that is in use or unanswered press Feature 469 or press the Automatic Callback Access button if one is programmed on your telephone 2 Disconnect from the call If the Automatic Callback attempt is successful the message Callback Extension XXX appears on your display panel If the Automatic Callback attempt is not permitted the message Not Allowed appears on your display panel S...

Страница 67: ...followed by an on hook event Invoking Directory followed by an on hook event Going off hook then on hook Using Feature 111 to terminate a session You cannot initiate an Automatic Callback to An external number An ACD extension A Hunt Group extension A TAPI RoutePoint extension A Call Park extension An extension receiving a transferred call A Phantom extension You cannot initiate Automatic Callback...

Страница 68: ...68 CHAPTER 4 STANDARD FEATURES ...

Страница 69: ...o set up your NBX NetSet utility password for the first time see Chapter 1 If your system uses a messaging application other than NBX Messaging use the documentation for your messaging application instead of these instructions Guidelines About Features on 3Com Telephones If your telephone does not have a button programmed for Feature ask your administrator to program one Because your administrator...

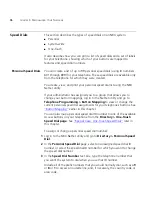
Страница 70: ... administrator enables this feature for your user group You can also modify the button mappings for a telephone to override group button mappings unless your administrator has locked a particular feature or features A lock icon in the NetSet display indicates whether the button can be remapped Call forwarding can occur when locking is enabled To check if button mapping is available for your teleph...

Страница 71: ...l Forward No Answer feature Call Forward No Answer in Chapter 4 CLIR All Press this button to toggle on and off the Caller ID All all external calls feature CLIR for All External Calls in Chapter 7 CLIR Next Press this button to toggle on and off the Caller ID Next next external call only feature CLIR for Next External Call Only in Chapter 7 Call Toggle Press this button to toggle between two call...

Страница 72: ...he group login logout Feature Codes login numbers to this button Ask your administrator for what login number to use Each login number logs you in or out of the associated group Automatic Call Distribution Groups Hunt Groups and Calling Groups in Chapter 7 Line Extension Use this button to map to the extension of another telephone to create a Busy Lamp Speed Dial or Analog Terminal Adapter ATA Onl...

Страница 73: ...ized Use of Your Telephone Park Press this button and dial a valid Call Park extension to park the current call To retrieve a parked call from a Call Park extension press the Park button and then dial the extension on which the call was parked Call Park in Chapter 7 PG 482 531 PG 500 531 on NBX 100 Press this button to pick up a call on any extension in the selected Pickup Group without dialing th...

Страница 74: ...e current call and leave the telephone idle on hook This feature is useful if you use a headset when you make calls Using a Headset later in this chapter SSD System Speed Dial Maps a System Speed Dial number to the button Speed Dials later in this chapter Switch to DTMF Press this button to switch this Analog Line Card port from pulse dialing to tone dialing DTMF You cannot switch from tone dialin...

Страница 75: ... call could ring immediately at telephone 1 begin ringing at telephone 2 after 4 rings and then begin ringing at telephone 3 after 8 rings Any of the telephones can pick up the call at any time even if it has not yet started ringing at a particular telephone Delayed Ringing works only when your administrator maps telephone company lines directly to buttons on two or more telephones or defines brid...

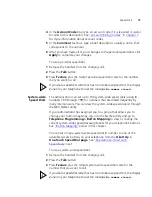
Страница 76: ... to Telephone Programming Button Mapping to view or change the current personal speed dial assignments for your telephone s buttons See Button Mapping earlier in this chapter You can also map a personal speed dial ID number to one of the available Access buttons on your telephone from the Directory One Touch Speed Dial page See Special Case One Touch Speed Dials later in this chapter To assign or ...

Страница 77: ...ls using ID numbers 700 through 799 for numbers that are dialed frequently by many internal users You can view the system wide speed dial list through the NBX NetSet utility If your administrator has assigned you to a group that allows you to change your button mappings log in to the NetSet utility and go to Telephone Programming Button Mapping to view or change the current system wide speed dial ...

Страница 78: ...umber in a box that already has a speed dial number Include all of the prefix numbers that you would normally dial such as a 9 or 8 or 1 to access an outside line and if necessary the country code or area code The complete number string can be longer than the box To include an account code in a one touch speed dial number enter the feature code account code and before the telephone number Example ...

Страница 79: ...nd the page in the LabelMaker that has labels for your telephone 4 Edit the label template by clicking any of the label text boxes to highlight the existing text and then typing new text 5 Press Tab to move to the next text field in the label 6 Click the Print button at the top of the LabelMaker screen to open the Print dialog Be sure to specify which page you want to print Typically the default i...

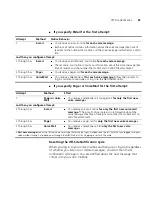
Страница 80: ...eatures enabled 2 Go to NBX Voice Mail Settings Off Site Notification 3 Select whether you want off site notification for all messages or for urgent messages only Next you will need to configure the Off Site Notification Attempts for up to five attempts at off site notification 4 In the first Attempt row in the Method drop down list select Pager VoiceMail or EMail The cycle of notice behaviors dif...

Страница 81: ...e attached to the e mail message as a WAV file See the tables in Notice Behaviors later in this section You can listen to the messages using your PC sound device a USB headset or a sound card with either speakers or headphones If you delete the e mail notice with its attached WAV file after you listen to the message you delete only the copy The original voice mail message remains in your NBX voice...

Страница 82: ...ailbox is full and someone tries to leave you a voice mail message the NBX system does not send you an e mail notification When you activate the Telephone Locking feature on your telephone the NBX system sends you off site notification messages only if the notification number for example your pager number is a toll free telephone number See Telephone Locking later in this chapter Notice Behaviors ...

Страница 83: ...number that called and no WAV file attachment 2 through 5 as Pager You receive a pager call for each voice message 2 through 5 as VoiceMail You receive a telephone call for each voice message Follow the prompts to log in and listen to messages or log in to the NBX NetSet utility Attempt Method Effect 1 Pager or Voice Mail You receive a telephone call or pager call for only the first new voice mess...

Страница 84: ... to your default call coverage point without ringing You set the default call coverage point from the NBX NetSet utility by going to Call Forward Call Forward See Forwarding Incoming Calls in Chapter 4 If Call Forward All is in effect it overrides Do Not Disturb Calls go to the call coverage point defined for Call Forward All in the Call Forward Call Forward Override page You can ask your administ...

Страница 85: ... 3Com Cordless Telephone shows DO NOT DISTURB when the phone is in AutoStandby mode 5 To disable Do Not Disturb mode repeat the above steps The DO NOT DISTURB message disappears from the display panel To view your current Do Not Disturb setting even if you do not have a 3Com Telephone or if you are away from your desk log in to the NBX NetSet utility and go to My Calling Privileges Feature Setting...

Страница 86: ...ministrator establishes Call Permissions to control the types of calls that can be dialed from your telephone The administrator can configure these permissions to change depending on the time of day For example your administrator can prevent long distance calls from being dialed from your telephone outside of business hours To view your current call permissions from the NBX NetSet utility go to My...

Страница 87: ...atures of your own 3Com Telephone were applied temporarily to the telephone on which you made the call Using a Headset You can use a headset that has a microphone with any telephone on an NBX system You may need to modify some of these instructions for some headsets or amplifiers See the instructions that come with your equipment To prepare a headset for calls 1 Assemble the headset following the ...

Страница 88: ...88 CHAPTER 5 PERSONALIZING YOUR TELEPHONE ...

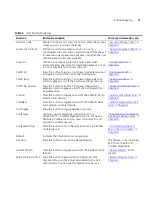
Страница 89: ... your telephone does not have a button programmed for Feature ask your administrator to program one Because your administrator determines whether some of the features that are described in this chapter are available for your telephone or for the entire system some of these features might not be available to you 3Com Cordless Telephone Some of the features that are listed in Table 6 are already ava...

Страница 90: ...code number your password or an extension as specified in Table 6 Confirmation Tone After certain steps as when you add a party to a conference call you hear a short Confirmation Tone or beep which confirms that you have completed the action Error Tone You hear the fast busy tone also called the congestion tone when no circuits are available In addition you hear the Error Tone if you make an error...

Страница 91: ...eature the feature code and any additional values as specified in Table 6 3 Hang up when your call is complete or you have activated the features that you want Table 6 NBX Feature Codes Alphabetical by Feature or Task Feature Feature Code See Account Codes F 888 account code telephone number Account Billing Codes in Chapter 7 ACD Hunt and Calling Groups F feature code for the group group password ...

Страница 92: ...ride in Chapter 5 Conference Call Add F 430 telephone number F 430 Establishing a Conference Call Using Feature Codes in Chapter 4 Conference Call Drop F 431 Establishing a Conference Call Using Feature Codes in Chapter 4 Direct Mail Transfer F 441 other person s extension hang up Direct Mail Transfer in Chapter 4 Do Not Disturb On Off F 446 Managing Off site Notification Using the Telephone in Ch...

Страница 93: ...ting Up Your Password and Voice Mail for the First Time in Chapter 1 Password Change F 434 current password new password repeat your new password Setting Up Your Password and Voice Mail for the First Time in Chapter 1 Pulse to Tone Make or receive a call F 891 Bridged Extensions in Chapter 7 Redial F 401 Redialing a Call in Chapter 4 Release F 111 Using a Headset in Chapter 5 Show Lists F 460 On t...

Страница 94: ...perPage F 426 destination extension brief delay 0 9 9 sec then begin whispering WhisperPage in Chapter 7 Wrap Up Time F 972 Wrap Up Time in Chapter 7 Table 6 NBX Feature Codes Alphabetical by Feature or Task Feature Feature Code See ...

Страница 95: ...hisperPage Call Park Paging Configurable Operators Using Message Waiting Indicator to Telephone Dialing a Call to a Remote Office Bridged Extensions Using Pulse Dialing Additional Applications If your system uses a messaging application other than NBX Messaging use the documentation for your messaging application instead of the instructions in this chapter For information on how to set up your NBX...

Страница 96: ...om the NBX system you must access your voice mailbox through the telephone or the NBX NetSet utility See Off Site Notification in Chapter 5 for a discussion of off site notification behavior Account Billing Codes Account Codes allow your administrator to track calls that are associated with an individual client or account When you dial a call or when you answer your telephone you dial a numeric ac...

Страница 97: ...rent call if you activate the Account Codes feature during a call Caller ID Your administrator can set up your NBX system to allow for Internal and External Caller ID or can configure the system so that you can block your identity telephone number from anyone you call Internal and External Caller ID By default the NBX system shows the extension and name of any internal caller on the display panel ...

Страница 98: ...ays active in which case you cannot change the CLIR settings on your telephone to override this option CLIR for All External Calls To enable CLIR All for all calls from your 3Com Cordless Telephone 1 Remove the handset from the charging unit 2 Press the Talk button 3 Press Feature 889 The display panel on your 3Com Cordless Telephone shows CLIR ALL on 4 Dial the number that you want to call The NB...

Страница 99: ... call that is ringing on another telephone This feature is best arranged in advance when you and another user know that it would be convenient or necessary to answer calls ringing on that user s telephone You can answer a call that is ringing on another telephone only if you and that user both are members of the same Call Pickup group or if that user is a member of a Call Pickup group that allows ...

Страница 100: ...and ensures that those calls are sent to the proper destination within the site The call center can be used for example as a help desk a reservations counter an information hotline or a customer service center If you do not answer calls that come in to your telephone Through your extension go to the call coverage point that you have set up Through automatic call distribution groups hunt groups and...

Страница 101: ...up 4 Dial the ACD group password 5 Press and hang up Your administrator can configure an ACD group to an Access button To log in to or to log out of the ACD group press the specified Access button The button lights to show that you are logged in To log in to an ACD group using the NBX NetSet utility To log in to an ACD group using the NBX NetSet utility 1 Go to Group Membership ACD Groups 2 Select...

Страница 102: ...ocked into the ACD group only the administrator can log you out If your extension is not locked into the ACD group you can log yourself out You can also perform the following actions Select All Select for an action all ACD groups of which you are a member Login Log in to the selected ACD group or groups Logout Log out from the selected ACD group or groups Detail Opens the ACD Groups screen which p...

Страница 103: ...what is allotted by default you can use the Extend Wrap Up Time feature Extend Wrap Up Time If the Wrap Up Time feature is enabled by the ACD administrator the Extend Wrap Up Time feature is enabled by default and allows an agent to extend the Wrap Up Time period for the same time duration as the Wrap Up Time This feature is valid only if you are already in the wrap up mode You can activate the Ex...

Страница 104: ...u must log in to the group to be part of it To log in to a dynamic hunt group using your 3Com Cordless Telephone 1 Remove the handset from the charging unit 2 Press the Talk button 3 Press Feature the feature code for the hunt group Your administrator can tell you which feature code to use 4 Dial the hunt group password Your administrator can tell you which password to use 5 Press 1 Incoming Telep...

Страница 105: ...utility 1 Go to Group Memberships Hunt Groups 2 Select the hunt group to which you want to log in 3 Click Login If you log in to a dynamic hunt group and do not answer a call when it rings on your telephone the system may log you out of the group depending on how the administrator has configured the group To log out of a dynamic hunt group using the NBX NetSet utility 1 Go to Group Memberships Hun...

Страница 106: ...ry Monitoring Supervisory monitoring is a feature that is typically used in call centers to allow supervisors to join a conversation between an agent and a customer to ensure proper customer support The supervisor s presence may or may not be announced to the agent or customer by a tone Supervisory monitoring enables monitoring of incoming calls to Automatic Call Distribution Groups and Hunt Group...

Страница 107: ...minology The following definitions help to explain how Supervisory Monitoring works in the NBX system Supervisory Monitoring Domains are created by the NBX System Administrator and specify the following information The supervisory monitoring domain s unique name and password The types of calls that can be monitored Incoming Group ACD HG or RP Only calls or All calls The calling groups ACD HG or RP...

Страница 108: ...e users can toggle Call Privacy on and off to block or accept supervisory monitoring on a call by call basis In contrast membership in the Privacy List domain set by the administrator ensures that all calls associated with this user cannot be monitored The NBX administrator can enable or disable Call Privacy for each Class of Service CoS user group If your administrator assigned you to a CoS group...

Страница 109: ...te a call and then exit the call the Call Privacy settings are no longer applicable and the next call will be open to monitoring More About Supervisory Monitoring The following usage tips and limitations apply to Supervisory Monitoring for the 3Com Cordless telephone Although calls on a 3Com Cordless telephone can be monitored a supervisor cannot use a 3Com Cordless telephone to monitor an agent A...

Страница 110: ...l when the assistant starts a WhisperPage session the call is placed just as if the assistant dialed the manager s extension Both the manager and the assistant in a WhisperPage session must be assigned to a WhisperPage domain and have appropriate WhisperPage access privileges To view your WhisperPage access privileges log in to the NBX NetSet Utility and go to System Group Settings WhisperPage Thi...

Страница 111: ...ll hear a tone that tells you to begin the WhisperPage session Additionally your telephone s display panel shows Whispering and the listener s extension 4 Begin speaking When you have finished go off hook to end the WhisperPage session More About WhisperPage The following usage tips and limitations apply to WhisperPage The WhisperPage listener can refuse or end a WhisperPage session at any time by...

Страница 112: ...sts the default Call Park extension numbers Ask your administrator to verify the Call Park extensions for your location If the call is not answered within 5 minutes default after it is parked it rings again at the original telephone Your administrator can modify the length of this waiting period To park a call 1 While you are on a call press Feature 444 2 Dial a Call Park extension from the list s...

Страница 113: ...pages to other 3Com Telephones on your system that do have speakers You cannot receive pages or be a member of a zone paging group You can Page all extensions with speakers on the system This method uses the default codes in Table 8 Page a subset of all extensions on the system called a zone This method uses extensions that the Administrator configures for this purpose Each method allows you to br...

Страница 114: ...nd the P A system simultaneously Zone extensions are configured by the System Administrator To discover the page zone extensions on your system 1 Log in to the NBX NetSet Utility and go to System Group Settings Page Zones The NBX NetSet utility lists the existing page zones and their extension numbers 2 Click the page zone extension to list the members of that zone Table 8 Paging Codes Feature 3 d...

Страница 115: ...configure your own operators for those who call your extension if the administrator allows it and you can also use this feature as a caller to another device How Configurable Operators Work Following is a brief description of how the system directs a caller from your voice mail to operators that you designate 1 If you do not answer a call the system invokes your voice mail 2 The caller listens to ...

Страница 116: ...o to My Calling Privileges Call Permissions Your current permissions to configure the System Operator and the Personal Operator are listed Configuring the Operator Destinations To configure your own destinations for System and Personal Operator 1 Log in to the NBX NetSet Utility and go to NBX Voice Mail Settings Personal Operator The current System Operator and Personal Operator extensions and acc...

Страница 117: ...elephone on your NBX system that has an MWI Retrieve button enabled Sending an MWI message turns on the light on the target telephone if it is not already lit and leaves your telephone number as a callback number You use feature codes or your administrator can configure Access buttons on your telephone to send and cancel MWI messages You cannot send an MWI message to Telephones that are not enable...

Страница 118: ...el on your 3Com Telephone shows Cancel Sent The Confirmation Tone plays Dialing a Call to a Remote Office You can dial calls between sites in your organization that are separated geographically but that are linked by a Wide Area Network WAN connection Each site must have an NBX system Typical configurations are described in the next sections Using Unique Extensions In the sample network shown in F...

Страница 119: ...llowed by the extension at the site For example as shown in Figure 8 to call someone in Atlanta a user in Chicago dials the site code 62 and then the appropriate extension 1000 through 3999 To reach a user in Dallas a user in Chicago dials 63 and then the appropriate extension 1000 through 3999 The site code prevents conflicts between the remote extension number and a duplicated extension number a...

Страница 120: ... on On the secondary telephone you can answer calls that are made to the primary telephone s extension but you cannot make calls using the buttons that are associated with the primary telephone The administrator can create bridged extensions to the 3Com Cordless Telephone s third and fourth Access buttons if an NBX Attendant Console is associated with it The administrator creates the bridged 1 NBX...

Страница 121: ...n map a primary telephone s extension to one or more secondary telephones Using Pulse Dialing In some locations analog telephone users must dial telephone calls using pulse dialing instead of tone dialing also called Dual Tone Multi Frequency or DTMF dialing Your administrator must configure the Analog Line Card ports for pulse dialing Examples Some of your telephone lines are provided by a teleph...

Страница 122: ...hrough a Mapped Button Your administrator can map a button on your telephone so that you can press the button to change from pulse dialing to DTMF during a call When you hang up the port that you were using on the Analog Line Card reverts to pulse dialing mode Through a Personal Speed Dial You can configure a personal speed dial in the NBX NetSet utility to dial a number in pulse dial mode and the...

Страница 123: ... These software applications are available on the NBX Resource Pack CD NBX Call Reports NBX TAPI Service Provider NBXTSP NBX Desktop Call Assistant formerly NBX TAPI Dialer Complement Attendant Software Palm Dialer pcXset Soft Telephone NBX Media Driver ...

Страница 124: ...124 CHAPTER 7 GETTING MORE FROM YOUR TELEPHONE SYSTEM ...

Страница 125: ...ng on the Wall Attaching the Beltclip to the Handset Installing the Handset Battery Pack Charging the Handset Battery Pack Charging an Optional Spare Battery Pack 3Com 3107C Low Battery Indicator Cleaning the Battery and Charging Unit Contacts Moving Your Telephone Swapping Telephones Cleaning Your Telephone Important Safety Instructions Troubleshooting Problems Telephone Specifications ...

Страница 126: ... using three or fewer 3Com Cordless Telephones at your site and require maximum operating range use 3Com 3107C units If you are using more than three 3Com Cordless Telephones at your site use 3Com 3106C units For optimum performance place base units at least 15 feet apart Place base units in the center of their coverage areas Place base units close to windows when coverage areas extend outdoors If...

Страница 127: ...ates over the LAN not through traditional telephone wiring Your telephone s base station connects to the LAN through an RJ45 connector instead of an RJ11 telephone connector Your telephone does not work if it is connected improperly Ask your administrator if you have questions about your telephone connection CAUTION Never install telephone wiring during a lightning storm Never touch uninsulated te...

Страница 128: ...AUTION Place the power cord so that it does not create a trip hazard or where it could become chafed and create a fire or other electrical hazards If you cannot plug the AC adapter into the outlet contact someone about replacing the outlet You can place the handset in the charging unit with or without the beltclip attached Figure 9 3Com 3106C Charging Unit 1 AC adapter 1 2 1 ...

Страница 129: ...1 AC adapter 2 Optional battery pack Installing on the Wall You can mount the 3Com Cordless Telephone base unit directly on a wall Before you do so follow these guidelines Select a location away from electrical cables pipes or other items behind the mounting location that could cause a hazard when inserting screws into the wall Verify that the wall material is capable of supporting the weight of t...

Страница 130: ...annel on the bottom of the wall mount stand 4 Plug one end of the RJ45 cable into the jack on back of the base unit Then place the cable inside the molded channel on the bottom of the wall mount stand 5 Place the base unit on the posts of the wall screws and push down until it is firmly seated 6 Plug the free end of the RJ45 cable into the LAN as specified by your NBX Administrator 7 Plug the AC a...

Страница 131: ...on that could cause a hazard when inserting screws into the wall Verify that the wall material is capable of supporting the weight of the charging unit Use 10 screws with anchoring devices suitable for the wall material 1 Insert two mounting screws into the wall with about 3 16 of an inch between the wall and screw heads for mounting the phone 3Com 3106C 3Com 3107C 1 1 5 in 3 16 in Insert the scre...

Страница 132: ...nd 3Com 3106C Pass the one end through the hole of the wall mount stand and plug it into the charging unit Wrap the AC adapter cord around the strain relief 1 3Com 3107C Wrap the AC adapter cord around the strain relief 1 Slide the wall mount stand into the notches on the bottom of the charging unit 1 1 ...

Страница 133: ...ing unit on the posts of the wall screws and push down until it is firmly seated 1 indicates the strain relief on the 3Com 3107C 4 Plug the AC adapter into a standard 120V AC wall outlet 3Com 3106C 3Com 3107C 1 1 5 in 3 16 in 3 16 in 1 9 10 in 1 ...

Страница 134: ...ltclip notch at the top of the handset 2 Both telephones Slide the beltclip into the tab slot The beltclip is designed to fit snugly onto the handset 3 Both telephones Press firmly until the clip snaps into place 4 Both telephones To remove the beltclip simultaneously press the retaining clip in toward the beltclip blade and slide the clip up 3Com 3106C only After the beltclip is removed reinstall...

Страница 135: ... connected correctly to the corresponding colored connectors inside the battery compartment CAUTION Do not exert force when making this connection You could damage the battery or handset After you are certain that you have made a good connection insert the battery pack into the battery compartment CAUTION Do not pinch the wires 3 To install the battery cover place it in the groves and slide the co...

Страница 136: ...m 3107C 1 Remove the battery cover by sliding it down until it comes off the handset You may have to remove the old battery 2 Slide the battery pack down into the handset 3 To close the battery compartment cover slide it up until it snaps securely into place ...

Страница 137: ...ess Telephone for the first time Charge the battery pack without interruption for 5 hours 1 Place the handset in the front slot of the charging unit 2 Verify that the CHARGE indicator is lit If the CHARGE light is out verify that the AC adapter is plugged in and that the handset is making good contact with the charging unit contacts 3Com 3106C 3Com 3107C ...

Страница 138: ... When charging is complete press out on the latch and remove the battery pack for use Or if you don t need the battery pack immediately leave it in the charging compartment it will not overcharge Low Battery Indicator When the battery pack in the handset is low and needs to be charged you see the message LOW on the display panel Return the handset to the charging unit for charging or on the 3Com 3...

Страница 139: ...one has a unique address You can move your 3Com Cordless Telephone s base unit to another location connect it to any RJ45 jack on the LAN and still maintain all of your personalized features speed dials and extension number Swapping Telephones Because your extension number and personal settings are associated with your physical telephone only your administrator can move phone extension settings fr...

Страница 140: ...provided This product should be operated only from the type of power source indicated on the marking label Do not allow anything to rest on the power cord Do not place this product where the cord could be damaged by persons walking on it Do not overload wall outlets and extension cords as this can result in the risk of fire or electrical shock Never put objects of any kind into this product throug...

Страница 141: ...te type and size battery pack specified in this Guide Do not dispose of the battery pack in a fire The cell may explode Do not open or mutilate the battery pack Released electrolyte is corrosive and may cause damage to the eyes or skin It may be toxic if swallowed Exercise care in handling the battery in order not to short the battery with conducting materials such as rings bracelets and keys The ...

Страница 142: ... with the qualification that the range depends upon the environment in which the telephone is used Many factors limit range and it would be impossible to include all the variables in our rating The Maximum Range rating of this phone is meant to be used as a means of comparison against other range claims Telephone Line Problems The FCC and IC have granted the telephone company the right to disconne...

Страница 143: ...may be receiving radio signals from another 3Com Cordless Telephone or another source of interference If you cannot eliminate this type of interference you need to change to a different channel Finally some telephones operate at frequencies that may cause interference to nearby TVs and VCRs To minimize or prevent such interference the base of the 3Com Cordless Telephone should not be placed near o...

Страница 144: ...Your mailbox may be full Log in to your voice mailbox and delete some messages Your telephone may be set up for Greeting Only Mailbox Log in to the NBX NetSet utility and go to NBX Voice Mail Settings Personal Greeting and clear the Greeting Only Mailbox checkbox When I park a call the display panel shows Park xtn in use and the call returns to my telephone You have selected a Call Park extension ...

Страница 145: ...t a few seconds If the telephone continues to ring disconnect the electrical power for your telephone and then plug it back in The display panel shows Wait for NCP Your telephone may be disconnected from the system Hang up your telephone and wait a few seconds Then remove the handset from the charging unit If the message still appears on your telephone display panel contact your administrator I di...

Страница 146: ...ttery pack for 5 6 hours Make sure the base unit antenna is fully vertical The handset may be too far away from the base unit Ensure the Ringer ON OFF switch is in the ON Position Make sure the AC adapter is plugged into the base unit and wall outlet Table 9 Possible Problems continued Possible Problem Suggested Solutions ...

Страница 147: ... x 2 1 4 in H 3Com 3107C 4 1 4 in W x 7 1 2 in D x 2 1 4 in H Weight 3Com 3106C Approx 13 7 oz 3Com 3107C Approx 15 4 oz Handset Receive Transmit Frequency 902 MHz to 928 MHz Power Requirements Ni MH battery pack Size 3Com 3106C 2 in W x 1 1 4 in D x 5 1 2 in H without antenna 3Com 3107C 2 1 5 in W x 1 2 3 in D x 8 2 3 in H with antenna Weight 3Com 3106C Approx 5 2 oz with battery 3Com 3107C Appro...

Страница 148: ...148 APPENDIX A TELEPHONE INSTALLATION AND MAINTENANCE ...

Страница 149: ...talling 3106C Cordless Telephone 135 installing 3107C Cordless telephone 136 low power indicator 138 precautions 141 spare 3107C Cordless Telephone 138 beltclip attaching to handset 134 billing and account codes 96 blocking internal and external ID 97 unauthorized outbound calls 85 branch offices calling 118 bridged extensions 120 broadcasting announcements 113 114 busy line call forwarding 52 but...

Страница 150: ...92 adding parties 61 drop feature code 92 dropping last party 61 introduction 60 configurable operators 115 connecting telephones caution RJ45 versus RJ11 jacks 127 conventions typographical 10 CoS override feature code 92 creating voice mail messages 41 customer supervisory monitoring 108 D dial tone troubleshooting a 3Com Telephone 144 dialing calls other methods 51 redial 51 switching from puls...

Страница 151: ...pping 72 flash feature code 92 forgot my password 34 36 forwarding calls all to voice mail feature code 92 directly to another user s mailbox 60 to voice mail 53 to your call coverage point 52 to your voice mailbox 52 53 unanswered calls 52 forwarding voice mail messages 40 FWD MAIL 53 G Greeting Only mailboxes 46 group call pickup 100 group lists personal voice mail creating 42 modifying 43 group...

Страница 152: ...mail group lists system 42 mailboxes greeting only 46 group 47 phantom 47 setting up personal 13 maintenance telephone 125 making calls 30 managing incoming calls 50 message button 26 button 3106C Cordless Telephone 22 button 3107C Cordless Telephone 25 creating and sending 41 forwarding 40 listening to from a remote location 37 listening from telephone 37 listening NBX NetSet 36 maximum length 34...

Страница 153: ...ed dial lists 78 privacy 143 Privacy List 107 private messages 45 problems solving 125 programmable access buttons 25 public address system 113 114 pulse dialing 121 pulse to tone feature code 93 putting calls on hold See hold Q Quick Reference sheets 17 R R VOL button 3107C Cordless Telephone 24 radio interference 143 receptionist definition 10 redial calls 51 Redial button button mapping 74 redi...

Страница 154: ...lling on wall 129 kit contents 127 line problems 142 maintenance 125 moving and swapping 139 range 142 telephone number for Off site notification 81 time of day calling restrictions 85 toll calls preventing others from dialing 86 tone 3Com telephone and feature code 90 dialing 121 ringer selection 70 transfer button Xfer 3106C Cordless Telephone 21 button XFER 3107C Cordless Telephone 24 calls 31 ...

Страница 155: ...Z 155 access privileges 110 button mapping 74 introduction 110 starting a session 111 Windows Desktop shortcut for LabelMaker 79 wrap up time 103 user button mapping 74 Z zone paging 113 ...

Страница 156: ...156 INDEX ...

Страница 157: ...unit is fully extended when needed In the unlikely event that you consistently hear other voices or distracting transmissions on your phone you may be receiving radio signals from another cordless telephone or other source of interference If you cannot eliminate this type of interference you need to change to a different channel Finally it should be noted that some cordless telephones operate at f...

Страница 158: ......

Отзывы: