background image

11

Configuration

1. Set the unique address for each thermostat from 01 to 20.  
2. Press and hold the 

Menu

button until you see the system mode

display on the lower right begin to scroll and change modes; then
press and hold the 

Heat/Cool

button with the 

Menu

button.  

3. When the display shows “address” and the setpoint temperature

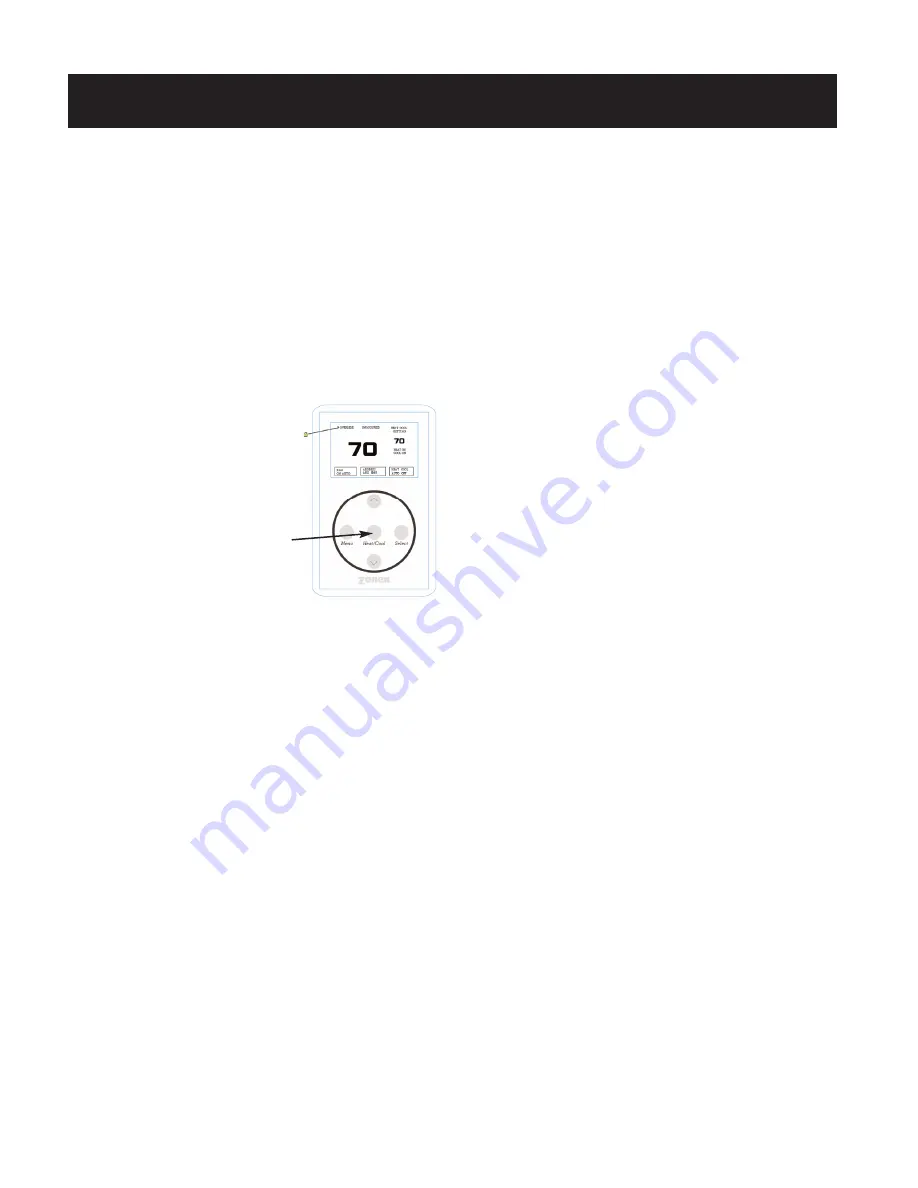
MANUAL ADJUSTMENTS
Heat and Cool Setpoint Display

Press the 

Heat/Cool

button to display the Heat or Cool setpoint temperatures.

Temperature Setpoints
COOL Setpoint

1. Press the 

Heat/Cool

button to display the

Cool setpoint on the upper right.

2. Press the 

UP

or 

DN

buttons to change the

Cool setpoint.

HEAT Setpoint

1. Press the 

Heat/Cool

button to display the

Heat setpoint on the upper right.

2. Press the 

UP

or 

DN

buttons to change the

Heat setpoint temperature.

FAN Mode

To change the FAN operation to AUTO or ON, press the 

UP

and 

DN

buttons together, once to toggle fan operation.

HVAC system mode

To select Heat, Cool, Auto, Emergency Heat (HP only) or OFF, press and

hold the 

Menu

button; and when the desired mode is displayed, press

and hold the 

Select

button; then release both to confirm mode.

Override

When the system is in the Unoccupied mode, the thermostat provides a

2-hour override for after-hours system operation. To select the 2-hour

override, press the 

Select

button and note “Override” indicated on the

display, along with the backlight coming on. When additional override is

required, press the 

Select

button again.

Calibration

When re-calibration is required, press and hold the 

Heat/Cool

and

Select 

buttons simultaneously (the screen will flash). Then press the 

UP

button once to increase temperature 1°, or press the 

DN

button once to

decrease the temperature 1°. If additional calibration is required, repeat

this step.

THERMOSTAT OPERATION
Display 

The grey display backlight is constantly illuminated in the Occupied mode.
The display backlight goes off when in the Unoccupied mode. When in the
Unoccupied mode, if any button is pressed, the backlight will illuminate
for 5 seconds. If the thermostat is placed into the override mode, the
backlight will illuminate until the 2 hours times out. To terminate
override, press the 

Select

button again.

COOL – DIGICOM / DIGIHP

: The thermostat will make a Y1 cool call

when the space temperature rises 1° above the cool setpoint. Y2 will
energize when the space temperature rises 2° above the cool setpoint.
When the room temperature is less than 2°from setpoint, Y2 de-energizes.
Y1 de-energizes at setpoint. O or B is energized for the reversing valve
circuit, depending on configuration. The G circuit is energized for fan.

HEAT – DIGICOM:

The thermostat will make a W1 heat call when the

space temperature is 1° below the heat setpoint. W2 will energize when
the space temperature is 2° below the heat setpoint. When the room
temperature rises to within 2° of the heat setpoint, W2 de-energizes.
W1 de-energizes at setpoint.

NOTE: The “G” fan circuit on the 

DIGICOM

thermostat is not energized

in the Heat mode unless the fan is set for ON operation.

HEAT – DIGIHP:

The thermostat will make a Y1 heat call when the space

space temperature is 2° below the heat setpoint. E (aux heat) will
energize when the space temperature is 3° below setpoint. When the
room temperature rises to within 2° of the heat setpoint, E (aux heat)
de-energizes. When the room temperature rises to within 1°, Y2
de-energizes. Y1 de-energizes at setpoint.

Emergency Heat – DIGIHP:

When Emergency heat is selected on the

DIGIHP

thermostat, on a call for heat, there is an output signal on “E”

for backup heat and “G” for the fan. The compressor circuits “Y1” and
“Y2” are locked out during heat calls until Auto, Heat or Cool mode is
selected. The thermostat display will indicate when Emergency Heat has
been selected.

DIGICOM – FAN

operation for electric heat applications: A pilot relay

may be required to energize the fan for heat operation on electric heat
applications. This relay is a 24vac coil – SPST and is field supplied. The coil
is energized from W1 and C from the 

DIGICOM

thermostat terminal base.

DIGICOM / DIGIHP THERMOSTATS

changes to the address number, release 

Heat/Cool

 and 

Menu

 buttons

and press the 

UP

or 

DN

button to raise or lower the number.

Reversing Valve Mode

DIGIHP

 (

O&B

) is factory set at "

O

" and can be field configured for "

B

"

reversing valve operation.  For "

B

" mode reversing valve (reversing valve

energized in the heat mode), press and hold the 

Heat/Cool 

and 

Select

temperature is 1° below the heat setpoint. Y2 will energize when the

buttons; then press and release the 

Menu

 button once. Release the 

Heat/

Cool

 and 

Select

 buttons.   The ° symbol next to the set point display

should disappear.  Repeat steps above to go back to "O." 

Summary of Contents for ZonexCommander

Page 1: ...1 Installation and Applications Manual Part ZCMAN ZonexCommander ZonexCommander Plus Network All Your HVAC Equipment Centralized DDC Communications for Stand Alone HVAC and Zoned Systems Rev Oct 2014...

Page 2: ...view 16 Sequence Of Operation 17 18 Command Center ZonexCommander Plus 19 Installation Instructions 20 ModStat Thermostat and Supplemental Heat Applications 21 22 Sequence Of Operation 23 RMOD Termina...

Page 3: ...Zonex is designed to network one or multiple zoned units on one two wire twisted pair for remote communications over the Internet in buildings too large for multiple programmable thermostats but too...

Page 4: ...provide expansion capability to to 20 devices ModStat MODS2 DIGICOM thermostats and for multiple zoned HVAC systems Each Command Center supports up For use with ZonexCommander Plus systems only capac...

Page 5: ...pumps blowers lighting etc The devices to be cycled ON and OFF by programmed schedules in the Commander software Status is displayed on the REVIEW screen for dedicated address from 01 to 20 The load a...

Page 6: ...es are controlled with a relay device RLYCOM Each of these devices can be scheduled through the simple Windows based ZonexCommander software and communicate to the Command Center via a daisy chained 2...

Page 7: ...oftops or split systems COMMUNICATING ACCESSORIES Optional STAND ALONE EQUIPMENT COMMAND CENTER 21 to 80 additional 20 Thermostats Stand Alone Equipment SENDCOM Duct Temperature Sensor 1 per HVAC unit...

Page 8: ...hen Emergency Heat is selected Y1 and Y2 are de energized and W2 and G are energized When the DIGIHP thermostat is configured for O reversing valve on an active heat call the O B output will be de ene...

Page 9: ...strips or solder NOTE for systems with potential electrical interference such as large transformers VFDs etc shielded twisted pair Belden 8450 may be used for the communications loop ZONEXCOMMANDER IN...

Page 10: ...t side terminal block is for the RX TX communication circuits There are two sets of RX TX terminals on the base to make daisy chain wiring from device to device straightforward and simple 1 Use minimu...

Page 11: ...cool call when the space temperature rises 1 above the cool setpoint Y2 will energize when the space temperature rises 2 above the cool setpoint When the room temperature is less than 2 from setpoint...

Page 12: ...RY SENSOR CALIBRATION R12 OUTSIDE AIR OA POWER LED INDICATOR MAIN CONTROL CHIP ZONEXCOMMANDER USB COMPUTER COMMUNICATION RS 485 TWISTED PAIR POLARITY SENSITIVE BELDEN 8740 OUTDOOR AIR SENSOR TERMINAL...

Page 13: ...13 ZONEXCOMMANDER WIRING OVERVIEW ROOFTOP UNITS UP TO 20 PER COMMAND CENTER...

Page 14: ...dampers based on zone demand The ZonexCommander Plus system can be applied to existing HVAC systems or new installations providing central control of HVAC operations using Windows based ZonexCommande...

Page 15: ...15 ZONEXCOMMANDER PLUS COMPONENT SELECTION GUIDE...

Page 16: ...o be cycled The W1 output signal is connected to the heating device input terminal and the coil of the fan relay This is required for electric heat and gas furnaces with no fan control See Fig 2 on a...

Page 17: ...ommunicate a heat mode call to the is two degrees or more below room temperature ModStat will modulate the damper to 100 open If the room temperature is within two degrees of setpoint the ModStat will...

Page 18: ...Release button 1 Push UP button until display shows H 2 Current setpoint will be displayed 3 Push UP or DN button until desired setpoint is displayed 4 Release button operation A shorted sensor or wir...

Page 19: ...SENSOR CALIBRATION R12 OUTSIDE AIR POWER LED INDICATOR MAIN CONTROL CHIP ZONEX COMMANDER PLUS COMMUNICATION RS 485 TWISTED PAIR POLARITY SENSITIVE BELDEN 8740 SENSOR TERMINAL OA OUTSIDE AIR ONLY TERMI...

Page 20: ...X Wire nuts are never to be used on the communication wire When making connections use screw type terminal strips or solder NOTE for systems with potential electrical interference such as large transf...

Page 21: ...After setting the address the thermostat will automatically go back to normal operation and the setpoint temperature will replace the address number just programmed Manual Operation Adjusting Setpoint...

Page 22: ...hen the space temperaturemeetstheheatsetpoint When configured for Reheat if the space temperature drops 1 below modulate the damper open The heat call will terminate when the space system goes into th...

Page 23: ...t and 75 F cool as measured by the MIX Air sensor in the return air TEMPERATURE LIMITS AND STAGING The RMOD monitors the leaving air temperature for staging and Hi Low 145 F Staging is based on the li...

Page 24: ...NSTALLED STATUS LEDs PWR1 Y1 Y2 W1 and O B W2 G 3 4 5 6 7 8 10 9 11 TERMINAL DESIGNATIONS TX Data transmit RX Data receive RA Return air sensor Gas Electric G Fan output W2 Stage 2 heat output W1 Stag...

Page 25: ...heat elements Heat Pump AHU Addressing Calibration button until the correct address appears and release 2 Energize the FAN only and check RMOD display calibration adjust calibration 4 Return air temp...

Page 26: ...26 RMOD WIRING OVERVIEW All RX communication wires must be connected to the RX terminals All TX communication wires must be connected to the TX terminals The RX and TX wires should never intersect...

Page 27: ...sensor controls low and high temperature limits and heat cool staging RA return air sensor controls unit operation in communication failure mode Keep sensor wires and power wires separate NOTE Shorte...

Page 28: ...gh the 1 4 hole 5 Attach the SENDCOM assembly to the duct or plenum with the sheet metal screws provided 6 Locate the position in the return duct or plenum for the return sensor and drill a 1 4 hole s...

Page 29: ...will be seen on address 1 2 3 and 4 current room temperatures On ZonexCommander Plus systems a SENDCOM cannot be addressed for thermostats 1 2 3 or 4 so start addressing any stand alone equipment in a...

Page 30: ...TION When the RLYCOM is in the Occupied mode the on board relays are energized In the Unoccupied mode the relays are de energized The mode status is displayed on the REVIEW screen of the Commander pro...

Page 31: ...hart 0 1 friction loss per 100 of duct All CFMs listed are approximate For accurate selection use duct sizing table or device MEDIUM PRESSURE STMPD MODSTAT L D W SIZE 6 8 10 12 14 16 6 8 10 12 14 16 D...

Page 32: ...r drive time open and close is 90 seconds RECTANGULAR MEDIUM PRESSURE ZONE DAMPERS Zonex Systems rectangular medium pressure dampers are recommended for systems under 7 5 tons with a maximum different...

Page 33: ...that modulates up and down to control air and throw remain constant This keeps the air hugging the ceiling which maximizes room air mixing and minimizes the waterfall effect ZONE DAMPERS RECTANGULAR D...

Page 34: ...n should be applied to the round pipe and be butted against the hat section do not insulate the motor The motor generates enough heat so that no condensation will develop on it 5 Remember to allow a 1...

Page 35: ...undersize the bypass damper ROUND BYPASS DAMPER SELECTION The Zonex Systems STMPD damper is used for round bypass applications When you know the bypass CFM requirements use the ROUND BYPASS SELECTION...

Page 36: ...2000 13333 14667 16000 36 9000 10500 12000 13500 15000 16500 18000 40 10000 11667 13333 15000 16667 18333 20000 44 11000 12833 14667 16500 18333 20167 22000 48 12000 14000 16000 18000 20000 22000 2400...

Page 37: ...ol IPC and air 3 Do not install the bypass damper outside dedicated 24vac 40VA transformer 2 Bypass damper and controller are powered by a recommended for 100 of system CFM system and not undersized B...

Page 38: ...ve Y outputs to unit on the zone control board and to Note 1 To open all dampers it may be necessary to translates to inches of W C one next to the potentiometer The Voltage reading the leads on the C...

Page 39: ...CD into the computer drive and note which drive is being used 2 Click on My Computer 1 Place Systems Software Master CD in the CD drive Installing System Software 4 Under the General Tab for propertie...

Page 40: ...events for each thermostat and RLYCOM Zoned Units Tab Used only with ZonexCommander Plus allocates thermostats to their respective units when multiple units are included in the system SYSTEM START UP...

Page 41: ...store the password NOTE Your password should be retained elsewhere If it is lost the program will have to be re installed and all information re entered Adding Modifying or Deleting Records To add or...

Page 42: ...ord to be deleted f Click on Records g Click on Delete h Click on File then click on Save i Click on Exit to return to the WELCOME Tab Connecting to the Zonex System 1 Click on the Connect Now button...

Page 43: ...nd Settings to place this information into memory Date Time will appear on the upper right of the screen 2 Click on the right or left arrow next to the month and year to select the current month or cl...

Page 44: ...by returning to the REVIEW Tab If the thermostat number you selected is Red it is locked if it is Black it is unlocked If necessary repeat the sequence above to change to desired setting Reviewing Sys...

Page 45: ...setting 6 SENDCOM communications are used to display RA SA temperatures from stand alone units a Place the cursor directly over a Current Room Temperature thermostat number with a SENDCOM attached an...

Page 46: ...isplay thermostat address numbers and names and click on an address b After selecting the desired address the current Occupied and Unoccupied temperature setpoints for that thermostat will be 4 After...

Page 47: ...y a Select the thermostat or RLYCOM address from the pull down menu under Select Thermostat b Click on the radio button next to the day of the week to be scheduled Schedule each day individually After...

Page 48: ...he thermostat address numbers to be assigned to that RMOD one or more addresses may be highlighted NOTE When DIGICOM DIGIHP thermostats or RLYCOM devices are part of the installation they must be addr...

Page 49: ...nex Systems 6 After the logging commences you may minimize the Zonex program in order to use other computer functions but do not turn off the computer or trending program during data collection This w...

Page 50: ...ge to return to Page 1 of the Trending program Then select another thermostat you wish to analyze by using the drop down arrow and the data will be retrieved quickly 13 After the data is collected if...

Page 51: ...thermostat address add 70 B Verify device has the correct address For A Verify device is powered up 1 SENDCOM reporting 0 on Read Sensors window SENDCOM Common Ground Phasing E Check polarity of R C...

Page 52: ...00 228 2966 M F 6 30 AM 5 00 PM PST DAY OCC DAY UNOCC NIGHT OCC NIGHT UNOCC DAY ADR NAME H C H C H C H C MON TUES WED THUR FRI SAT SUN MON TUES WED THUR FRI SAT SUN MON TUES WED THUR FRI SAT SUN MON T...

Page 53: ......

Page 54: ...iscontinue or change at any time specifications or designs without notice and without incurring obligations Part ZCMAN ZonexCommander Plus Network All Your HVAC Equipment Centralized DDC Communication...

Reviews: