Smart Connect
Single Loop Touch Screen Panel
Doc: GLT-229-7-1
73
Issue: 3
Date: 12/05/2017
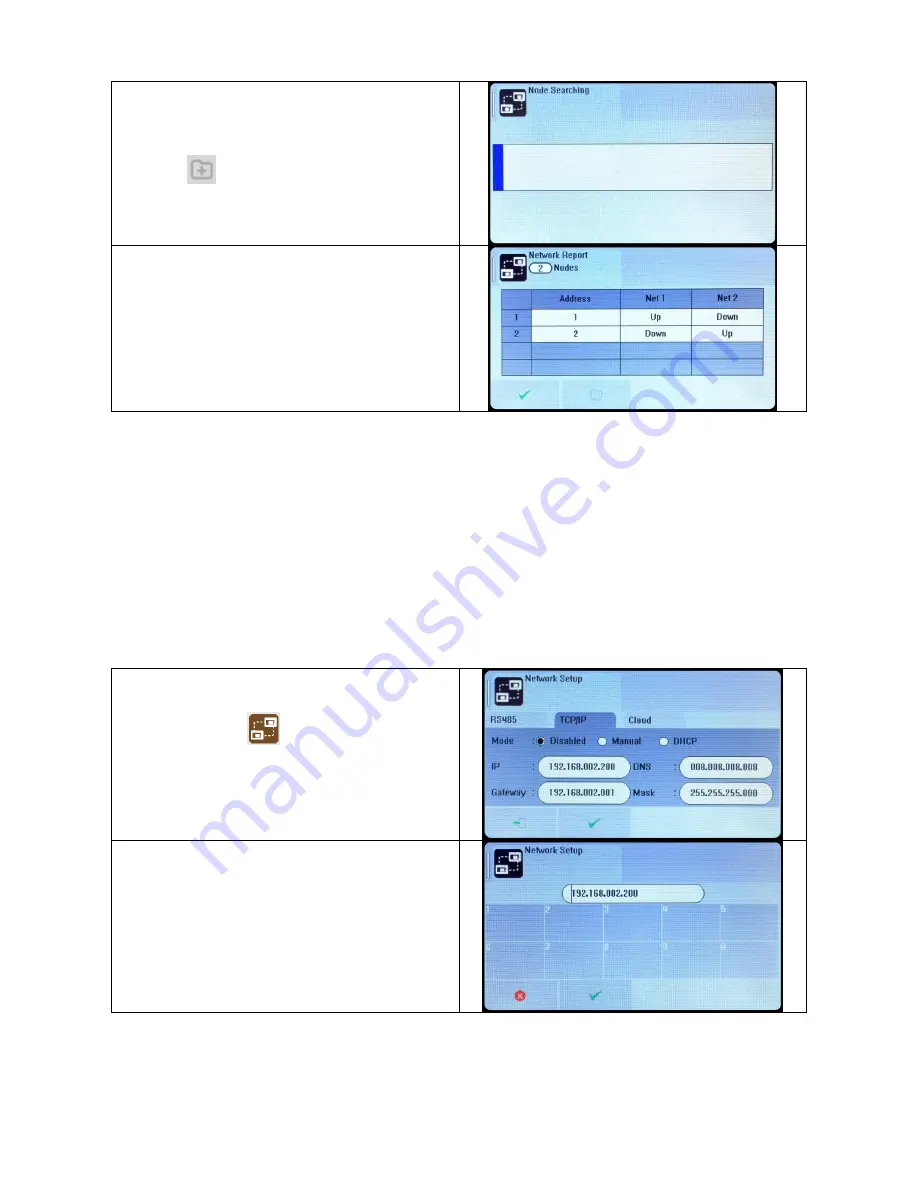
Repeat the above step for all panels on the network, then press
the Add icon
to search and configure the network.
When the search is complete, the panel shows a list of network
node addresses seen, and whether the panel sees a connection
on Network port A (NET 1), and Network port B (NET 2).
If the panel sees a connection it reports the port as UP. If it does
not see a connection, it reports the port as down.
(In this example we have a single panel)
11.5 RUNNING THE NETWORK
On a Smart Connect panel, running in a network, all events are reported at all panels. All panels are able to silence & reset the
system, when a suitable access code has been entered.
Operation of outputs over the network is determined by the programmed cause & effect. Any input on the network can be
programmed to operate any output. The cause & effect is entered at the panel that has the INPUT CAUSE connected.
11.6 CONFIGURING TCP/IP CONNECTION
The Smart Connect panel has a TCP/IP connection that allows the panel to report events to a central server. To do this, First the
TCP/IP address must be set.
From the Network Menu
, press the TCP/IP tab.
The panel shows that the TCP/IP connection is disabled (It`s
default state).
Select DHCP for the LAN to assign the settings, or select manual
to enter the settings by hand.
If entering the settings by hand, just type the numbers. The
panel will automatically insert the dots.
With only the TCP/IP configured, the panel will sit on a network, but would need 3
rd
party software on a PC to do anything useful.
The cloud tab will need to be configured in order for the panel to link to the remote server.


