EN 18
YASKAWA Europe
TOMP_C710606_75A V1000 IP66 - Quick Start Guide
5 Start Up
5
Start Up
Drive Setup Procedure
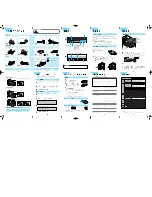
The illustration below shows the basic setup procedure. Each step is explained more detailed on the following pages.
Power On
Before turning on the power supply,
• Make sure all wires are connected properly.
• Make sure no screws, loose wire ends or tools are left in the drive.
• After turning the power on, the drive mode display should appear and no fault or alarm should be displayed.
Control Mode Selection (A1-02)
There are three control modes available. Select the control mode that best suits the application the drive will control.
Control Mode
Parameter
Main Applications
V/f Control
A1-02 = 0
(default)
• General variable speed applications, particularly useful for running multiple motors from a single
drive
• When replacing a drive in which parameter settings are unknown
Open Loop Vector Control
(OLV)
A1-02 = 2
• General variable speed applications
• Applications requiring high precision, high speed control
PM Open Loop Vector Control
A1-02 = 5
• Derated torque-load applications employing permanent magnet motors (SPM, IPM) and energy
savings.
Install and wire the drive as explained.
Turn the power on.
Set the control mode.
Set/check the basic parameters:
* b1-01, b1-02 for frequency reference and RUN command source
* H1-
, H2-
, H3-
, H4-
, H6-
to configure the I/Os
* Frequency reference values
* C1-
, C2-
for Acceleration/Deceleration times and S-curves
Run the motor without load, check the operation and verify, if the
upper controller (e.g. PLC,...) commands to the drive work as
desired.
Connect the load, run the motor and check the operation
Fine tune and set application parameters (e.g. PID,...) if necessary.
Final check the operation and verify the settings.
Drive is ready to run the application
START
Perform Auto-Tuning or set the motor data manually.
Initialize the drive if necessary using parameter A1-01.
Select Normal / Heavy Duty
TOMP_C710606_75A_0_0_prePrint.pdf 50
21.12.2010 13:52:24


