background image

22

23

Hotline: 1-866-902-9690

Hotline: 1-866-902-9690

AP mode

This is the Hotkey to enter
Wireless setting

 1.

  ON 


 2. OFF

6. Press the 

 button or use the navigation key + OK button to enter Sensor setting

Sensor setting

SETTING FUNCTION
1. System date and time
2. Working date and time
3. Pin code reset
4. Wireless setting
5. Sensor setting
6. Language setting
7. Other setting

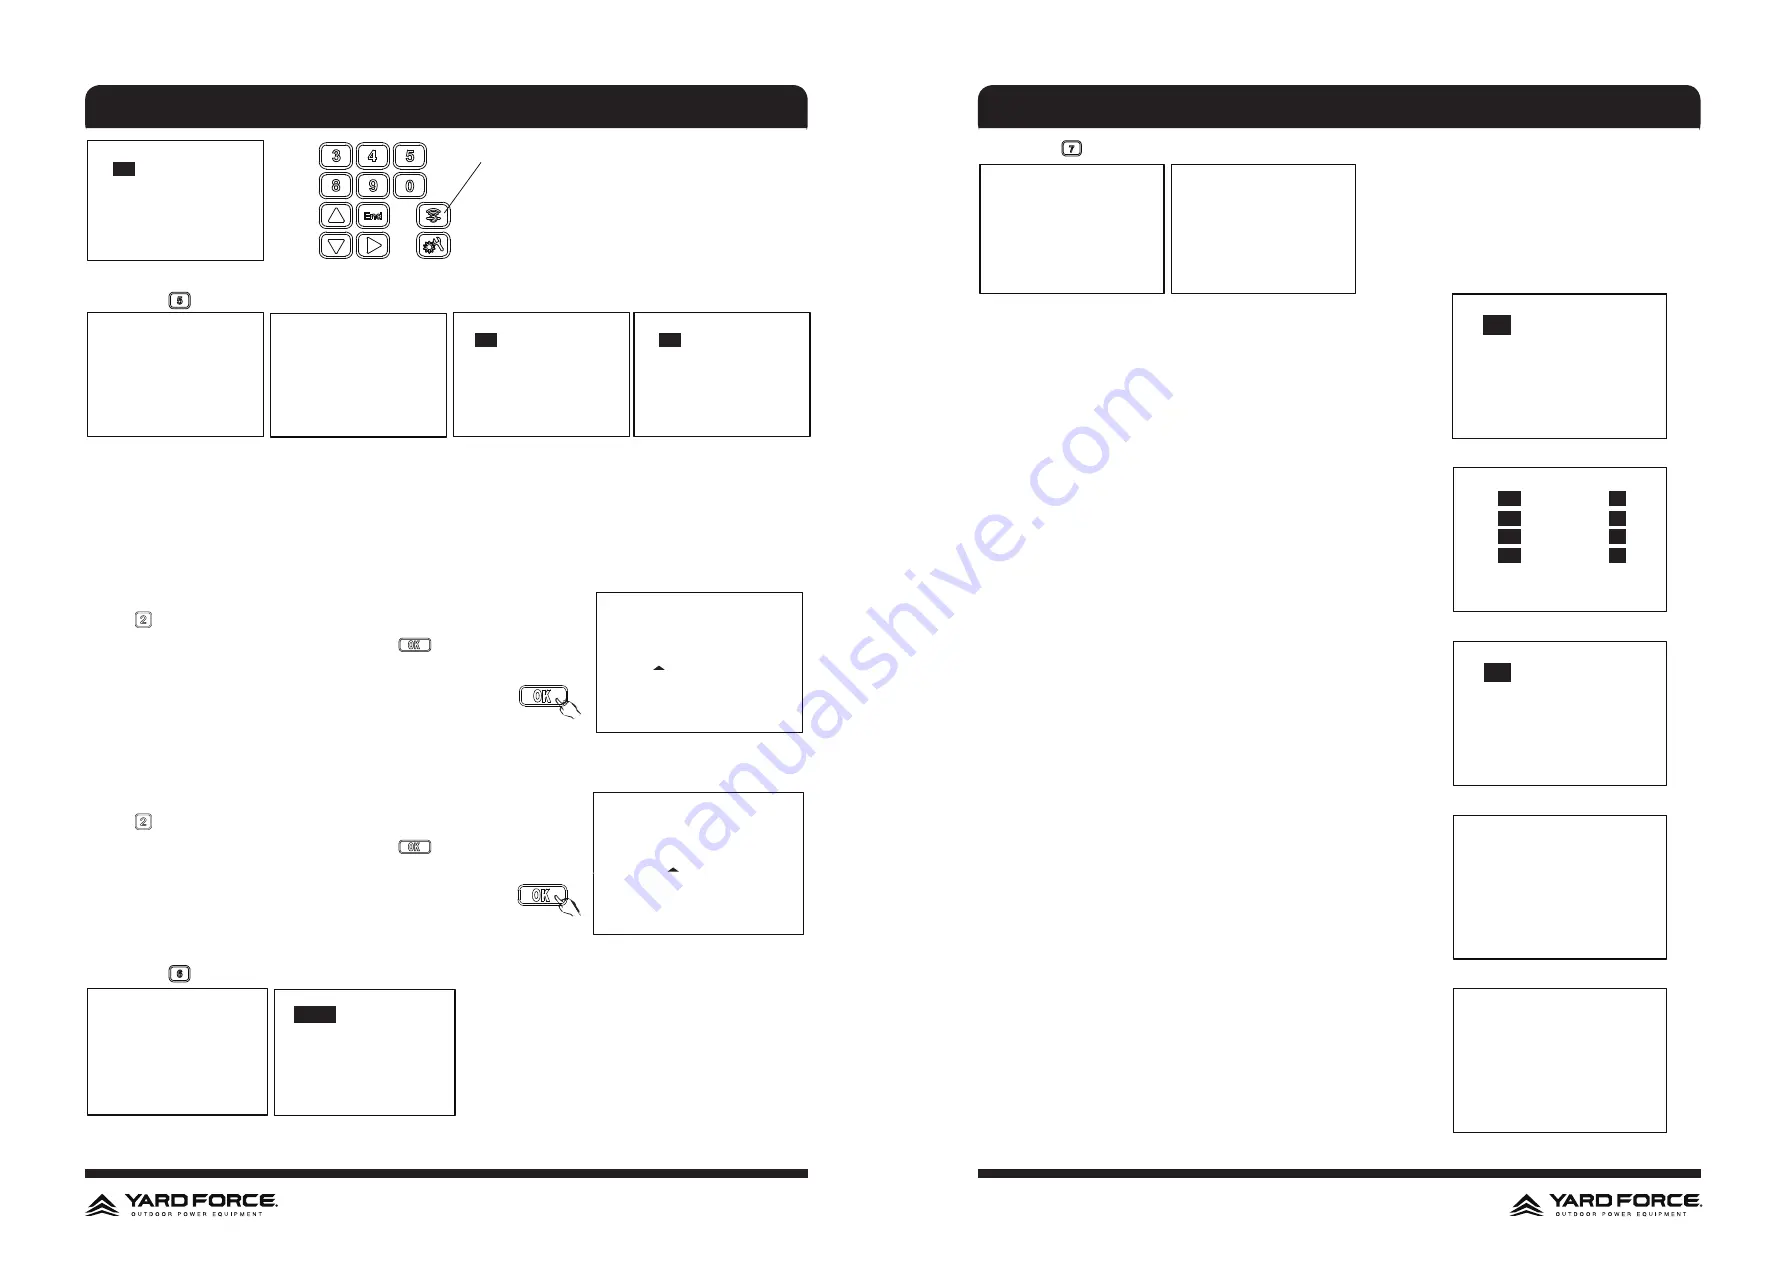
Rain sensor

1. Rain sensor
2. Ultrasonic sensor

Ultrasonic sensor

 1.

  ON 


 2. OFF             

 1.

   ON 


 2. OFF             

      Please press “OK“ to edit                Please press “OK“ to edit

- Rain sensor

NOTE: 

Mowing in the rain is not recommended.

This machine has a rain sensor which may stop the robot from mowing in the rain. When the rain sensor is 
triggered, the robot will go back to the charging station first, where it will be fully charged. Once charged the 
mower will remain in the charging station until the rain has stopped before starting to mow again.
Note: Be careful not to short circuit the sensors on the machine with any metal objects. This will cause the 
mower to work abnormally.
  Press   to switch off the sensor.
  When the rain sensor is activated, then press 

 to set the delay time.

Delay time in docking station

020 minute


- UltraSonic sensor
This machine equipped 2 ultrasonic sensors which may detect the obstacle on the lawn. When the sensor is 
actived, the robot will stop and then turn around when detect an obstacle.
  Press   to switch off the sensor.
  When the rain sensor is activated, then press 

 to set the delay time.

Detect distance before action

30 cm (30-60) 


7. Press the 

 button or use the navigation key + OK button to enter Language setting

Language setting

SETTING FUNCTION
1. System date and time
2. Working date and time
3. Pin code reset
4. Wireless setting
5. Sensor setting
6. Language setting
7. Other setting

1. 

English

2. Espanol
3. Francais

Select related number to set the language you require.

8. Press the 

 button or use the navigation key + OK button to enter Other setting

Other setting

SETTING FUNCTION
1. System date and time
2. Working date and time
3. Pin code reset
4. Wireless setting
5. Sensor setting
6. Language setting
7. Other setting

1. Boundary singal 
2. Multi zone function
3. LED light
4. About device
5. Fault record

Select the boundary singal between S1 and S2, make sure that the 
mower signal is matched with docking station signal.

If your garden is complex and has separated to different zone via 
the narrow path, we suggest to switch on the mult-zone function
You can define the different zone with distance to docking station 
and related working time in this area.

The LED light can be turn on, turn off and also can make it 
flashing.

The device information is listed in “about device” section, include 
product SN number, MAC address , accumulated working time 
and also total charging cycles

Device operating fault information is storaged in “ Fault record ”

OPERATION

OPERATION

Boundary signal
1.     

 S1

2.    S2

Boundary signal
1.     

 S1

2.    S2

Boundary signal
1.     

 S1

2.    S2

Multi zone setting

Zone A 

010 

m from station,

25

%time

Zone B 

030 

m from station,

25

%time

Zone C 

050 

m from station,

25

%time

Zone D 

100 

m from station,

25

%time

LED light
1.     

ON

2.   OFF
3.   Flash

About device

Mower SN:   XXXXXXXXXX
MAC address: XXXXXXXXXXXX
Firmware version:   XXXXXXXX

Total working hours:  XXXXX

Total charging cycles: XXXX

Fault record

Fault :   XXXXXXXXXXXXXXXXXXXXXX
                    2021/01/01      08:00
Fault :   XXXXXXXXXXXXXXXXXXXXXX
                    2021/01/01      09:00
Fault :   XXXXXXXXXXXXXXXXXXXXXX
                    2021/01/01      09:00

Summary of Contents for Revola X4E

Page 1: ...replacement parts ship from our facility For immediate help with assembly or for additional product information visit www YardForceUSA com or email support MerotecUSA com SAVE THIS MANUAL FOR REFEREN...

Page 2: ...max 26 ft min 6 5 ft 12 in 12 in 12 in 12 in 2 in A 4 in 4 in...

Page 3: ...ols or pictographs SYMBOL MEANINGS This page depicts and describes safety symbols that may appear on this product Read fully understand and follow all instructions on the machine before attempting to...

Page 4: ...URE REFERENCE PREPARATION Read the instructions carefully and make sure you understand them fully Be familiar with the controls and the proper use of the machine Never allow children persons with redu...

Page 5: ...E MAINS Risk of electric shock The supply cord cannot be replaced If the cord is damaged the appliance should be scrapped Keep extension cable away from blades and other moving parts They may damage t...

Page 6: ...ufacturer cannot be held liable for damage caused by other incorrect operation of the Robotic Mower or if it is not used in line with its intended purpose TECHNICAL SPECIFICATIONS TECHNICAL SPECIFICAT...

Page 7: ...wire at any point in the mowing area 4 in Trees The Robotic Mower treats trees as common obstacles but if the roots of the tree are exposed and lower than 4 in this area should be excluded using bound...

Page 8: ...grass protection mesh Otherwise the repeated stress of the rear wheels can damage the turf Once the position of the docking station is confirmed and mains electrical connection is laid out please do...

Page 9: ...rain and spray water being submerged is likely to cause severe damage to the electronic parts Therefore it is imperative to exclude any pools from the cutting area For added safety we recommend placi...

Page 10: ...ition for the docking station You should now drive fixing pegs into ground fully Take care not to damage or kink the surplus wire stored under the docking station Signal selection Note the default sig...

Page 11: ...king day Sun Sat Fri Thu Wed Tue Mon 1 2 3 4 5 6 7 Set working Time 1 2 3 4 5 6 7 T1 08 00 11 00 T2 16 00 18 00 SETTING FUNCTION 1 System date and time 2 Working date and time 3 Pin code reset 4 Wirel...

Page 12: ...ing SETTING FUNCTION 1 System date and time 2 Working date and time 3 Pin code reset 4 Wireless setting 5 Sensor setting 6 Language setting 7 Other setting 1 English 2 Espanol 3 Francais Select relate...

Page 13: ...e mains outlet 5 Disconnect the power supply from the docking station 6 Disconnect the boundary wire from the docking station Lift up the docking station and clean The boundary wire can remain outside...

Page 14: ...ery fine grade emery paper clean the contact pins and the charging strips on your mower and docking station Remove any debris leaves or grass clippings around the contact pins and charging strips to e...

Page 15: ...Mowing trouble shooting Problem Possible cause Corrective action No Power to machine ON OFF key has not been activated Switch ON the machine and try again Robotic Mower has low charge Place machine i...

Page 16: ...ing from any of the above nor does it cover repairs made or attempted by unauthorized persons This warranty is void if the product is used for commercial rental or industrial purposes Certain parts at...

Reviews: