


42
System Setup
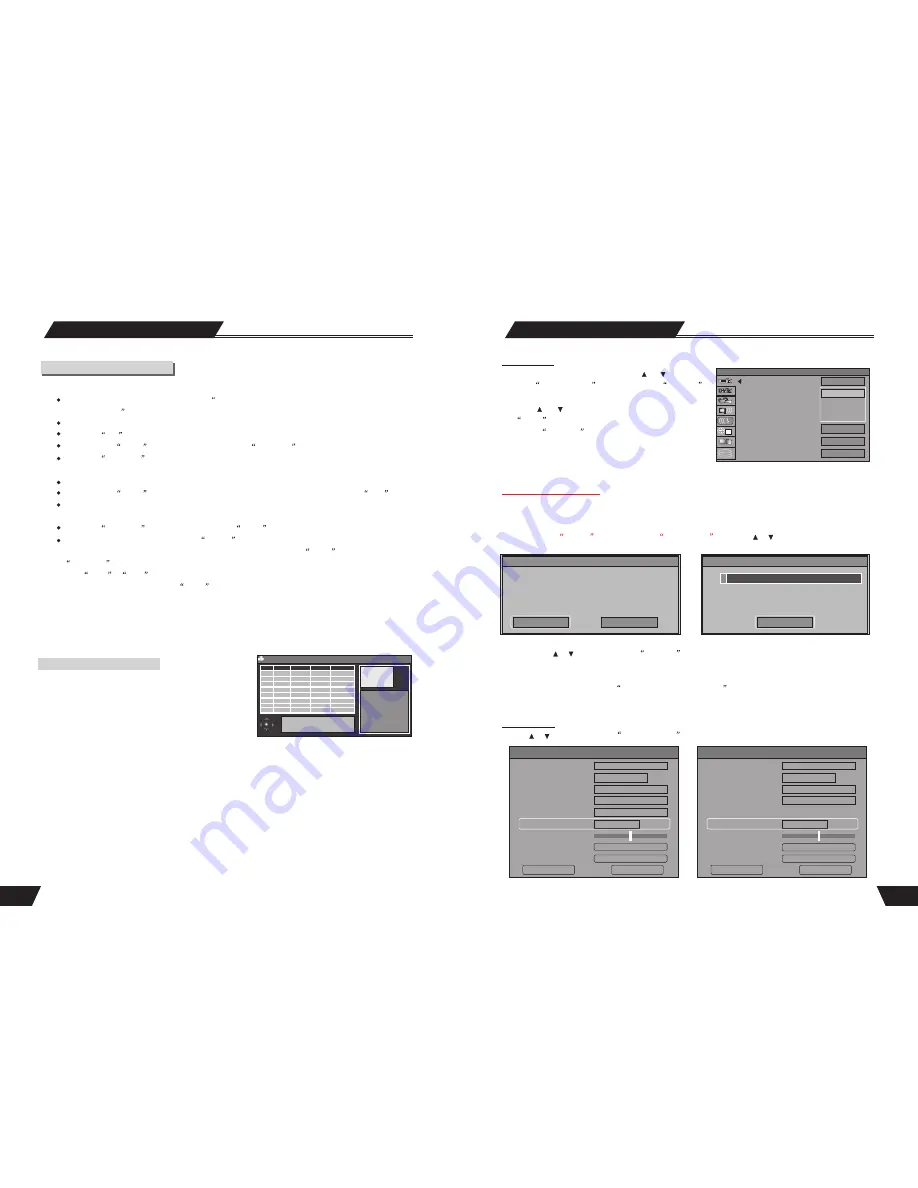
Record Quality
1. In the Recording Settings menu, use the or button to
select the
Default Quality
item, and press the
SELECT
button to drop down a menu.
2. Use the or button to select a desired value and press
the
Select
button.
3. Press the
RETURN
button to return to the upper level
menu and set up other items.
* For the differences of the six quality levels, SP, SP+, LP,
SLP, EP and HQ, see the glossary for reference.
The meanings of the icons:
1)press the or button to Select the
Autoscan
item, as shown in the left top chart (if in TV channel state) .
2) Press OK button, shows the right top chart. The tuner will start searching through various channel frequencies
and add available channels to the system memory. This procedure may take several minutes.
3)When the scan is complete,
TOTAL CHANNELS FOUND
will appear on the screen with the number
of channels that have been stored to memory. Press the SETUP button on the remote control to exit.
Modify Channel
Use the or button to Select the
Modify Channel
item, in dialog chart select OK. As shown in the following chart .
Autoscan(Auto program scan)
The unit has a channel tuner. You can receive TV signals directly from the unit. Before the tuning, you must
conduct a channel scan to enable the unit to tune in various channels automatically and determine their frequencies.
The tuned channels will be saved automatically. Even if the power is off, the saved channel information will not
be lost. Press the
SETUP
button to enter the
System Setup
mode. Use or button, highlight Autoscan,
select it, and the following chart will show.
Auto Chapter Marker
Record Quality
Autoscan
Modify Channel
Program Table
Timer Setting Menu
Country Selection
SETUP MENU -RECORDING
Off
SP
SP+
LP
EP
SORT
OK
Deutschland
Confirm
Need stop current TimeShift before
AutoScan, and channel will be deleted.
OK to start auto scan, Cancel to exit.
CANCEL
OK
Scan channels
STOP
2% 63.80MHz
0 channel (s) found.
Modify channel information
P003
C h 0 3 4
PAL 1
Channel
Standard
C - 3 4
Off
OK
Cancel
Program Number
Name
Standard
Search Type
Band
Channel
Fine Tuning
Decoder
Delete
OK
Modify channel information
P003
C h 0 3 4
PAL 1
Frequency
607. 30MHz
Off
OK
Cancel
Program Number
Name
Standard
Search Type
Frequency
Fine Tuning
Decoder
Delete
OK
16
Recording Mode
1
DV Controlled Recording
1. This unit can perform real-time monitoring and recording for a DV through the IEEE 1394 serial port (DV).
Connect the DV to the unit (for details, see
System Connection: System Connection for Recording
External Signals
) by the front panel inputs.
Switch on the power of the unit.
Press the
DV
button.
Switch on the
Power
button of the DV, set it to the
CAMERA
mode, and start monitoring.
Press the
REC/OTR
button to start recording. (Other operations is the same as in the Recording Mode)
2. This unit can also record the VCR content of the DV.
The connection method is the same as stated in the first 3 steps of 1.
Switch on the
Power
button of the DV to enter the VCR status, and the VCR status is
Stop
.
Use the remote controller of the unit to complete the operations of the DV, including STOP, PLAY, PAUSE,
FB, FF, etc.
Press the
REC/OTR
button and then press the
PLAY button to start recording.
During the recording process, press the
PAUSE button to susp end reco rding of the unit, and press the
butt on a gain to susp end the DV. To restore play of the DV, pres s th e
PLAY button; if you press the
REC/OTR
button, the play of the DV and the recording of the unit will resume at the same time; press
the
FWD
,
REV
button to complete forward or rewind operation for the DV, while it reports Pause
status to the unit; If you press the
STOP
button, the recording of the unit will stop first, and press again
to stop the play of the DV.
Note: Do not move the unit or switch off the power during the recording process.
The finalized DVD+R disc could not be recorded.
Be sure to switch off the power of the unit and the DV before connecting the DV cables.
Copy from HDD to optical disc
HDD
No.
CH
Date
Time
Title
002 R-COMP 12/01/04 13:20 Title 2
003 R-COMP 12/01/04 13:24 Title 3
001 R-COMP 12/01/04 13:17 Title 1
For other options Press DVD,
Timeshift, DV/USB, SETUP or TIMER
keys
Press Add/Clear key to
select program(s)
Press Rec key to copy
selected program(s) to
DVD
Press Sort key to sort
programs by name, date
or time
Press the remote controller HDD button, enter into the HDD
display state . Show as follow, in this state, press ADD/
CLEAR key to select the file titles you desire to copy to
DVD, then press REC key to copy selected file to DVD.
Note1:
In DVD tray ,there should be a blank Rewritable
DVD disc ,or the disc was previously used only for archiving from HDD.
Note2:
When copying from HDD to DVD+RW disc, there will be a flashing icon on the upper left corner
of the screen to indicate the recording process.
Note3:
You can press the STOP button to finish copying from HDD to optical disc
ONLY
in
HDD
mode.