


44
SETUP MENU-DVB
System Setup
Country Selection
Use the remote control arrow button, you may select 19
difference countries, when select difference country
option, when scanning channels, you can scan through
the specific channel list of the country you have selected.
1.Digital Channel Management
2.Auto Scan Digital Channels
3.Manual Scan Digital channels
4.Favorite Digital channels
5.Display EPG
6.Game:Tetris
Digital Channel Management
Need stop current Timeshift before
channel edit, OK to edit window,
cancel to exit.
OK
Cancel
1. In the setup MENU-DVB, use arrow buttons to select “Digital Channel”, and press the “SELECT” button,
as shown in the chart.
2.Press“OK” button, as shown in the right chart.
3.Use “T/R” key to view TV or radio channel list. You can preview the channel and move the channel
with“ / ”button.
1.In the setup MENU-DVB, Use arrow buttons to select”
Auto Scan Digital Channels
”, and press
“SELECT” button, as shown in the chart.
Need stop current Timeshift before
channel edit, OK to edit window,
cancel to exit.
OK
Cancel
Auto Scan Digital Channels
14
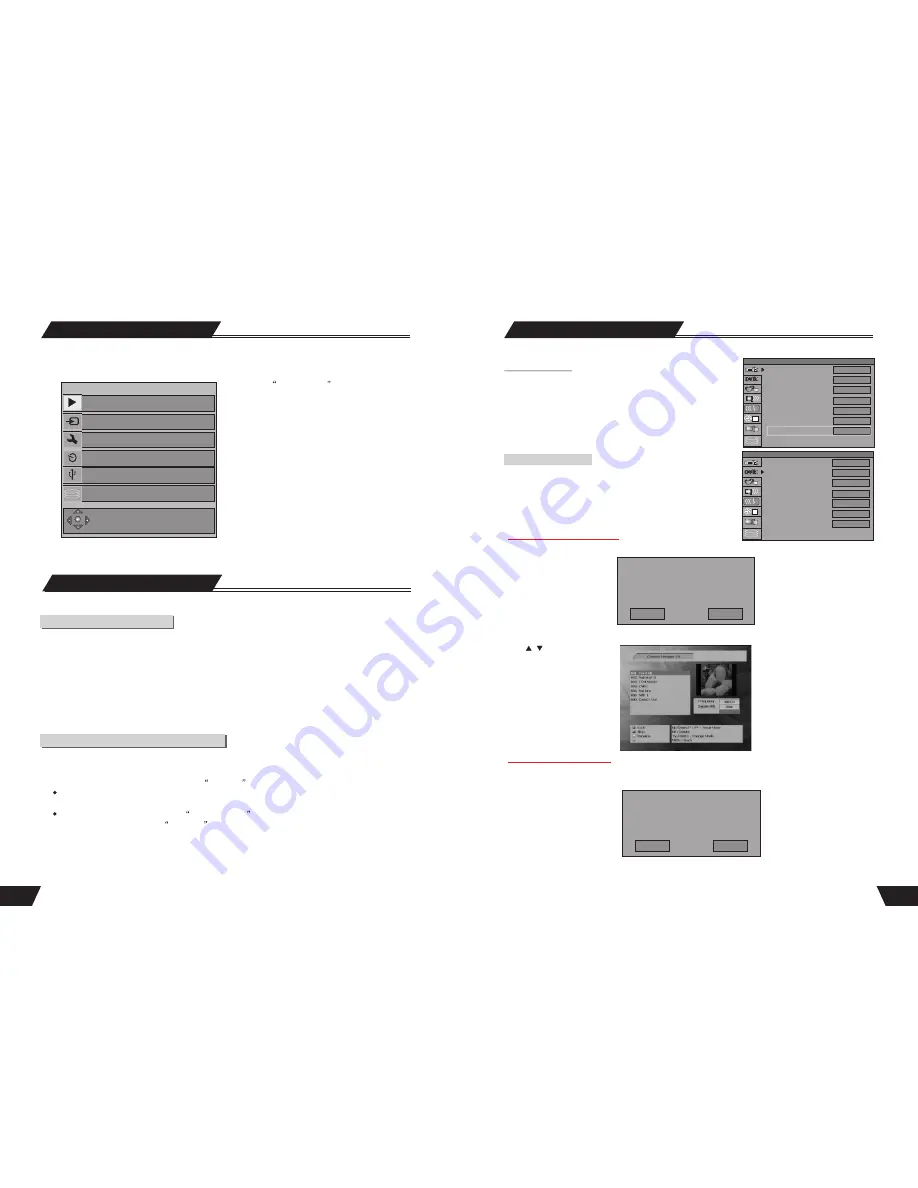
NAVIGATION Mode
Recording Mode
Introduction
There are various external signal inputs in the unit, including S-Video, composite video DVB, TV tuning , DV
input and stereo audio input. You can select any group of audio and video signals from these inputs for recording.
The recording discs of the unit include DVD+RW, DVD+R and HDD. There are six available recording
modes of different qualities, including SLP (6 hours), LP (4 hours), EP (3 hours), SP+ (2.5hours),SP (2 hours) and
HQ (1 hour).
The unit has a function of timer recording. You can set up a recording schedule in advance. The unit will record
the programs that you select automatically.
Entering the recording mode and menu description
To enter the recording mode, take the following steps:
1. In the Non-rewritable Disc mode, press the
SOURCE
button to enter the Monitoring Mode.
The Monitoring Mode can be regarded as a sub-mode of the Recording Mode.
2.The system will automatically enter the Recording Mode when the setup time is reached.
For details about timer recording, see
Timer Recording
for reference.
3.In the Recording Mode, press the
button to show or hide the recording control bar menu.
DISPLAY
Auto Chapter Marker
Record Quality
APS
Modify Channel
Program Table
Timer Setting Menu
Country Selection
1
SETUP MENU -RECORDING
Off
LP
SCAN
EDIT
SORT
OK
Deutschland
Digital Channel Management
Auto Scan Digital Channel
Manual Scan Digital Channles
Favorite Digital Channels
Display EPG
Game: Tetris
1
SETUP MENU -DVB
OK
OK
OK
OK
OK
OK
OK
1
2
3
4
5
6
The NAVIGATION Mode can realize all functions of the unit.
Press the
NAVIGATION
button of the remote
control to display the screen on the left.
1.Switch to DVD Playback Mode;
2.Switch to TIMESHIFT Mode;
3.Switch to SYSTEM SETUP Mode;
4.Switch to TIMER RECORD Mode;
6.Switch to HDD Playback Mode;
5.Switch to Pictures, Music, Video Playback Mode;
Functions
Functions
DVD
Timeshift
Setup
Timer Recording
Pictures, Music, Video
HDD
DVD
Timeshift
Setup
Timer Recording
Pictures, Music, Video
HDD
Play disk
Play disk